This article aims to show you how to connect your server using SSH with the PEM key file. You will also learn how to set up a secure connection to your remote server from different platforms like Windows, Linux, and macOS.
How to connect to an instance using a PEM Key from Windows
Windows OS users can use PuTTY to connect to the server. PuTTY is a free and open-source terminal emulator that supports network protocols like SSH, SCP, and Telnet.
Using PuTTY, you can make an SSH connection between the server and your window's client. You can download PuTTY from its official website.
Next, you should convert the PEM file to PPK format, as PuTTY only understands PPK format.
Convert .pem to .ppk using PuTTYgen
You will need PuTTYgen to generate a .ppk file.
1. Install PuTTYgen tool.
Normally PuTTYgen should be included into PuTTY, but if it is not then you can install it from: https://puttygen.com/download-putty. Now, open PuTTYgen and Load your pem key by clicking the "Load" button.
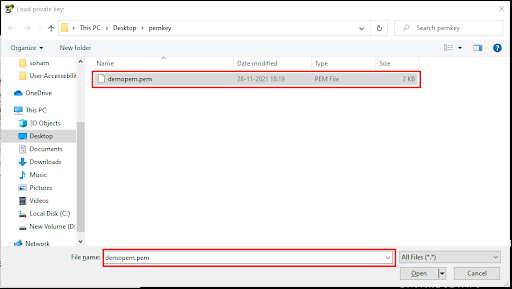
Here, you will see the "Load private key" window. Change the PuTTY Private Key Files (*.ppk) option to "All Files" as shown below.
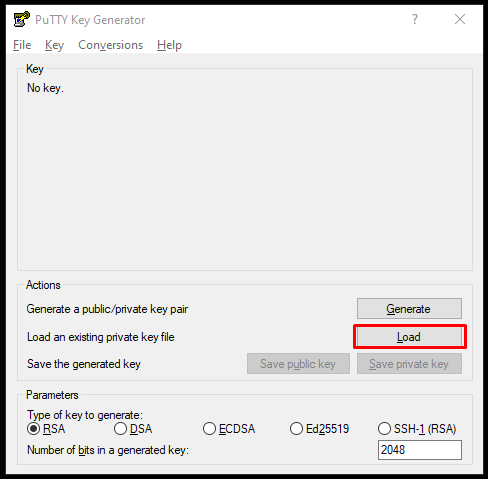
PuTTy Key Generator - Load private key
Now, select the PEM file that you want to convert into PPK.

Select PEM file you want to convert
Click the "Open" button, and then click "OK" as outlined in the screenshot below.
PuTTy open pem file
Here, you will see a key comment as "imported-openssh-key." You can replace it with your server name or something easily identifiable by you for your own convenience. This comment will be displayed on PuTTY windows when you connect to the server.
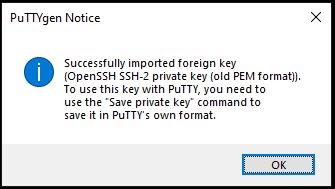
PuTTYgen Notice: key imported
Click the "Save private key" button.
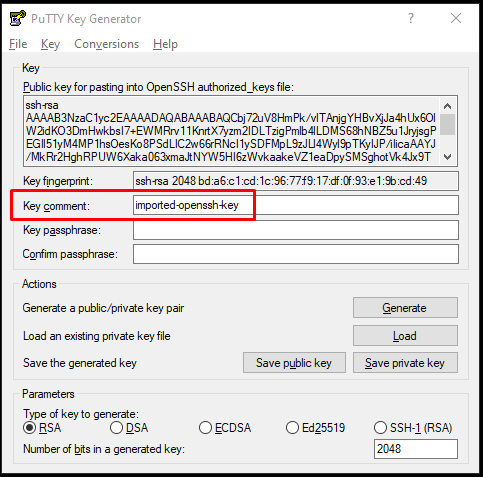
PuTTY Key Generator - generate key
It shows the PuTTYgen Warning dialog box. Click the "Yes" button as shown below:
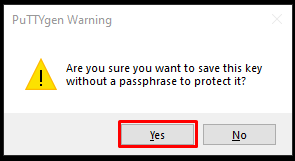
PuTTYgen Warning: Are you sure you want to save this key
Now, give ppk a name of your choice. In our case, it is mysql.ppk
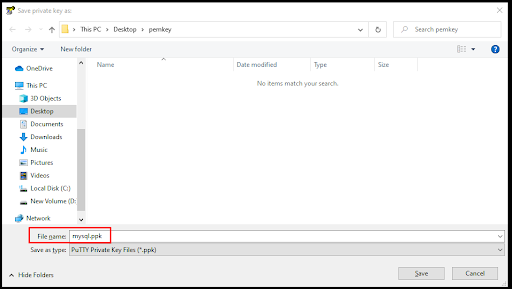
Congratulations! You have successfully converted PEM to PPK.
2. Connect to the server using PPK
Now, using this PPK Key file, we can connect to the server using PuTTY.
Open PuTTY, select Session as shown below. Then, enter a Hostname: (your server IP) and Port: (SSH Port).
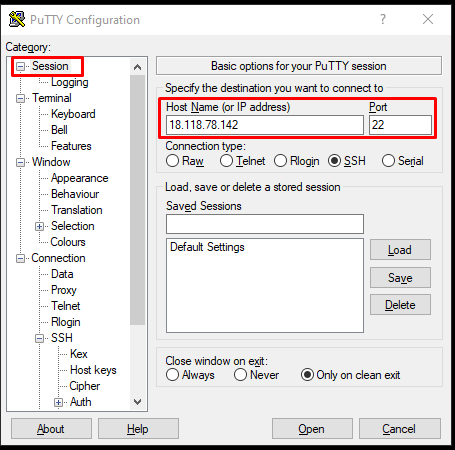
PuTTY Configuration: Session - basic options
Next, select the SSH option on the left, expand it, select Auth, and click the "Browse" button.
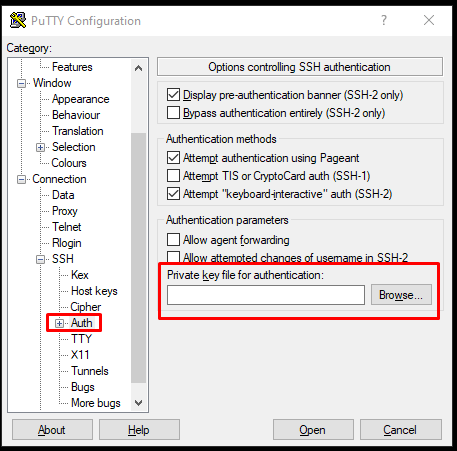
PuTTY - Private key file for authentication
It will open "Select Private key file" windows, go to your PPK file path and select PPK file.
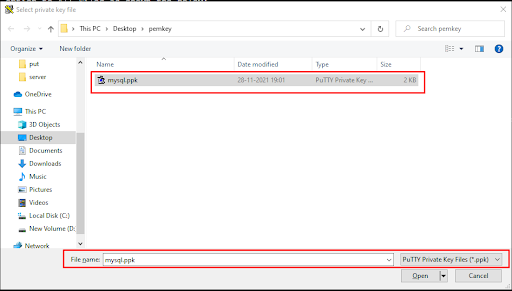
PuTTY select ppk file
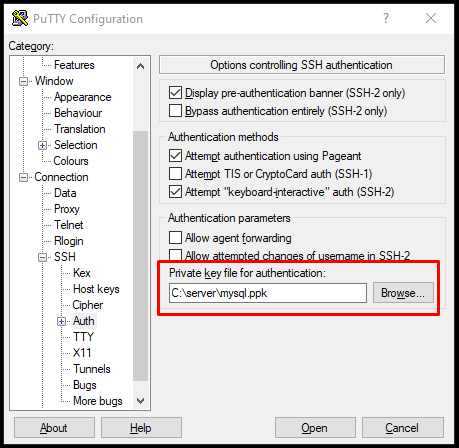
Next, click on the "Open" button.
Here, you need to enter your server username, and you will be directly connected to your server using PuTTy on Windows.
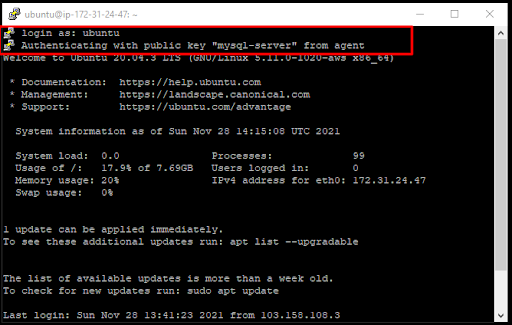
PuTTY - Authenticating
Did not find the solution? Join our discord channel and consult with our tech experts
Still don't know how to check? Get system administration help from our partners
How to connect to a server using a PEM key file from Linux
If you are a Linux OS user, you can easily connect to the server using the PEM key.
Let's first run the command as it is shown below:
ssh -i demopem.pem root@18.118.78.142Here, -i is used for an identity file (private key). In this case, it will be a PEM key.
Output:
root@ubuntu-20:~# ssh -i demopem.pem ubuntu@18.118.78.142
@@@@@@@@@@@@@@@@@@@@@@@@@@@@@@@@@@@@@@@@@@@@@@@@@@@@@@@@@@@
@      WARNING: UNPROTECTED PRIVATE KEY FILE!       @
@@@@@@@@@@@@@@@@@@@@@@@@@@@@@@@@@@@@@@@@@@@@@@@@@@@@@@@@@@@
Permissions 0644 for 'demopem.pem' are too open.
It is required that your private key files are NOT accessible by others.
This private key will be ignored.
Load key "demopem.pem": bad permissions
ubnutu@18.118.78.142: Permission denied (publickey).
root@ubuntu-20:~#
As we can see from the above output, there is a permission issue with the PEM file
Run the following command to check file permission:
ls -la demopem.pemOutput:
root@ubuntu-20:~# ls -la demopem.pem
-rw-r--r-- 1 root root 1704 Nov 28 15:35 demopem.pem
Here, PEM file permission is 644.
We need to change the PEM file permission to 400. To do so, run the following command in terminal:
chmod 400 demopem.pemls -l demopem.pemOutput:
root@ubuntu-20:~# chmod 400 demopem.pem
root@ubuntu-20:~# ls -l demopem.pem
-r-------- 1 root root 1704 Nov 28 15:35 demopem.pem
Now, execute the following command:
ssh -i demopem.pem ubuntu@18.118.78.142Output:
root@ubuntu-20:~# ssh -i demopem.pem ubuntu@18.118.78.142
@@@@@@@@@@@@@@@@@@@@@@@@@@@@@@@@@@@@@@@@@@@@@@@@@@@@@@@@@@@
@      WARNING: UNPROTECTED PRIVATE KEY FILE!       @
@@@@@@@@@@@@@@@@@@@@@@@@@@@@@@@@@@@@@@@@@@@@@@@@@@@@@@@@@@@
Permissions 0644 for 'demopem.pem' are too open.
It is required that your private key files are NOT accessible by others.
You have successfully connected to the server using the PEM key from Your Linux OS.
Could not find the answer? Join our discord channel and consult with other developers and system administrators
Need help from a tech expert? Get system administration help from our partners