
OpenVPN is an open-source protocol that creates a secure tunnel between your device and the VPN server. OpenVPN sends encrypted data over the internet. It is one of the most reliable and widely used protocols for VPN connection.
Why OpenVPN?
- OpenVPN is available for all platforms.
- OpenVPN uses SSL/TLS for key exchange. OpenSSL library’s encryption, authentication, and SSL certificate make VPN connection more secure.
- OpenVPN supports industry-standard 256-bit AES encryption.
- Any new vulnerabilities are quickly fixed due to the sizeable
- open-source OpenVPN community.
Let’s create our first OpenVPN server at Digital Ocean.
Let's assume that you already have an account.
Sign in and click the “Generate New Token” button, as shown below.
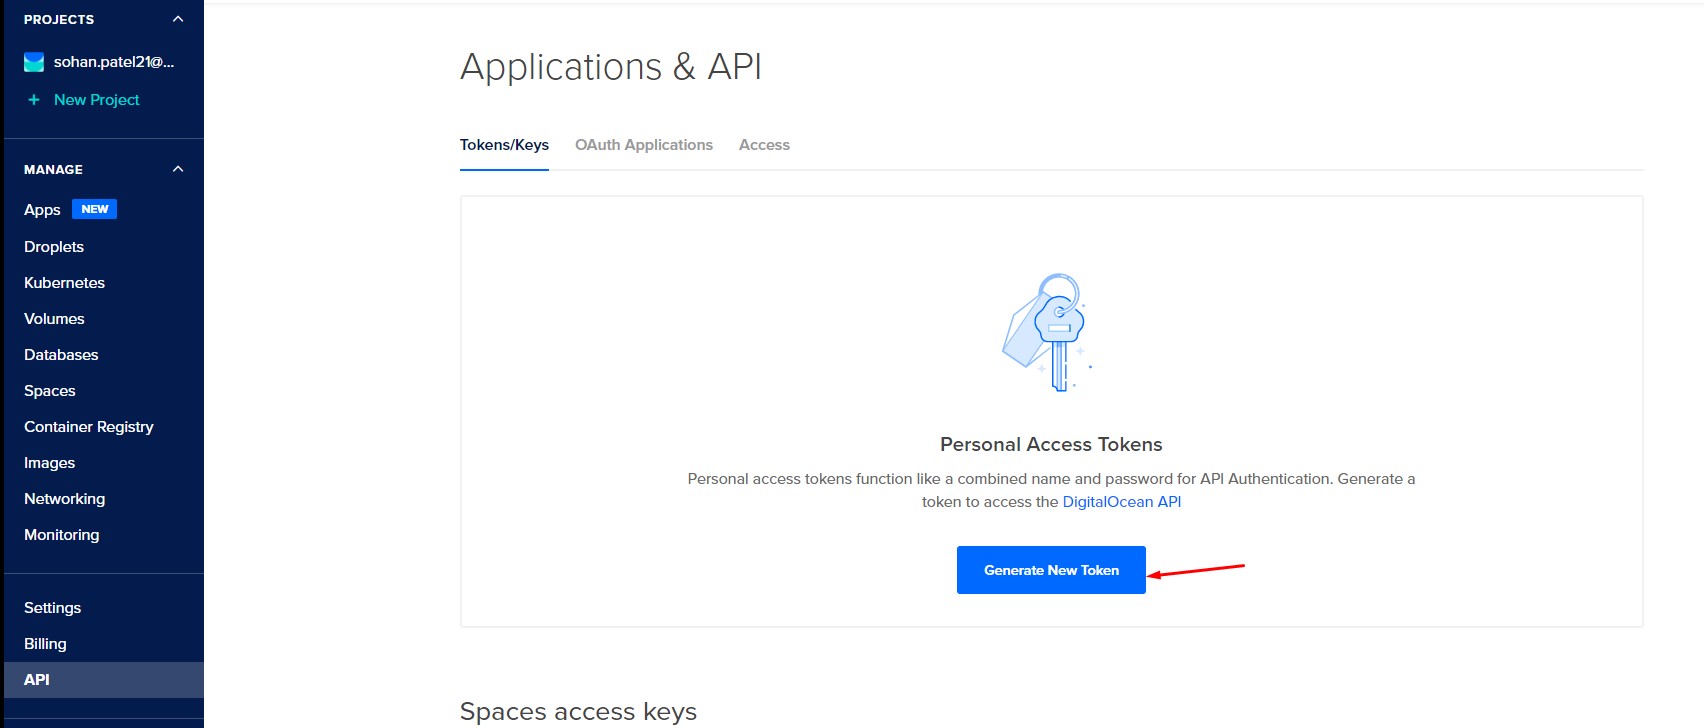
How to generate personal access token at Digital Ocean
Next, enter the Token name and select the token expiry term you’d like to set from the drop-down menu. It’s very important to check the Write permission. This allows TryDirect to create a Droplet in your account.
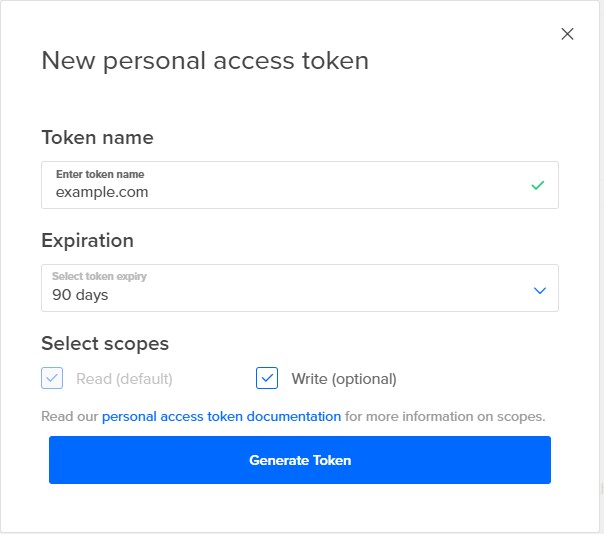
Set token scopes at Digital Ocean
Now, click the “Generate Token” button to create an API token.
Copy and save the Token. You will need to provide this token later.
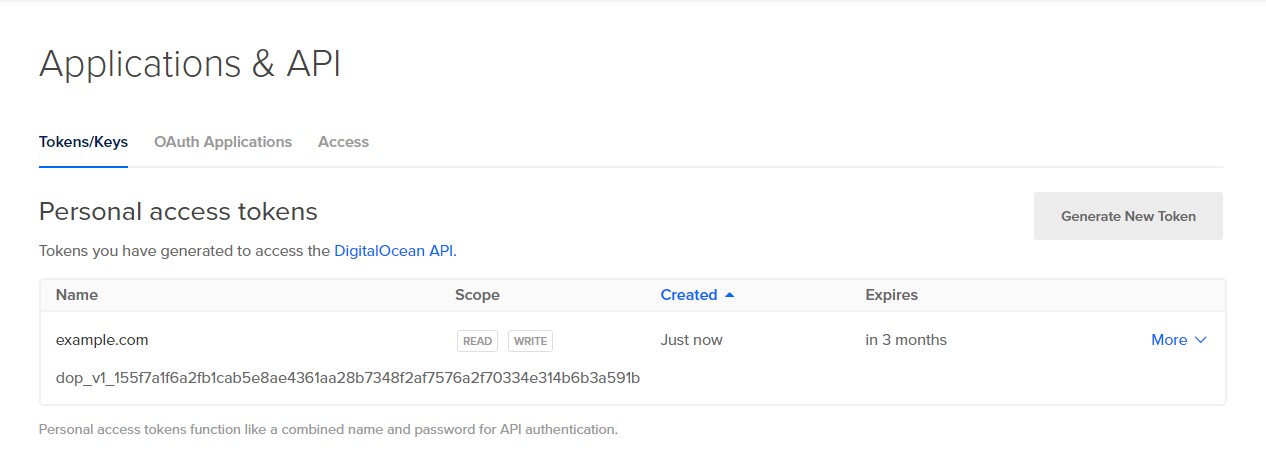
Copy and Save token
Next, log in to the TryDirect dashboard using https://try.direct/sign-in. If you don't have a TryDirect account, SIGN UP for a new account using https://try.direct/sign-up
After login, click the 'STACKS' option from the top menu, search for OpenVPN, and click it.
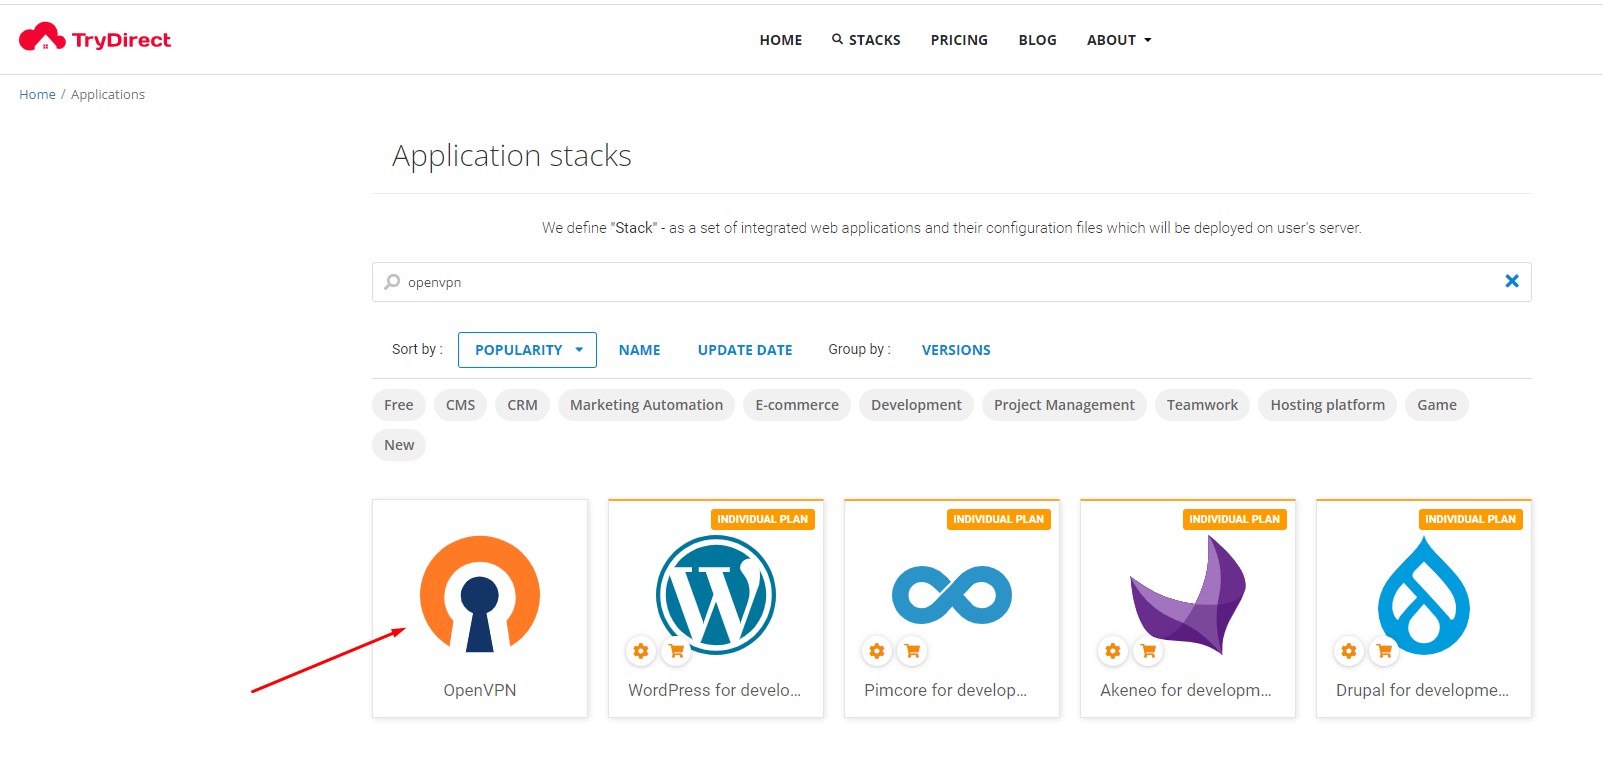
Click to install OpenVPN
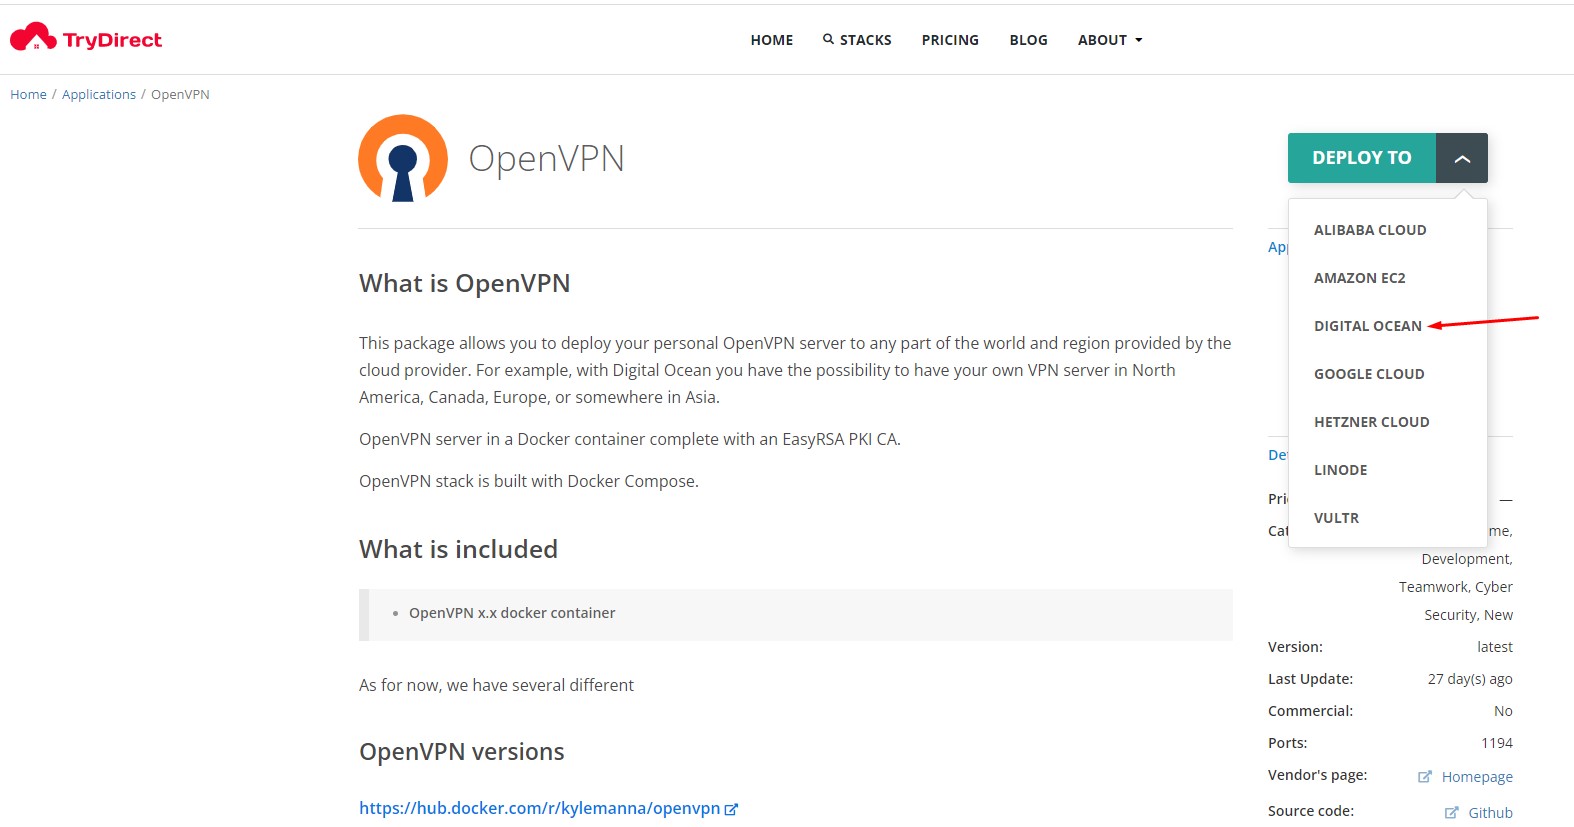
You will see the OpenVPN page with a description. Find the 'DEPLOY TO' button on this page, click it and select 'DIGITAL OCEAN' as shown in the below screenshot.
Select prefered cloud provider and start installation
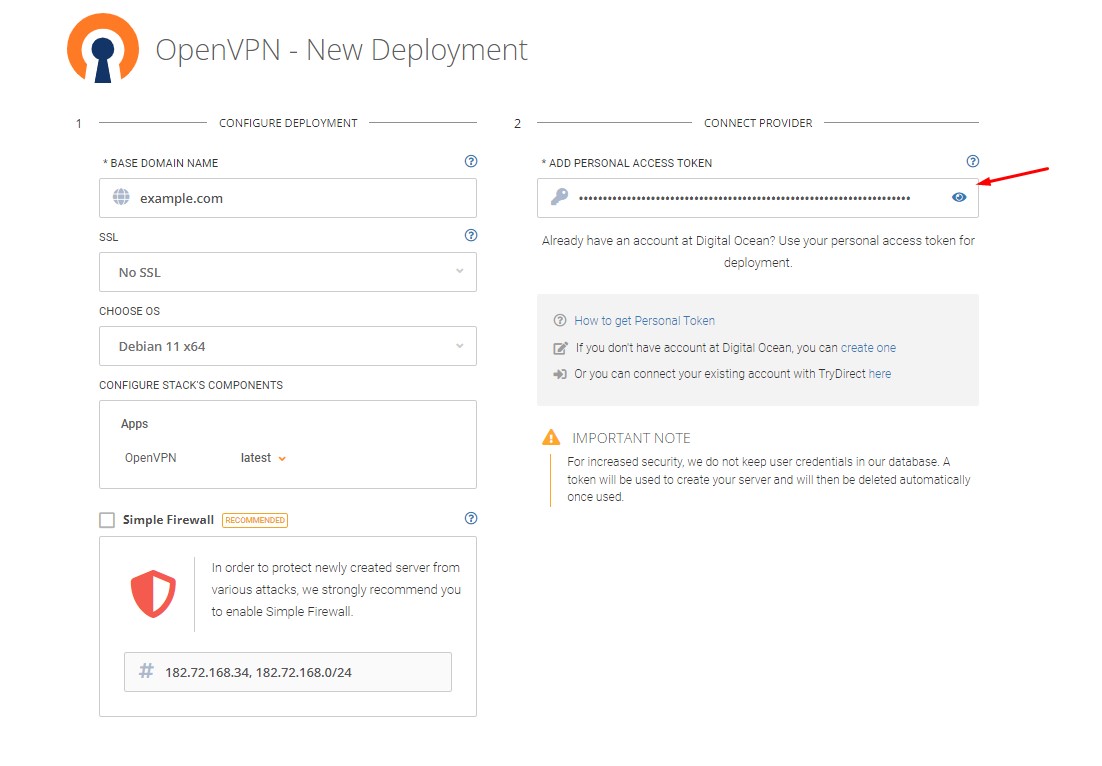
Next, you will be redirected to “OpenVPN—New Deployment.” Enter your domain name and your Digital Ocean API Token, which you had created earlier. Here the "BASE DOMAIN NAME" and "ADD PERSONAL ACCESS TOKEN" are mandatory. Fill in all the details required on this page.
Set personal access token
Then select the data center region where you want to deploy the OpenVPN server.
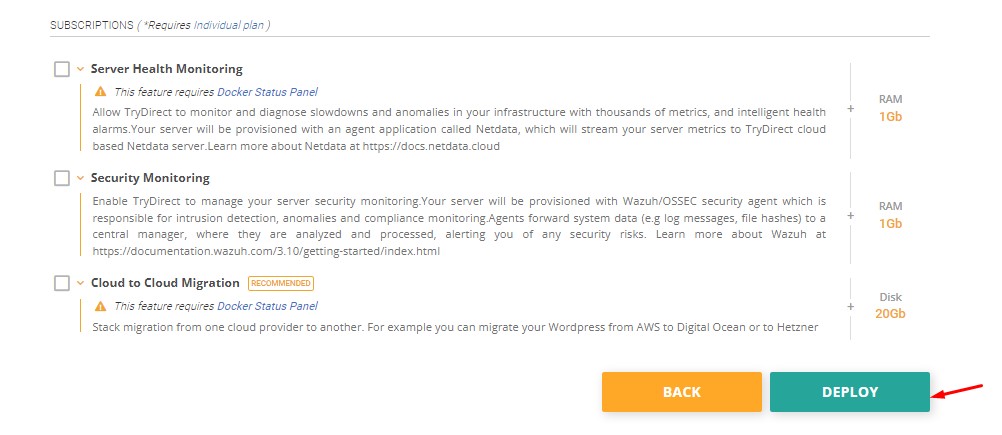
Next, choose the server from a list and select features per your requirements.
At last, click the “DEPLOY” button.
Click deploy button
Your OpenVPN server deployment started. It will take around 15 minutes.

Watch installation progress
At the same time, you will see a new droplet created on your Digital Ocean account.

Find the newly created droplet at Digital Ocean
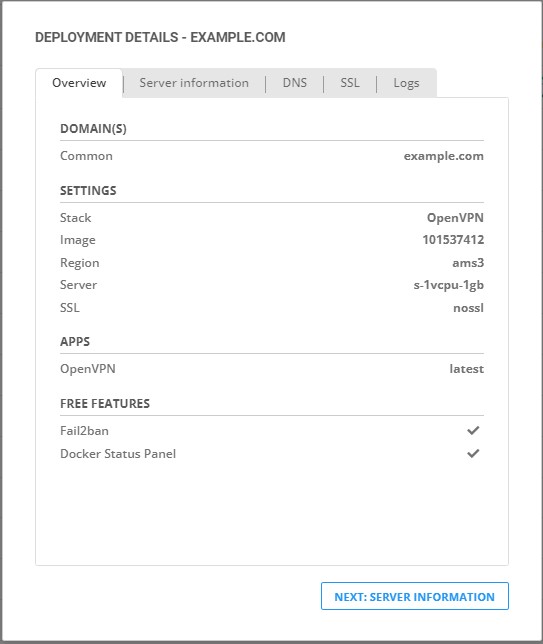
Once the OpenVPN setup process is completed, a detailed information menu will pop up.
Details of the created server
You will receive a notification email from TryDirect that contains a deployment-configs PDF file, the key PEM file of your server and OpenVPN configuration file with ovpn extension.
How to connect to OpenVPN
Download your “ovpn” file and save the file somewhere on your system. You will need this “ovpn” file later for the OpenVPN connection.
Install the OpenVPN client
Now, you need to install the OpenVPN client for your OS
Windows users
Go to https://openvpn.net/community-downloads/ and Download OpenVPN client.
Download OpenVPN for connecting your own server
Next, install the OpenVPN client on your system.

Setup OpenVPN client on Windows
Once the OpenVPN client is installed you may get a ‘no readable profile’ warning alert as shown in the below screenshot.
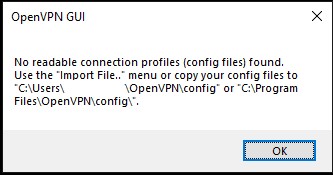
No readable connection profiles
Click the “OK” button, then right-click the OpenVPN GUI icon from the system tray.
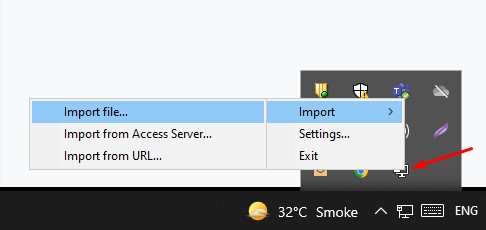
Import ovpn file
It will open pop-up windows, go to your “.ovpn” file location on your system and select OpenVPN “.ovpn” file.
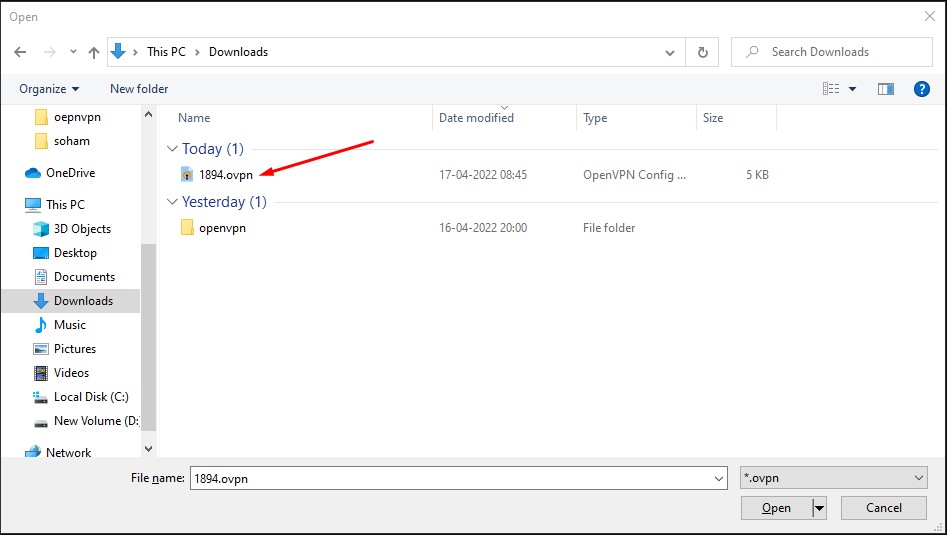
Find the file of type ovpn in Downloads
It will display “File imported successfully” message.
Now, again, right-click on the OpenVPN GUI icon and click on Connect Option.
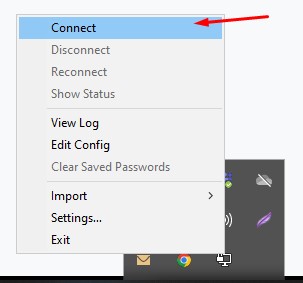
Click connect OpenVPN server
You are now connected with your OpenVPN server using your OpenVPN client from your Windows system.
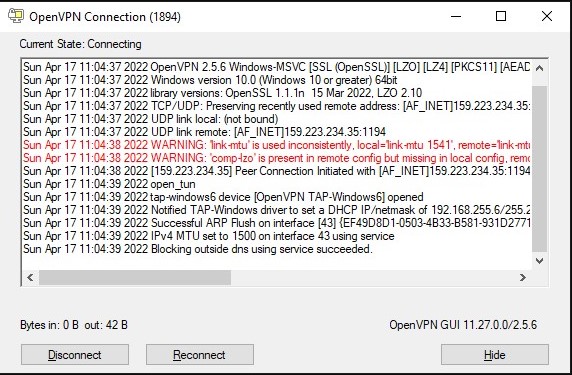
OpenVPN WARNING: "link -mtu" is used inconsistently
To verify your OpenVPN connection, go to the web browser and type “what is my ip” or "show my ip address". You will see the IP address on your OpenVPN data center.
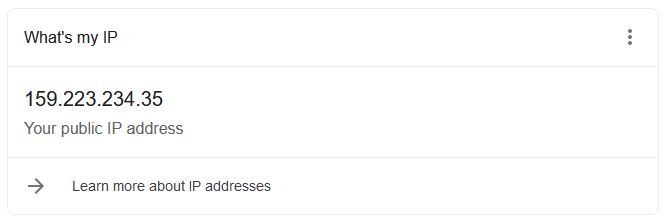
What is my ip
Linux users
If you are using Linux distributions, then you need to install the OpenVPN client from repository:
Ubuntu/Debian users, execute the following commands in your terminal:
sudo apt-get update
sudo apt-get install openvpn
sudo openvpn --config xxxx.ovpn  (Replace 'xxxx' with the filename you got in e-mail)
bash
CentOS users:
sudo yum install epel-release
sudo yum install openvpn
sudo openvpn --config xxxx.ovpn  (Replace 'xxxx' with the filename you got in e-mail)
bash
After running the above command, you will see an output like:
Output:

Mon Apr 18 11:05:39 2022 /sbin/ip addr add dev tun0 local 192.168.255.6 peer 192.168.255.5
Mon Apr 18 11:05:39 2022 WARNING: this configuration may cache passwords in memory -- use the auth-nocache option to prevent this
Mon Apr 18 11:05:39 2022 Initialization Sequence CompletedNote: If you are using an older version of Ubuntu and getting errors like write to TUN/TAP: Invalid argument (code=22) , make sure to update OpenVPN to version 3.
If you want to run the OpenVPN client in the background, execute the following command:
openvpn --config xxxx.ovpn --daemon (Replace 'xxxx' with the filename you got in e-mail)bash
For example:
sudo openvpn --config 1894.ovpn --daemonbash
How to add new VPN users
First, change the downloaded PEM file permission to 400. Run the following command in terminal:
sudo chmod 400 example.com.pembash
Replace ‘example.com.pem’ with the PEM file name you got in the e-mail.
Now, run the command along with your server IP address as shown below:
ssh -i example.com.pem root@159.223.234.35(Replace with your OpenVPN server IP)
Next, go to the directory containing docker-compose.yml file on your server.
cd /root/openvpn/bash
Now, execute the commands below.
docker-compose run --rm openvpn easyrsa build-client-full USERNAME nopassbash
For example:
docker-compose run --rm openvpn easyrsa build-client-full admin nopassbash
The above command will generate an admin user without a passphrase.
Generate user’s ovpn file.
Syntax:
docker-compose run --rm openvpn ovpn_getclient USERNAME > USERNAME.ovpnbash
Example:
docker-compose run --rm openvpn ovpn_getclient pratik > /root/openvpn/client_conf/pratik.ovpnbash
Now, download New user's ovpn file on your system.
scp -i example.com.pem root@159.223.234.35:/root/openvpn/client_conf/admin.ovpn .bash
Now you can connect with OpenVPN server, as shown before:
sudo openvpn --config admin.ovpnbash
Replace admin.ovpn with your ovpn key.
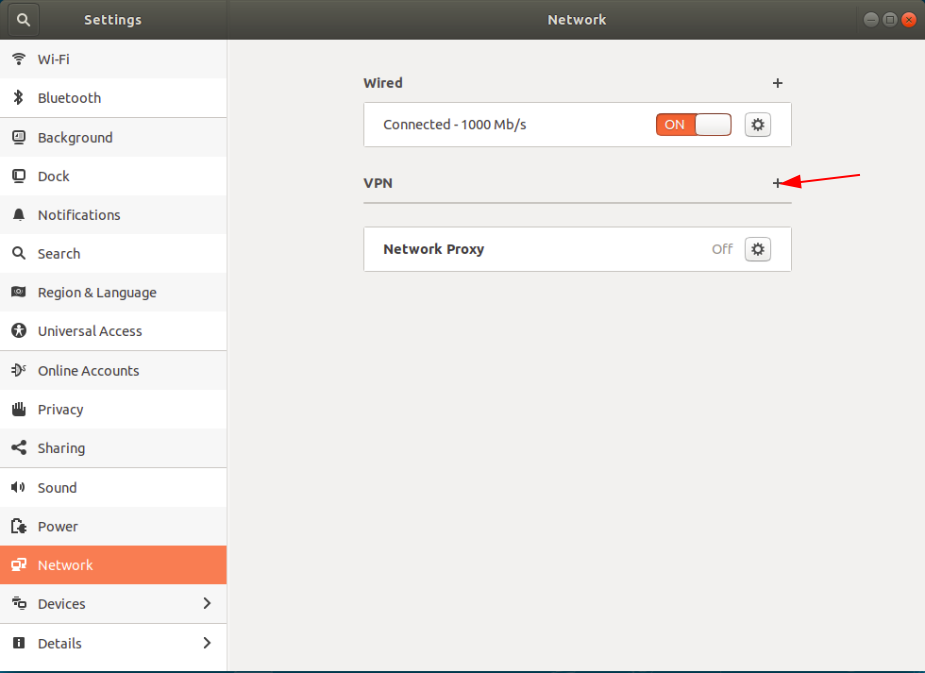
Alternatively, you can easily connect to the OpenVPN server by using network-manager.
Run the below command to add OpenVPN support to the network-manager.
sudo apt install network-manager-openvpn-gnomebash
Then, click the network-manager and VPN ‘+’ symbol as shown in the below screenshot.
Configure OpenVPN in Ubuntu
Next, select the ‘import from file’ option from the selection box opened.
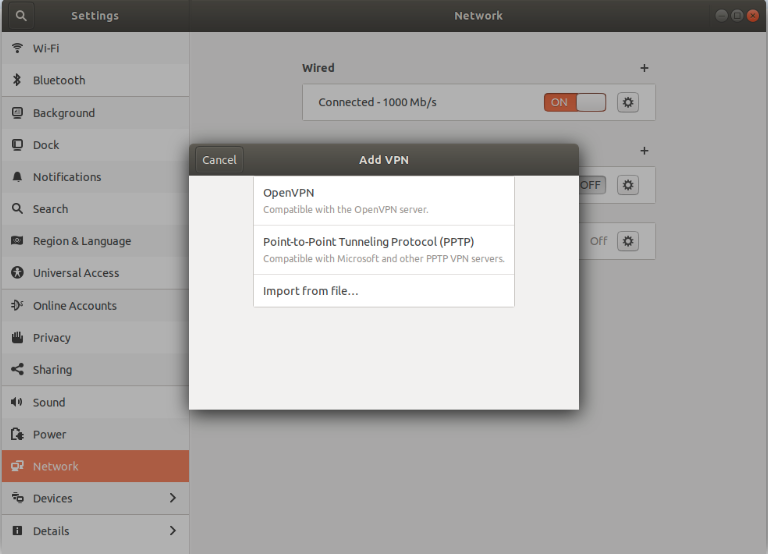
Ubuntu Linux - Add VPN
Now, select your ovpn file from your system.
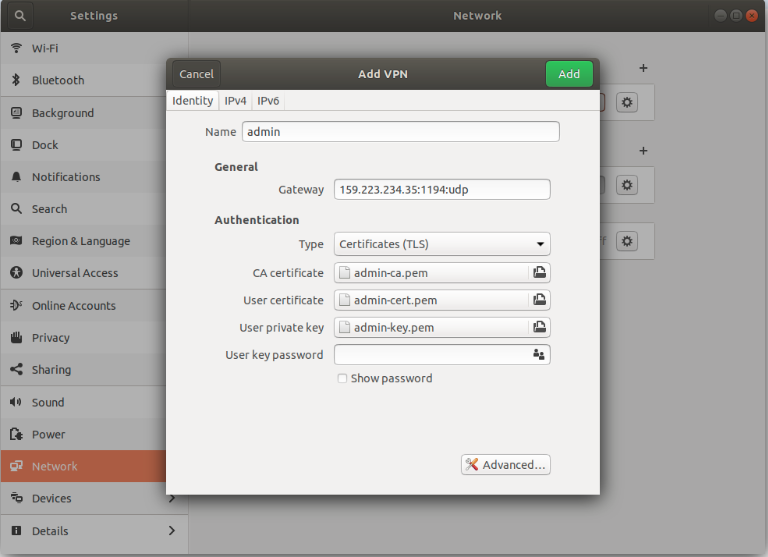
Ubuntu OpenVPN import ovpn file into client app
Next, enable the VPN. Now you are connected with the OpenVPN server using your network manager.
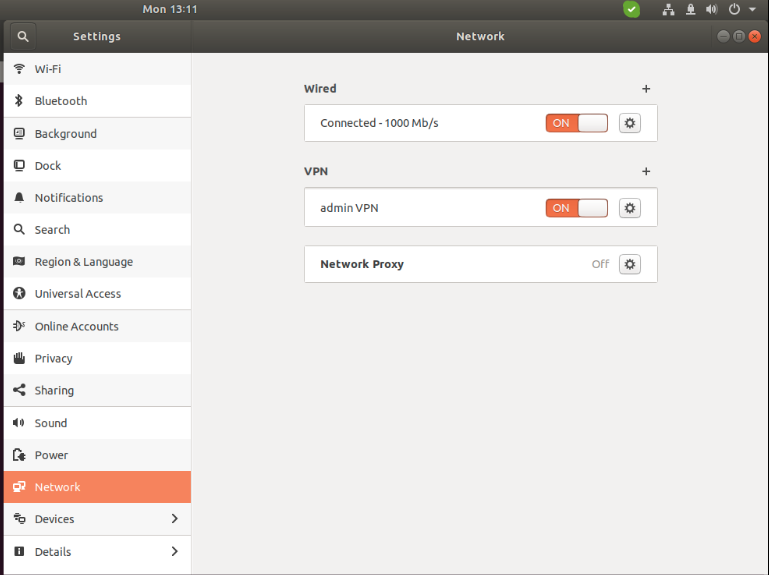
Ubuntu - Check network manager
Congratulations! You got an understanding of OpenVPN. Now you are informed on the ways to set up the OpenVPN server using the TryDIrect platform and configure the OpenVPN client on your system.