Deploying on your own server is a great business option for start-ups and small business. The reason is because this provides flexibility and an efficient cloud hosting allowance at a reasonable cost while allowing you to virtually set up technologies such as servers, web apps, databases storage.
This way, you can control everything yourself. TryDirect will be using Docker technologies for deployment.
Your own server can be a Dedicated Server, On-Premise Server, Self-Hosted Server. Learn the difference.
Understanding SSH Protocol
In order to configure your dedicated server for stack deployment, TryDirect will connect to the server using the SSH protocol, which is uses port 22 by default. Server port should be accessible for the TryDirect worker servers. If firewall is used please allow connections from the following worker IP's:
188.34.154.244
116.202.13.141
⚠️ Before we proceed, please ensure that:
- You are installing web app stack on a fresh server without any software that might interrupt process.
- Your server’s port 22 should be accessible by TryDirect, otherwise you will need to re-configure your router firewall and then forward the port to your server’s internal IP within your network. This can be tricky for less tech savvy users, so it’s always better to use a VPS server.
- You are connecting as the root user, and root SSH access is enabled.
To enable root access via SSH, follow these steps:
Log in to the server with a user that has sudo privileges:
ssh user@your-server

Open the SSH daemon configuration file:
sudo nano /etc/ssh/sshd_config

Locate the following line:
#PermitRootLogin prohibit-password

Uncomment the line and change it to:
PermitRootLogin yes

Save and exit the editor.
Restart the SSH service:
sudo systemctl restart sshd

Ensure you can connect as the root user:
ssh root@your-server
Once these prerequisites are confirmed, you can proceed with the deployment.
Let's get started
Step 1
The first step in the deployment of your server begins where you find “Connect your server”. But to connect your server, first you need to know your server public/external IP. Go to step 2 if you obtained your server's public IP.
Here is how to obtain your Public Server IP:
Visit a free Port Checker website and find it online, or
Executing bash commands right from your server terminal, as shown below
curl ifconfig.coor using dig command
dig +short myip.opendns.com @resolver1.opendns.comNext, check if port 22 of your public server is opened using this command
telnet <server ip> 22Example:
telnet 127.0.0.1 22Output should be something like:
Connected to 127.0.0.1.
Escape character is '^]'.
To exit telnet type: exit
Step 2
Once you obtained your server IP, paste into the "Server IP address" field. Please add your port number, by default it's 22. Add your server's user name that has sudo priveleges, for example "root" or "ubuntu".
We will use “ubuntu” for in the example but this can be any other user you use to access your server even root.
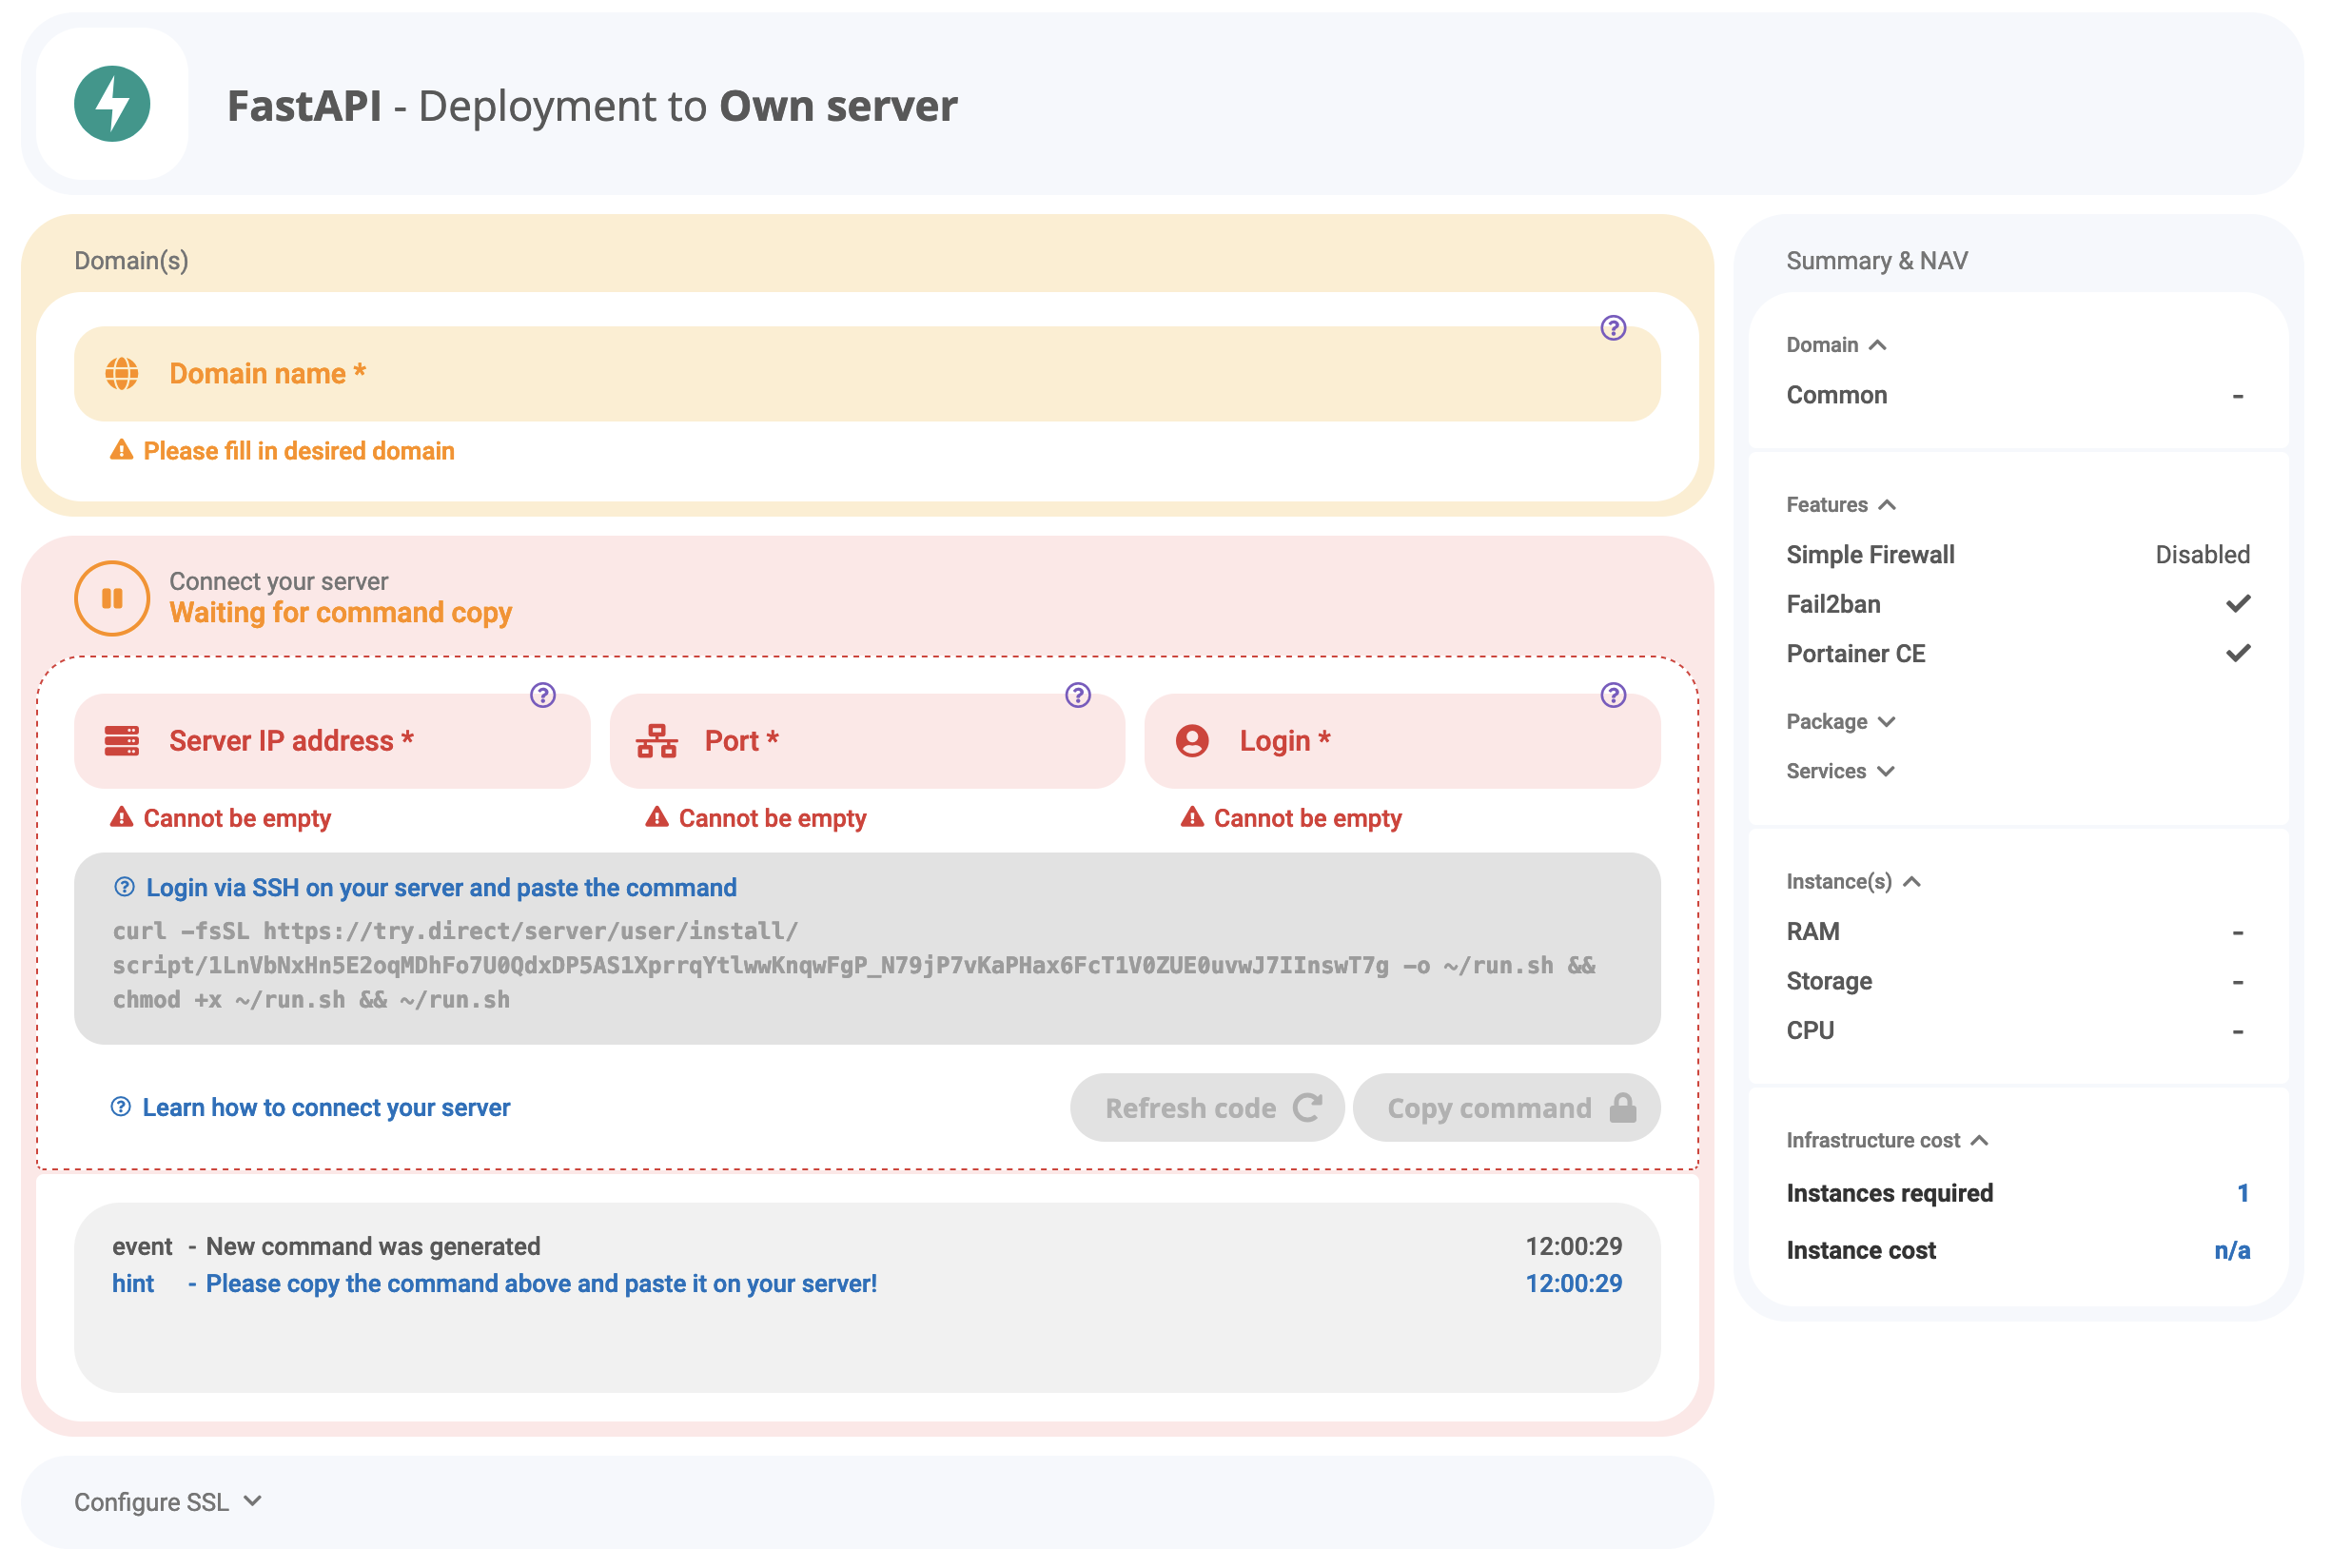
Connect your own server via SSH. Deploy FastAPI.
Step 3
Click "Copy command", go to your server terminal aand paste the code

Step 4
Wait for 10-20 seconds until the connection with your server is established. Once connected, the window will become green, saying “Server is connected”.
Step 5
Click "Deploy" button and you are good to go! The deployment may take around 15 minutes for the non-complex stacks. Once complete, you will receive an e-mail with PDF attachment.