osTicket is an open-source ticketing system available on the Linux/Windows platform. It is an extremely lightweight, easy-to-use web-based customer support application. It is written in PHP and supports MySQL/MariaDB. Not only that, but it provides Integration with LDAP/Active Directory for central authentication.
osTicket is the most reliable and widely used application for managing and tracking all the tickets. Here are some key features of osTicket.
- Clean Dashboard Reports
- Custom Fields
- Custom Columns and Queues
- Ticket Filters
- Agent Collision Avoidance
- Configurable Help Topics
- Assign and Transfer Tickets
- Auto-Responder
- Thread Action
- Service Level Agreements
- Customer Portal
In this tutorial, you will learn how to install osTIcket with Nginx on Ubuntu 24.04. Before you start, we offer users to use alternative and more easy way to deploy osTicket using Docker technologies with additional features included.
Prerequisites
- A server running Ubuntu 24.04.
- A sudo user configured with root privileges
Step 1: Upgrade the base OS
Before starting the installation, update the system with latest stable version by executing the below command on your server:
sudo apt update && sudo apt upgrade -ybash
After the system upgraded to the latest packages, you need to install the required dependencies, to do so run the below command in the terminal:
sudo apt install ca-certificates apt-transport-https software-properties-common wget curl unzip -ybash
Step 2: Install and Configure Nginx Web Server
You can install the nginx web server by executing the command given below:
sudo apt install nginx -ybash
Next, start the nginx service and check the status of the nginx service by running the following command:
sudo systemctl start nginx
sudo systemctl status nginx
bash
Now, enable the nginx service at system boot time using the below command:
sudo systemctl enable nginxbash
Output:
sohan@ubuntu:~$ sudo systemctl enable nginx
Synchronizing state of nginx.service with SysV service script with /usr/lib/systemd/systemd-sysv-install.
Executing: /usr/lib/systemd/systemd-sysv-install enable nginx
Step 3: Install PHP and PHP Modules
Next, Install PHP, and its required dependencies using the command below:
sudo apt install php8.3 php8.3-mysql php8.3-cgi php8.3-fpm php8.3-cli php8.3-curl php8.3-gd php8bash
Now make the necessary changes in php.ini by editing the file.
sudo vim /etc/php/8.3/fpm/php.inibash
Here, search for “cgi.fix_pathinfo” uncomment the line, and set its value 0
cgi.fix_pathinfo=0bash
Once you are done with editing, save and close the file.
To apply the changes, you need to restart the php8.3-fpm service and also enable it as a system reboot.
sudo systemctl restart php8.3-fpm
sudo systemctl enable php8.3-fpm
bash
Step 4: Install and Configure MariaDB
Now, install the MariaDB database server by executing the command below:
sudo apt install mariadb-server -y
Next, start the MariaDB service, check the service status, and enable the service at system reboot by running the following command:
sudo systemctl start mysql
sudo systemctl enable mysql
sudo systemctl status mysql
bash
Next, Secure the MariaDB installation by running the below command:
sudo mysql_secure_installationbash
Answer the questions below:
Enter current password for root (enter for none):
Switch to unix_socket authentication [Y/n] n
Change the root password? [Y/n] n
Remove anonymous users? [Y/n] Y
Disallow root login remotely? [Y/n] Y
Remove test database and access to it? [Y/n] Y
Reload privilege tables now? [Y/n] Y
Note: We assume that you already set the strong root password, so we don’t need to change to root password here.
Now, log in to the MariaDB shell as a root user by running the following command:
sudo mysql -u root -pbash
Enter, your root password and press “Enter”
Now you need to create a database and user for osTicket.
create database osticket_database;bash
grant all privileges on osticket_database.* to osticket_user identified by 'your-password';bash
You can set the database user and password of your choice.
Now, flush the privileges and exit from the MariaDB shell by running the below command:
flush privileges;
exit;
The output looks like the below:
sohan@ubuntu:~$ sudo mysql -u root -p
Enter password:
Welcome to the MariaDB monitor.  Commands end with ; or \g.
Your MariaDB connection id is 42
Server version: 10.11.8-MariaDB-0ubuntu0.24.04.1 Ubuntu 24.04

Copyright (c) 2000, 2018, Oracle, MariaDB Corporation Ab and others.

Type 'help;' or '\h' for help. Type '\c' to clear the current input statement.
MariaDB [(none)]> create database osticket_database;
Query OK, 1 row affected (0.000 sec)

MariaDB [(none)]> grant all privileges on osticket_database.* to osticket_user identified by 'your-password';
Query OK, 0 rows affected (0.001 sec)

MariaDB [(none)]> flush privileges;
Query OK, 0 rows affected (0.001 sec)

MariaDB [(none)]> exit;
Bye
Step 5: Download and Configure osTicket
Start by acquiring the latest version of osTicket from the GitHub download page.
sudo wget https://github.com/osTicket/osTicket/releases/download/v1.18.1/osTicket-v1.18.1.zipbash
Once you download the package, create a directory for osTicket and extract the downloaded files inside it as shown in the below command.
sudo mkdir -p /var/www/html/osticketbash
sudo unzip osTicket-v1.18.1.zip -d /var/www/html/osticket/bash
Next, change ownership and set the required permission for osTicket directory.
sudo chown -R www-data:www-data /var/www/html/osticketbash
sudo chmod -R 755 /var/www/html/osticketbash
Then, generate an osTicket configuration file from the given ‘ost-sampleconfig.php’ file using the below command:
sudo cp /var/www/html/osticket/upload/include/ost-sampleconfig.php /var/www/html/osticket/upload/include/ost-config.phpbash
Step 6: Configure the Nginx virtual host file for osTicket
To access osTicket, you need to create the nginx virtual host file.
sudo vim /etc/nginx/sites-available/osticket.confThen, paste the following configuration into it:
server {
    listen 80;
    server_name example.com;

    root /var/www/html/osticket/upload;

    index index.php index.html index.htm;

    access_log /var/log/nginx/osticket_access.log;
    error_log /var/log/nginx/osticket_error.log;

    client_max_body_size 100M;

    location / {
        try_files $uri $uri/ =404;
    }

    location ~ \.php$ {
        include snippets/fastcgi-php.conf;
        fastcgi_pass unix:/var/run/php/php8.3-fpm.sock;
        fastcgi_param SCRIPT_FILENAME $document_root$fastcgi_script_name;
        include fastcgi_params;
    }
    location ~ /\.ht {
        deny all;
    }
}
nginx
Please note that here, you need to replace example.com with your domain_name/server_IP address.
Save and exit from the vim editor.
Next, create a symlink using the below command:
sudo ln -s /etc/nginx/sites-available/osticket.conf /etc/nginx/sites-enabled/bash
The above command creates a file as shown below:
sohan@ubuntu:~$ ll /etc/nginx/sites-enabled/
total 8
drwxr-xr-x 2 root root 4096 Jul  7 19:42 ./
drwxr-xr-x 8 root root 4096 Jul  7 12:23 ../
lrwxrwxrwx 1 root root   40 Jul  7 19:41 osticket.conf -> /etc/nginx/sites-available/osticket.conf
sohan@ubuntu:~$
Now, verify the configuration file using the following command:
sudo nginx -tOutput:
sohan@ubuntu:~$ sudo nginx -t
nginx: the configuration file /etc/nginx/nginx.conf syntax is ok
nginx: configuration file /etc/nginx/nginx.conf test is successful
sohan@ubuntu:~$
Once the configuration test is successful, restart the nginx service to apply the changes.
sudo systemctl restart nginxbash
You can check the Nginx service status by executing the command below:
sudo systemctl status nginxbash
Step 7: Access the osTicket
Please open your web browser and navigate to http://example.com to access the osTicket installation page. You will be directed to the prerequisites page.
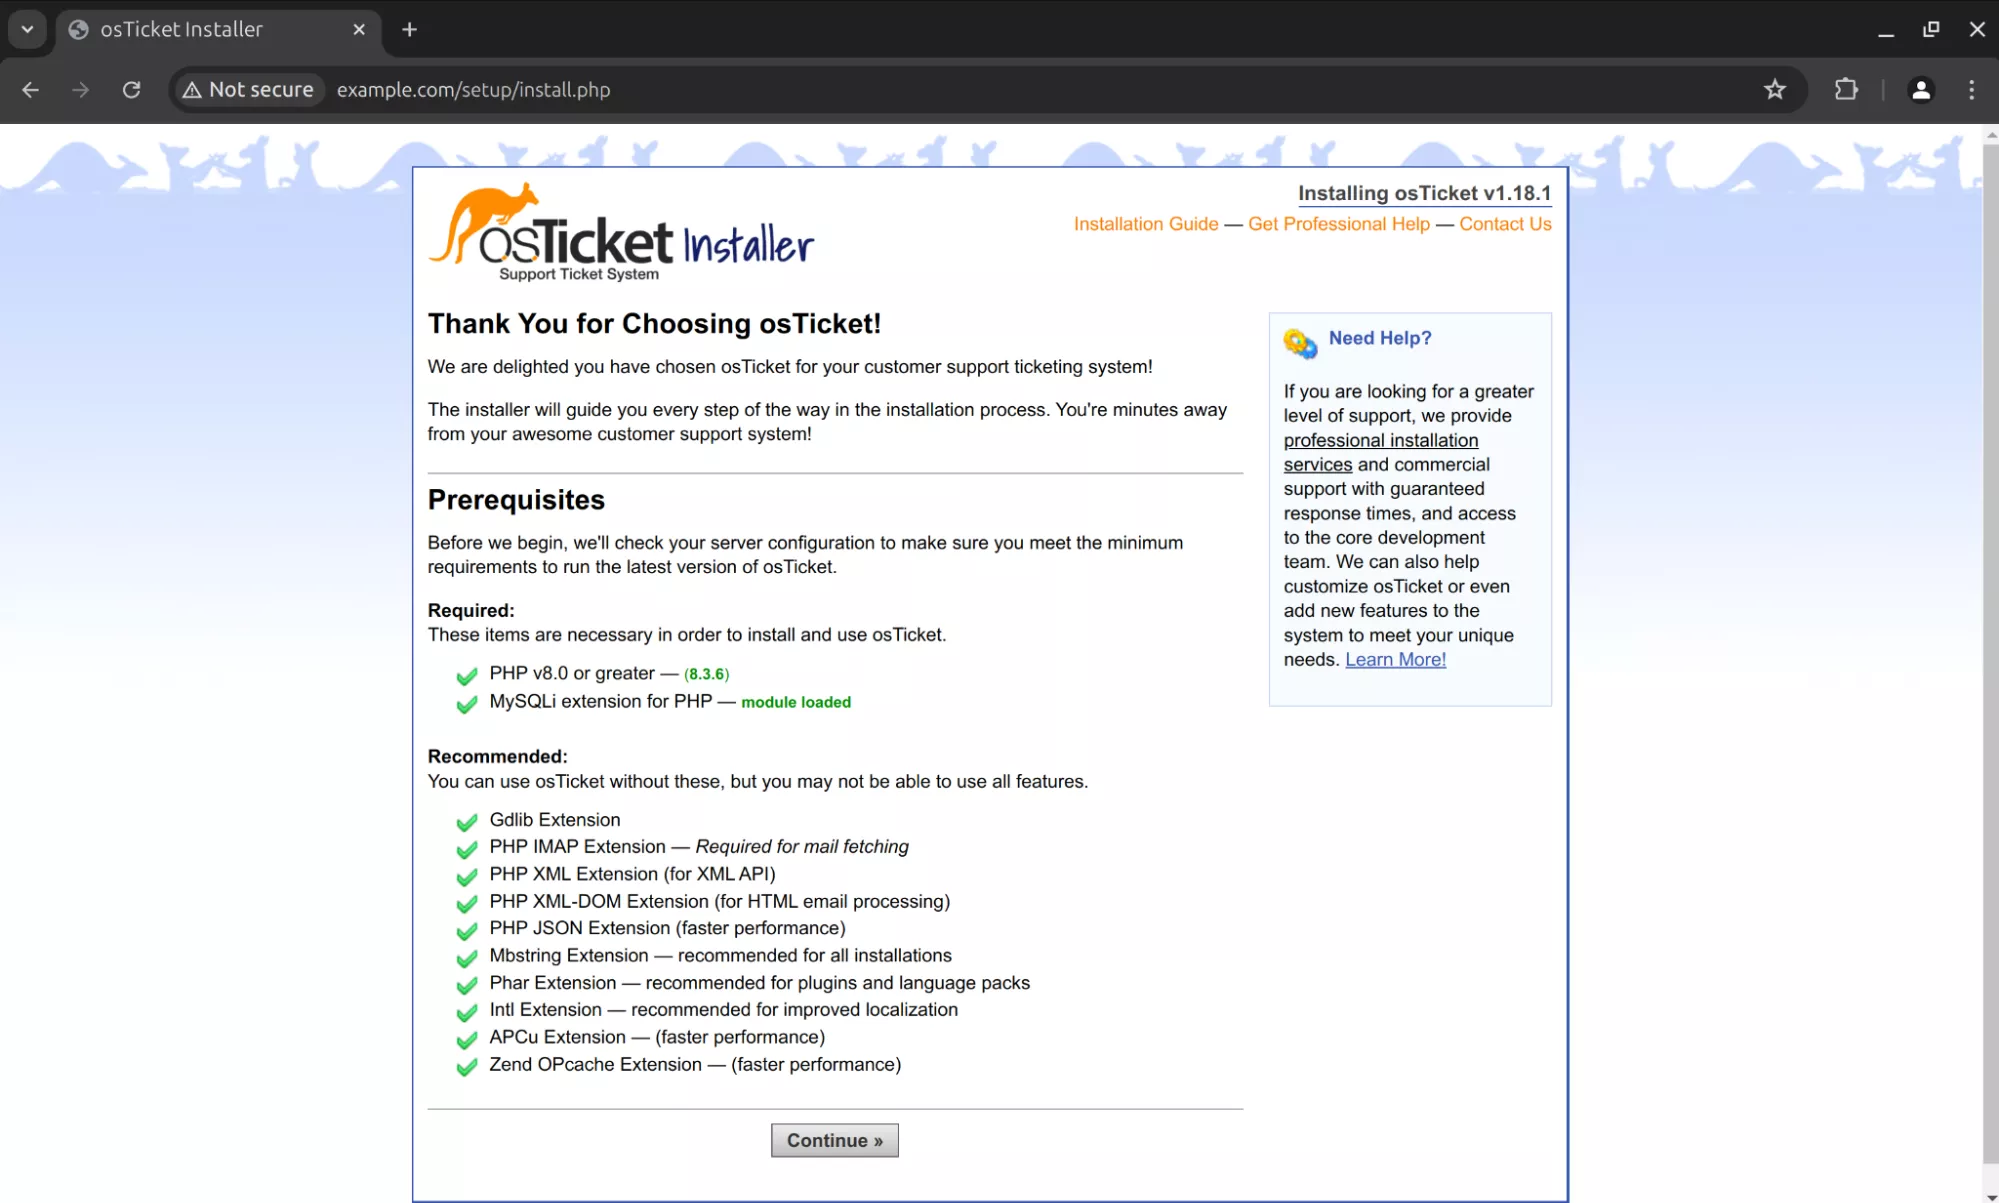
Press the ‘Continue’ button, and you will see the installation page on the next screen.
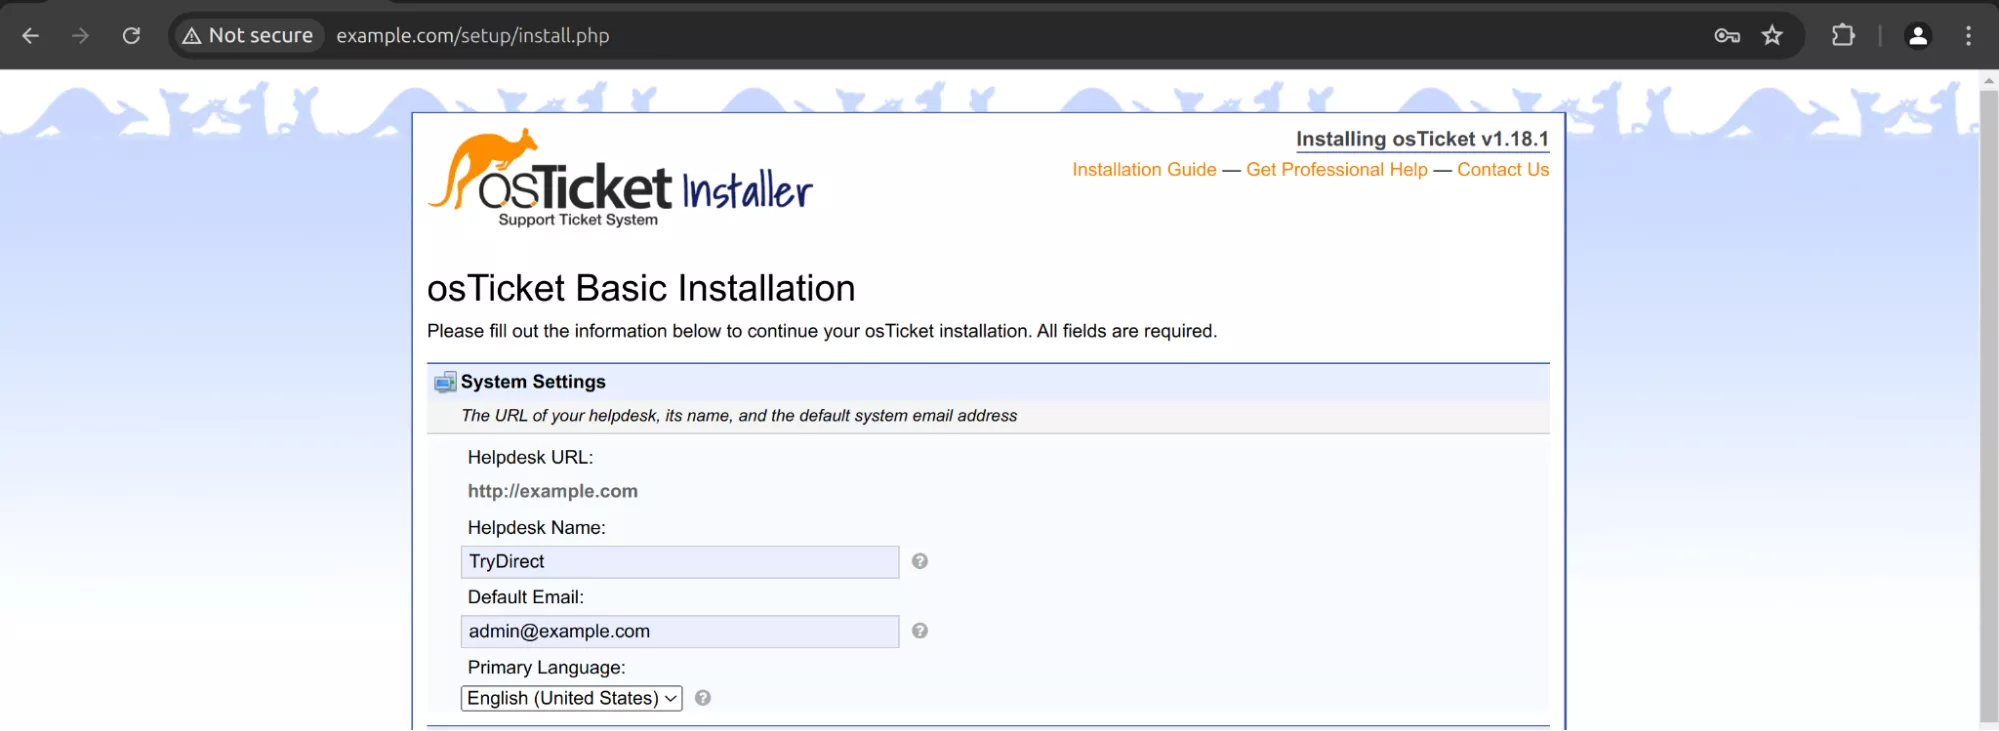
osTicket - installer | System Settings
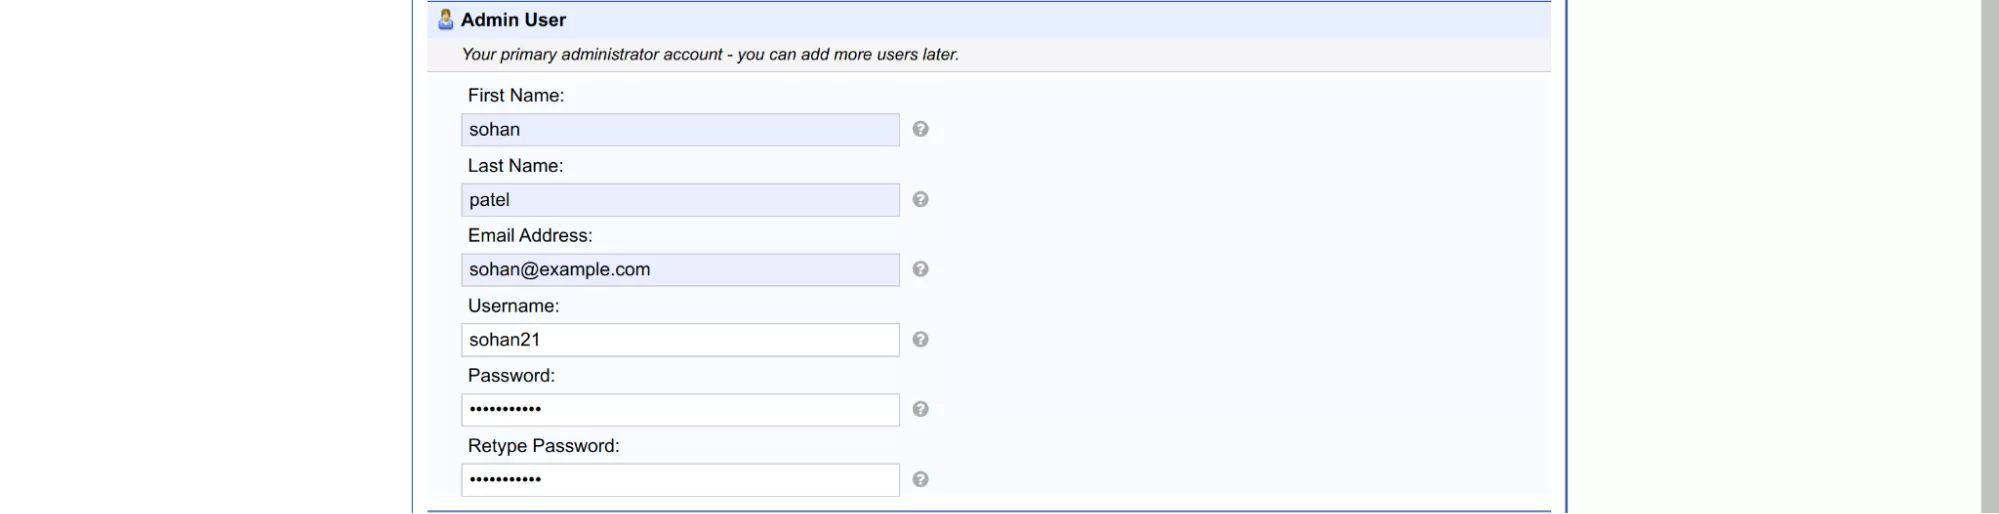
osTicket - Installer | Admin User
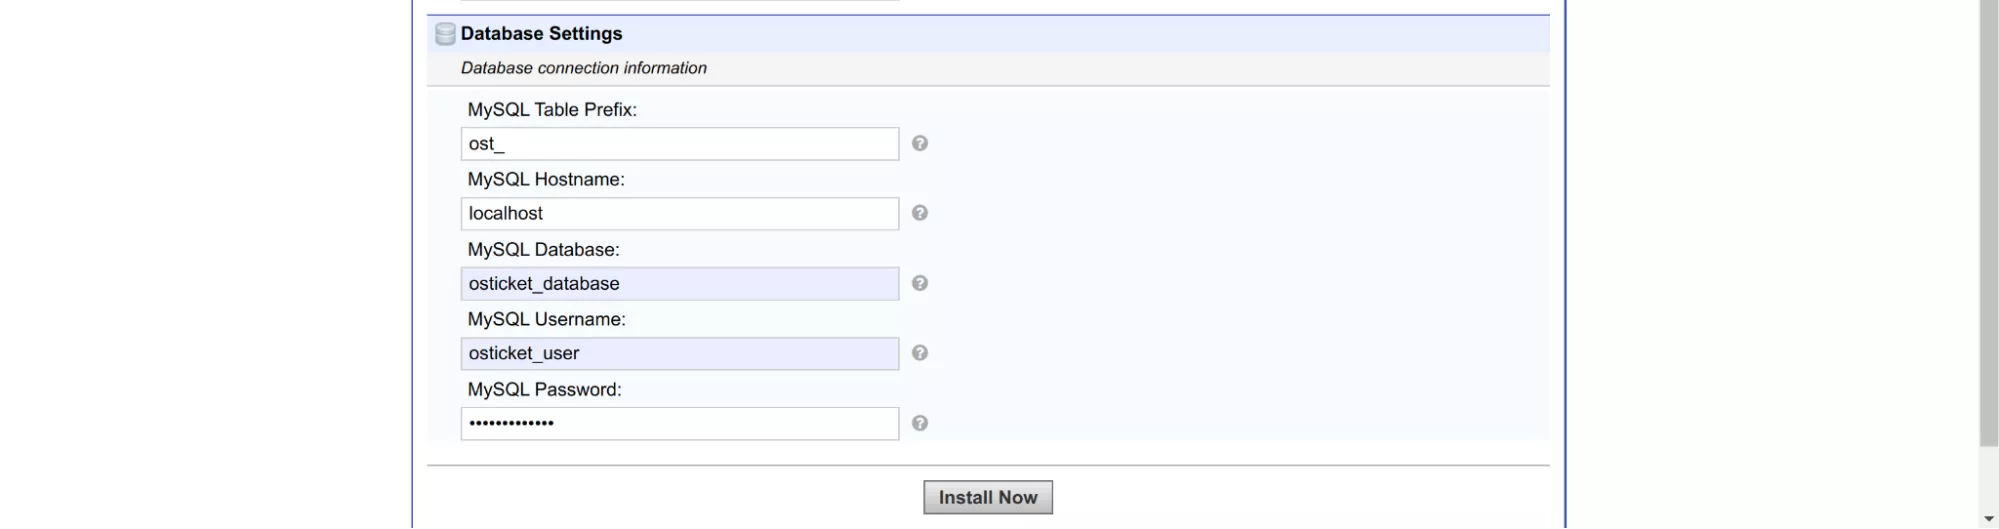
osTicket - Installer | DB Settings
Set your Helpdesk Name and other details along with the database name, username, and password you set earlier, then click on ‘install now’ button to finish the installation.
You will see the screenshot as shown below:
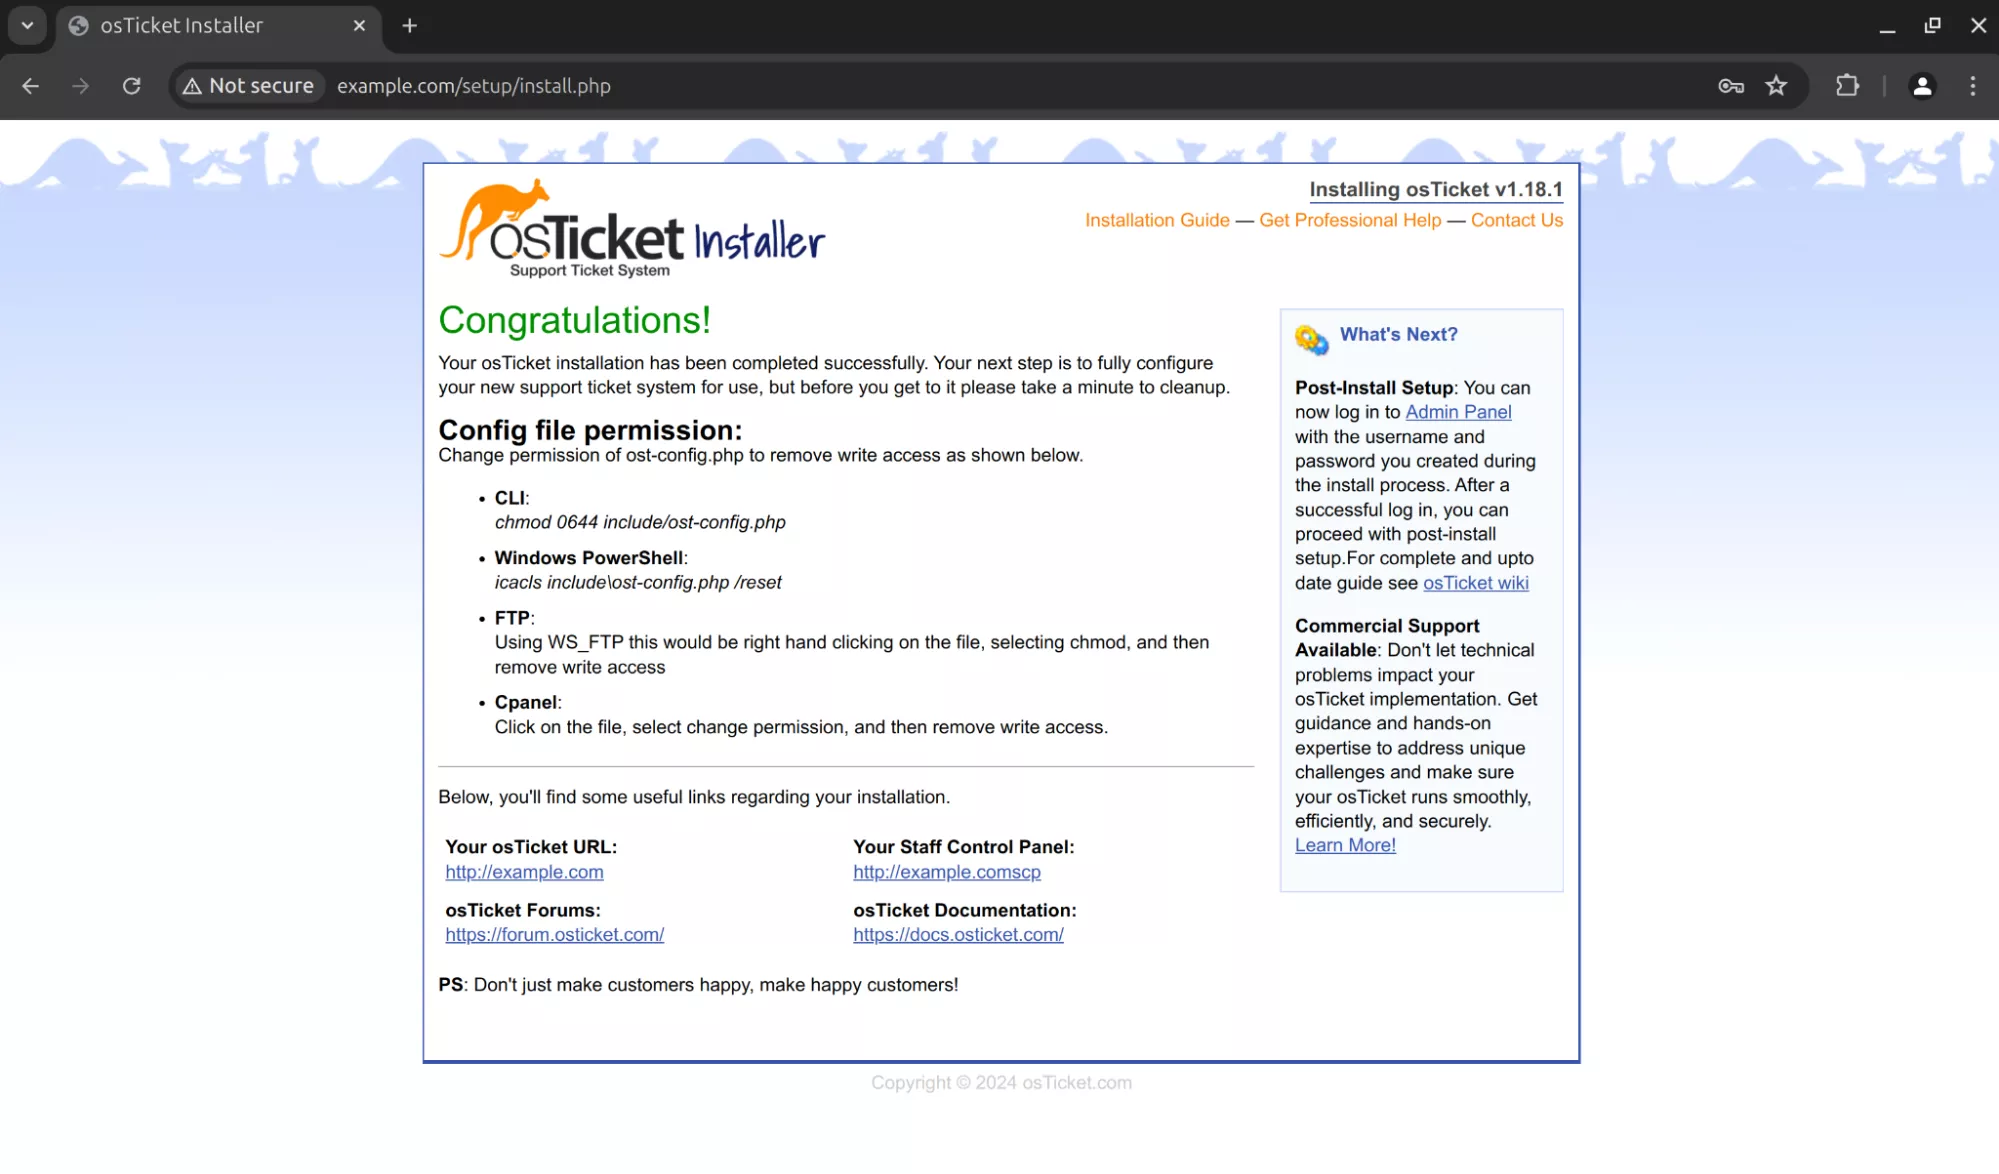
osTicket - Installer | File permissions
Next, open the osTicket URL and you will see the homepage here http://example.com
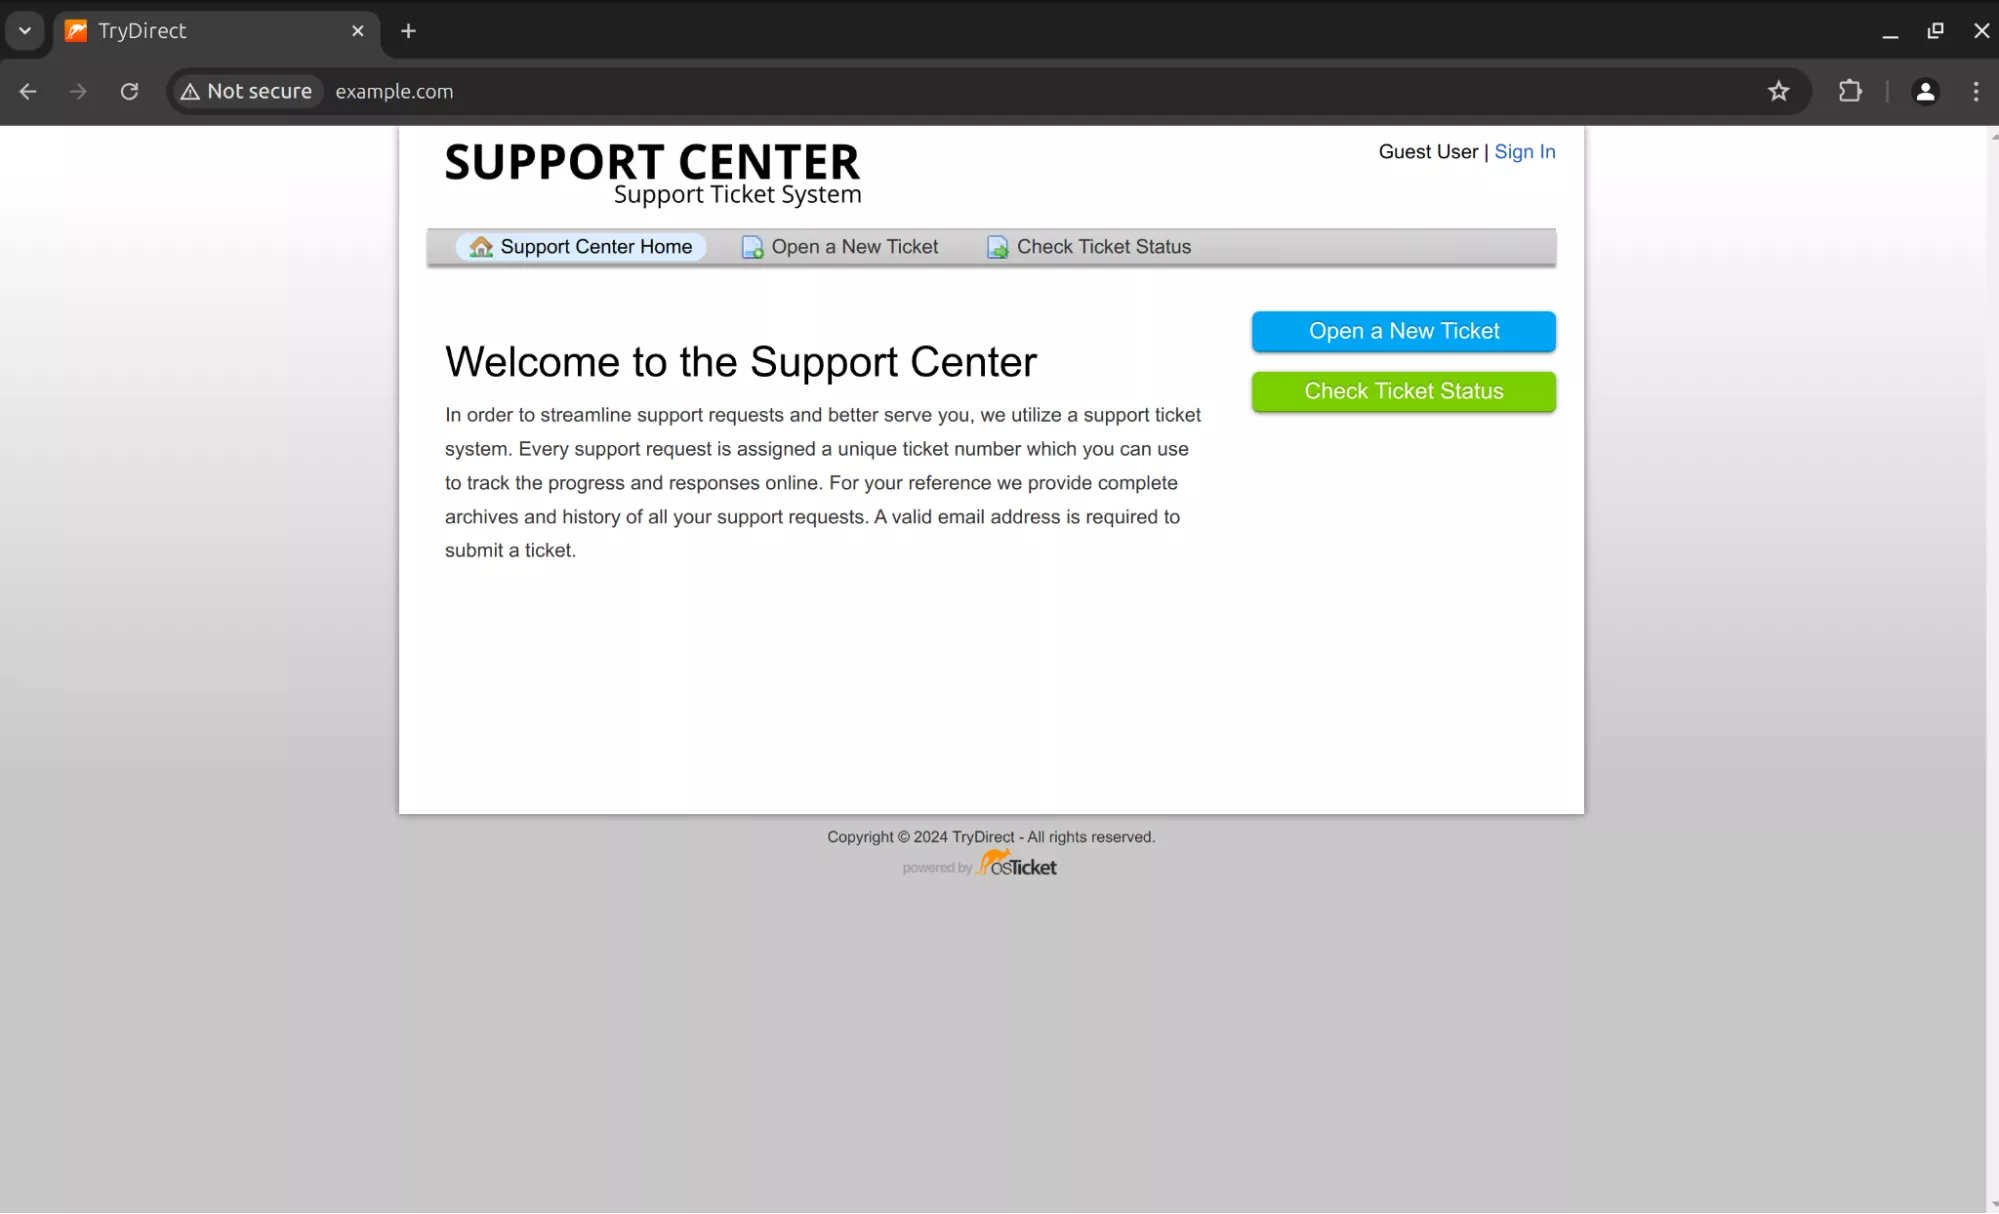
osTicket - Support Center page
osTicket Admin Panel: http://example.com/scp/login.php
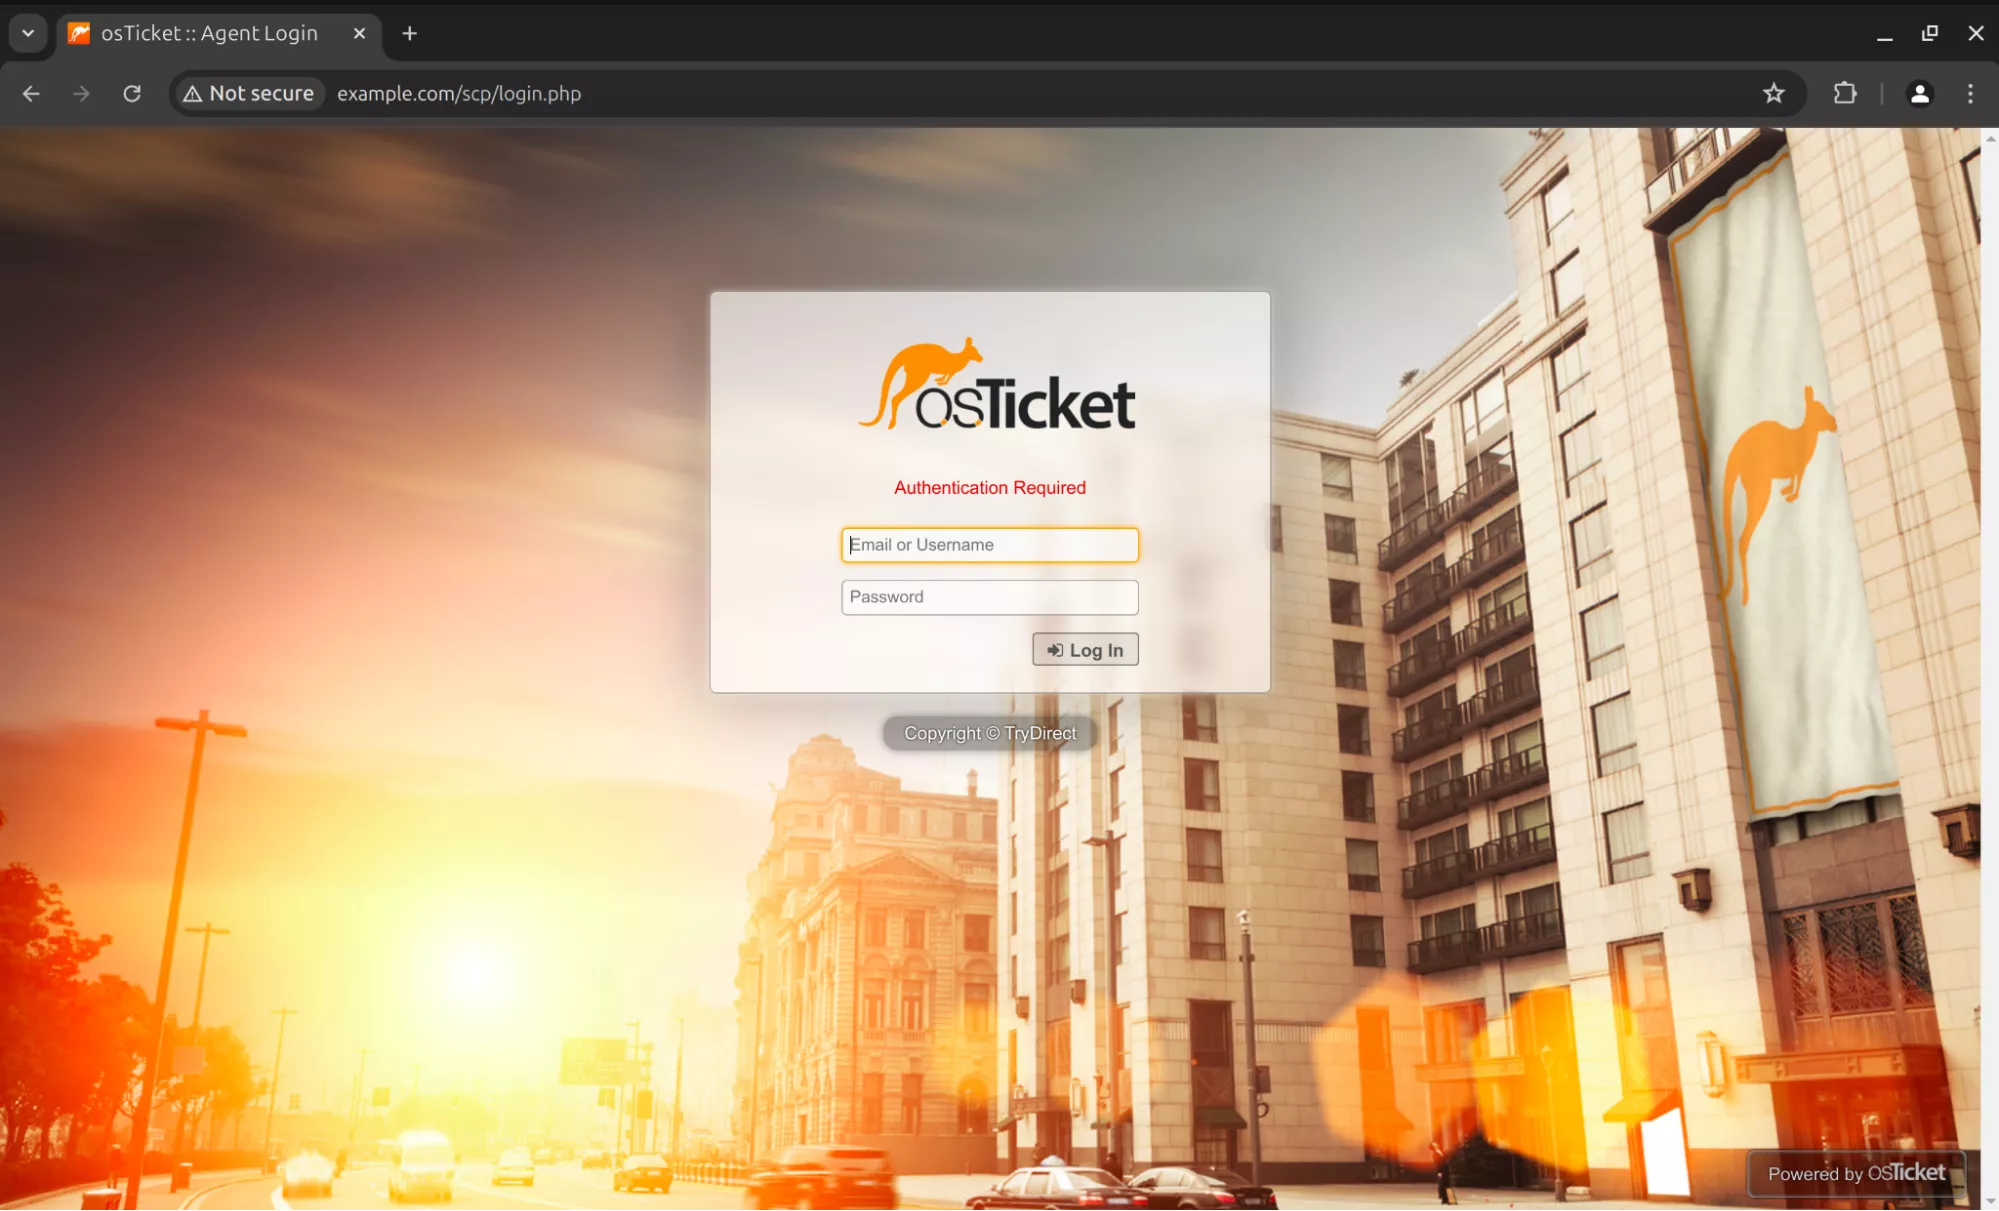
osTicket | Admin Login
Enter the username and password, you have set at installation time. You will see a screen similar to the one below:
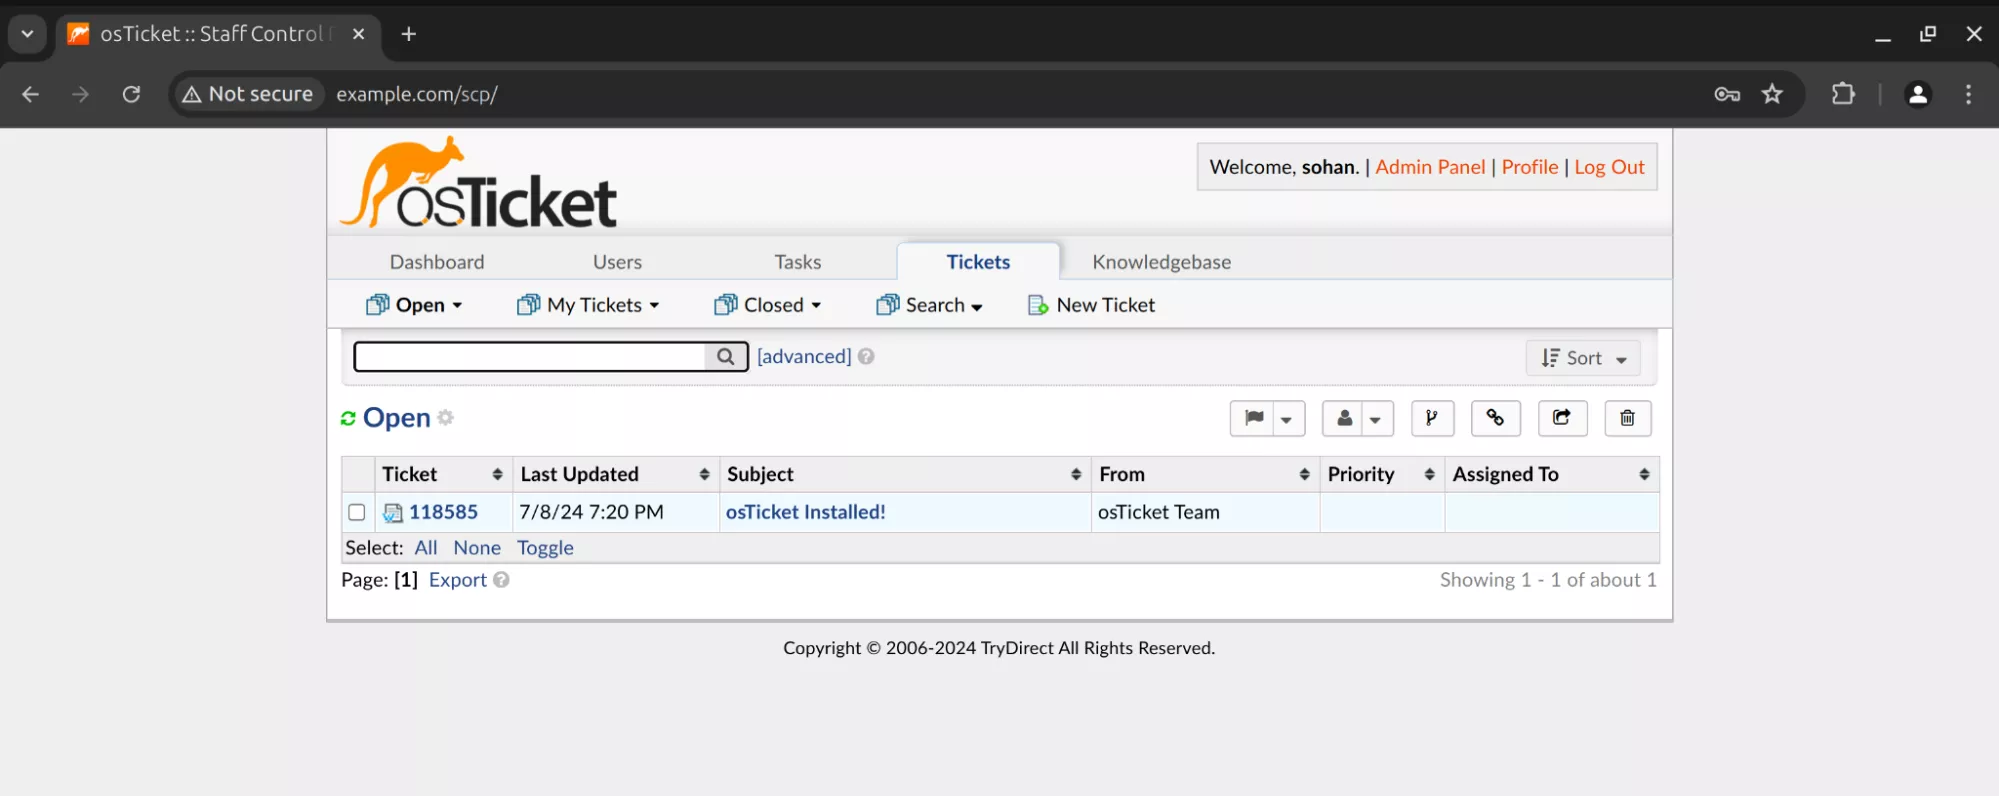
osTicket | Admin Dashboard
OsTicket Admin panel configuration: http://example.com/scp/settings.php
Here, you will see the alert like “Please take a minute to delete setup directory (../setup/) for security reasons.”
To resolve this, delete the setup directory from the osTicket home path.
sudo rm -rf /var/www/html/osticket/upload/setup/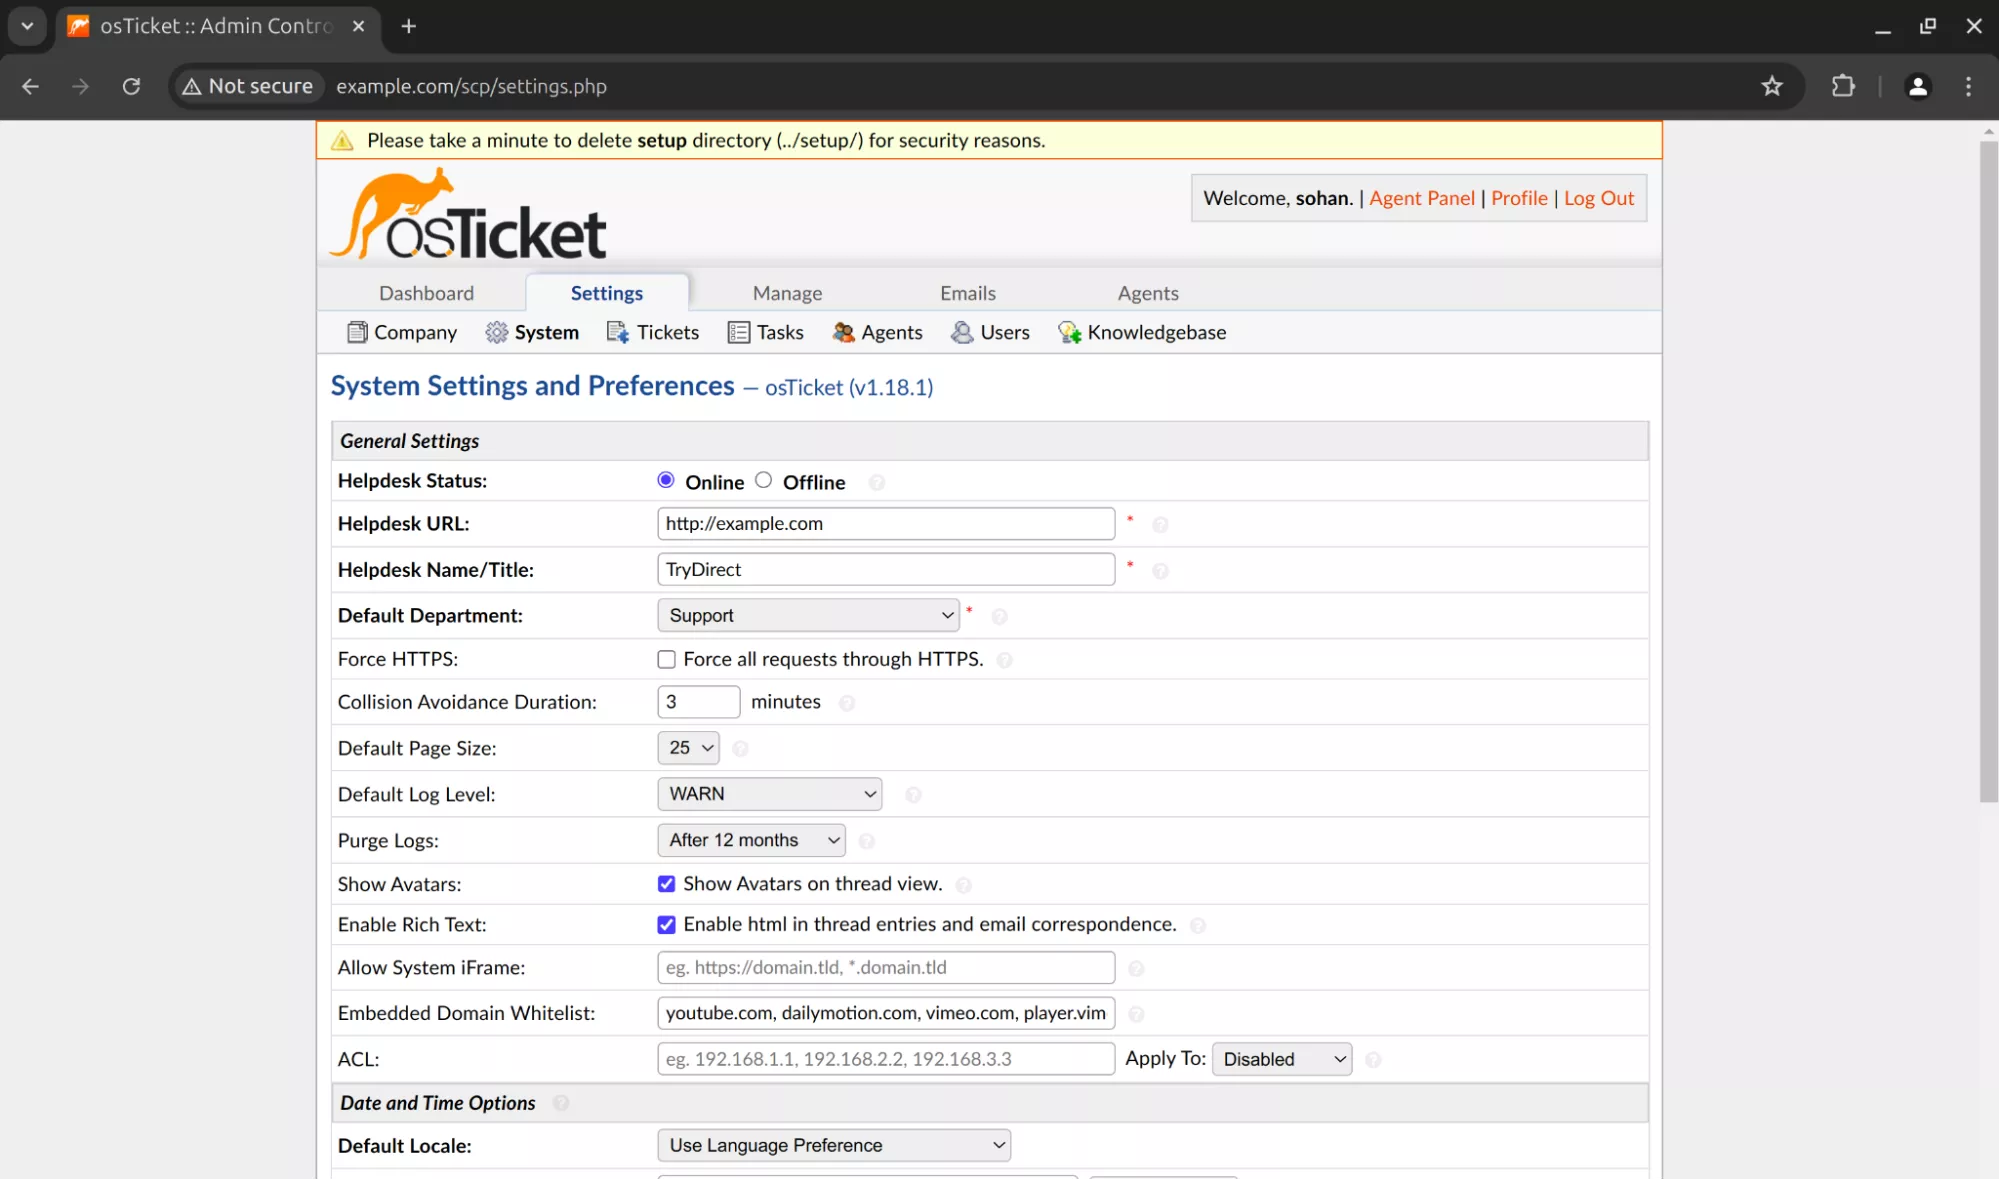
osTicket | System Preferences

osTicket | System Preferences and Settings
Think it's too complex? Let us automatically deploy it for you with all above included
Conclusion
Congratulations! You have installed osTicket with Nginx on Ubuntu 24.04. osTicket offers great features like customizable fields, ticket routing, customizable logos and many more which make it a perfect solution for small to medium businesses. You can combine with other system as well. It provides robust and cost-effective solution that improve your customer service. Overall, osTicket is a very flexible and reliable solution you can trust for tracking support issues.