How to setup Akeneo with Nginx, Nginx Proxy Manager, and Portainer
We already have the Akeneo stack, and its related information, on the Akeneo stack page. We can enhance this widely-used Product Information Management (PIM) system by adding Nginx, Nginx Proxy Manager, and Portainer features to the stack.
The Akeneo stack with Nginx, Nginx Proxy Manager, and Portainer are more secure, efficient, robust, and easy to maintain.
Step 1: Introduction
Let’s briefly understand the role of each component.
Akeneo:
It is a simple yet highly customizable Product Information Management system and a core component of the stack. Akeneo can import data from virtually any source and manage it in a central repository. Akeneo provides user interaction to create, edit, and manage data.
Nginx:
It is a next-generation high-performance web server that reduces the load on Akeneo by serving static files and enhancing the overall stack performance.
Nginx Proxy Manager:
It makes reverse proxy management simple by avoiding SSL complexity. It provides a web interface that is the easiest way to set up Nginx as a reverse proxy. You can configure Nginx files without manual editing.
Nginx Proxy Manager automatically obtains and renews SSL certificates, redirects HTTP requests to HTTPS, and provides a secure connection to the Akeneo application.
Portainer:
You can manage the Docker containers, entirely from the web UI. You can manage Docker services, monitor Docker, manage volume, network, and various tasks using a clean web UI. For more information, you can check Portainer page.
In this tutorial, we will show you how you can easily integrate all these tools using the Akeneo stack (Akeneo) in just a few clicks. Akeneo stack removes the complexity of configuring all these tools manually, and it is the fastest method of deployment to save time and avoid errors.
2. Setup Akeneo Stack
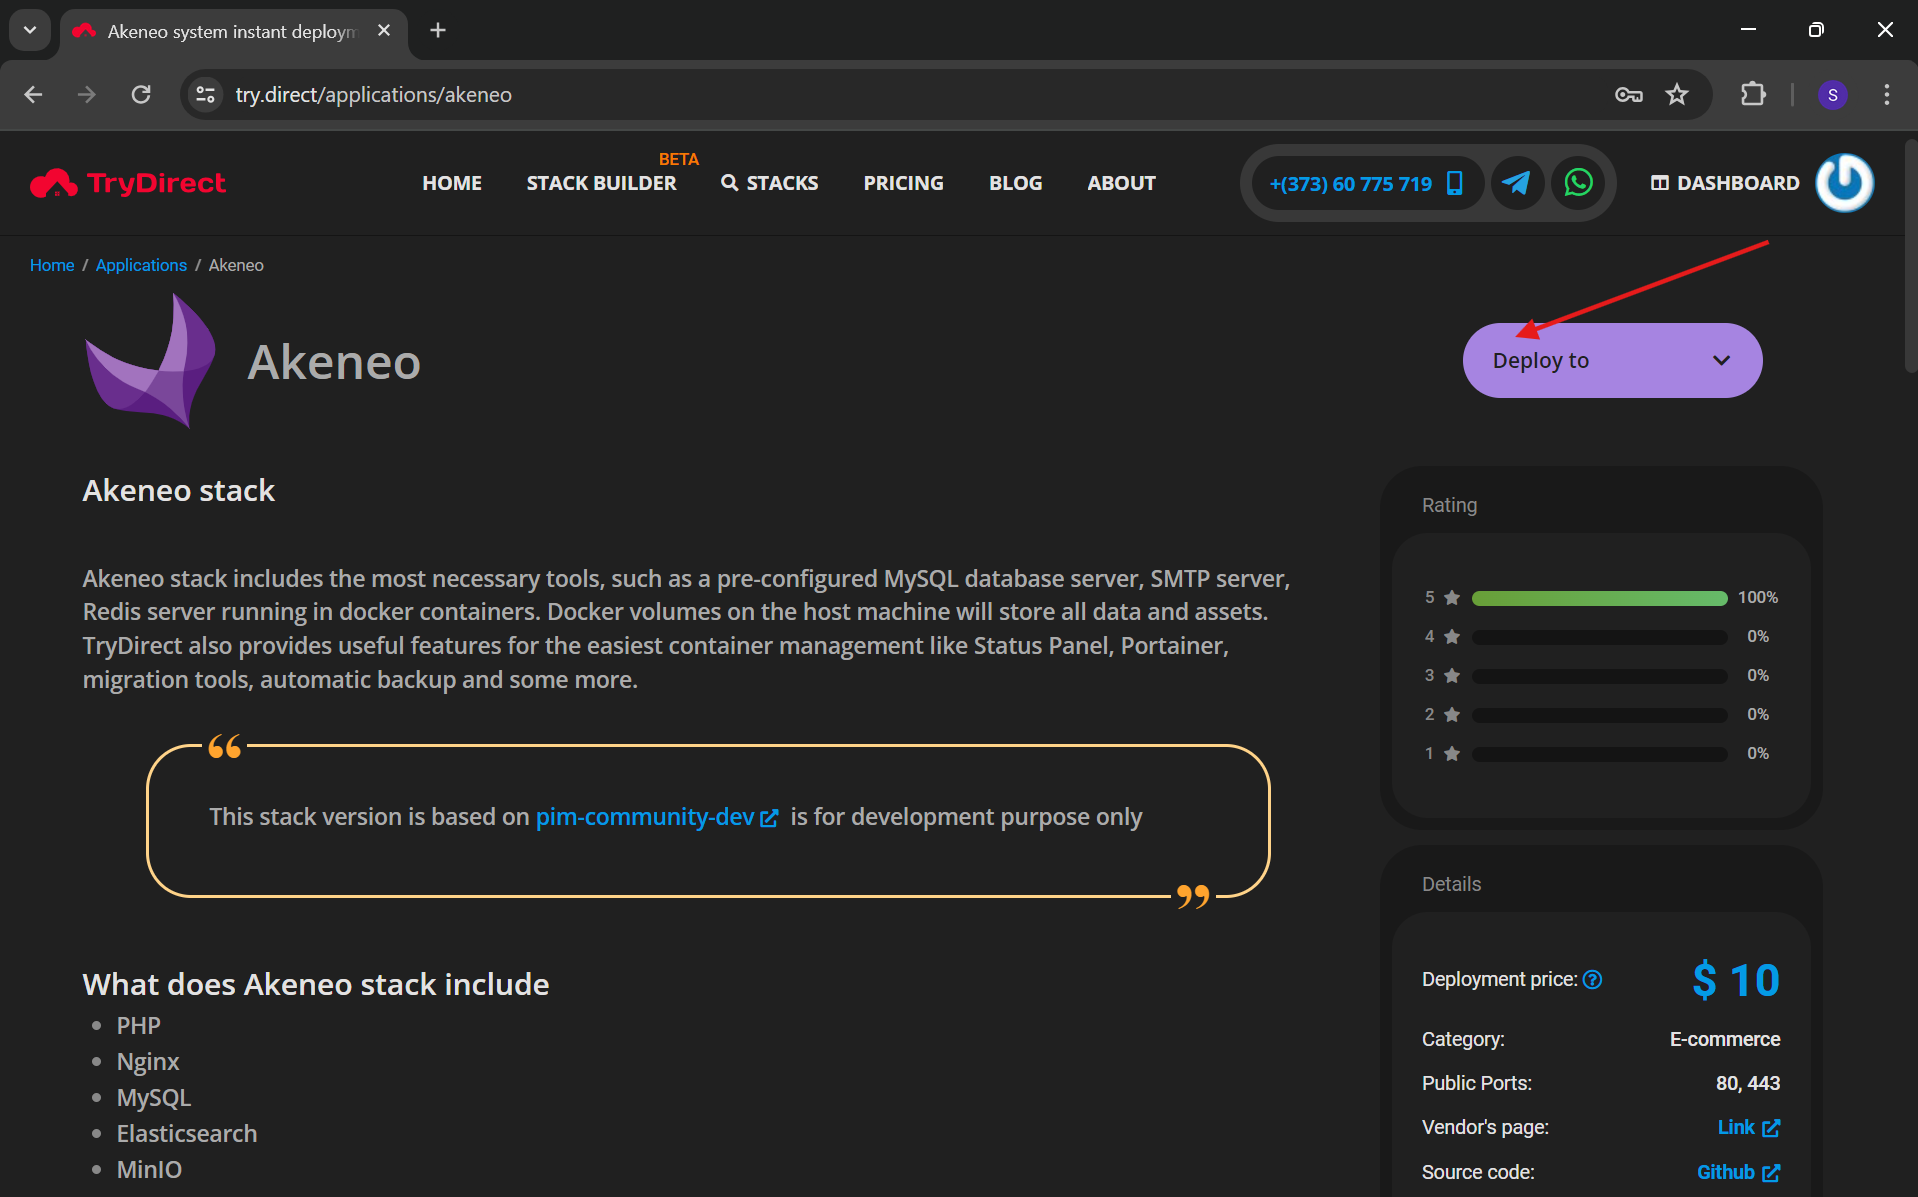
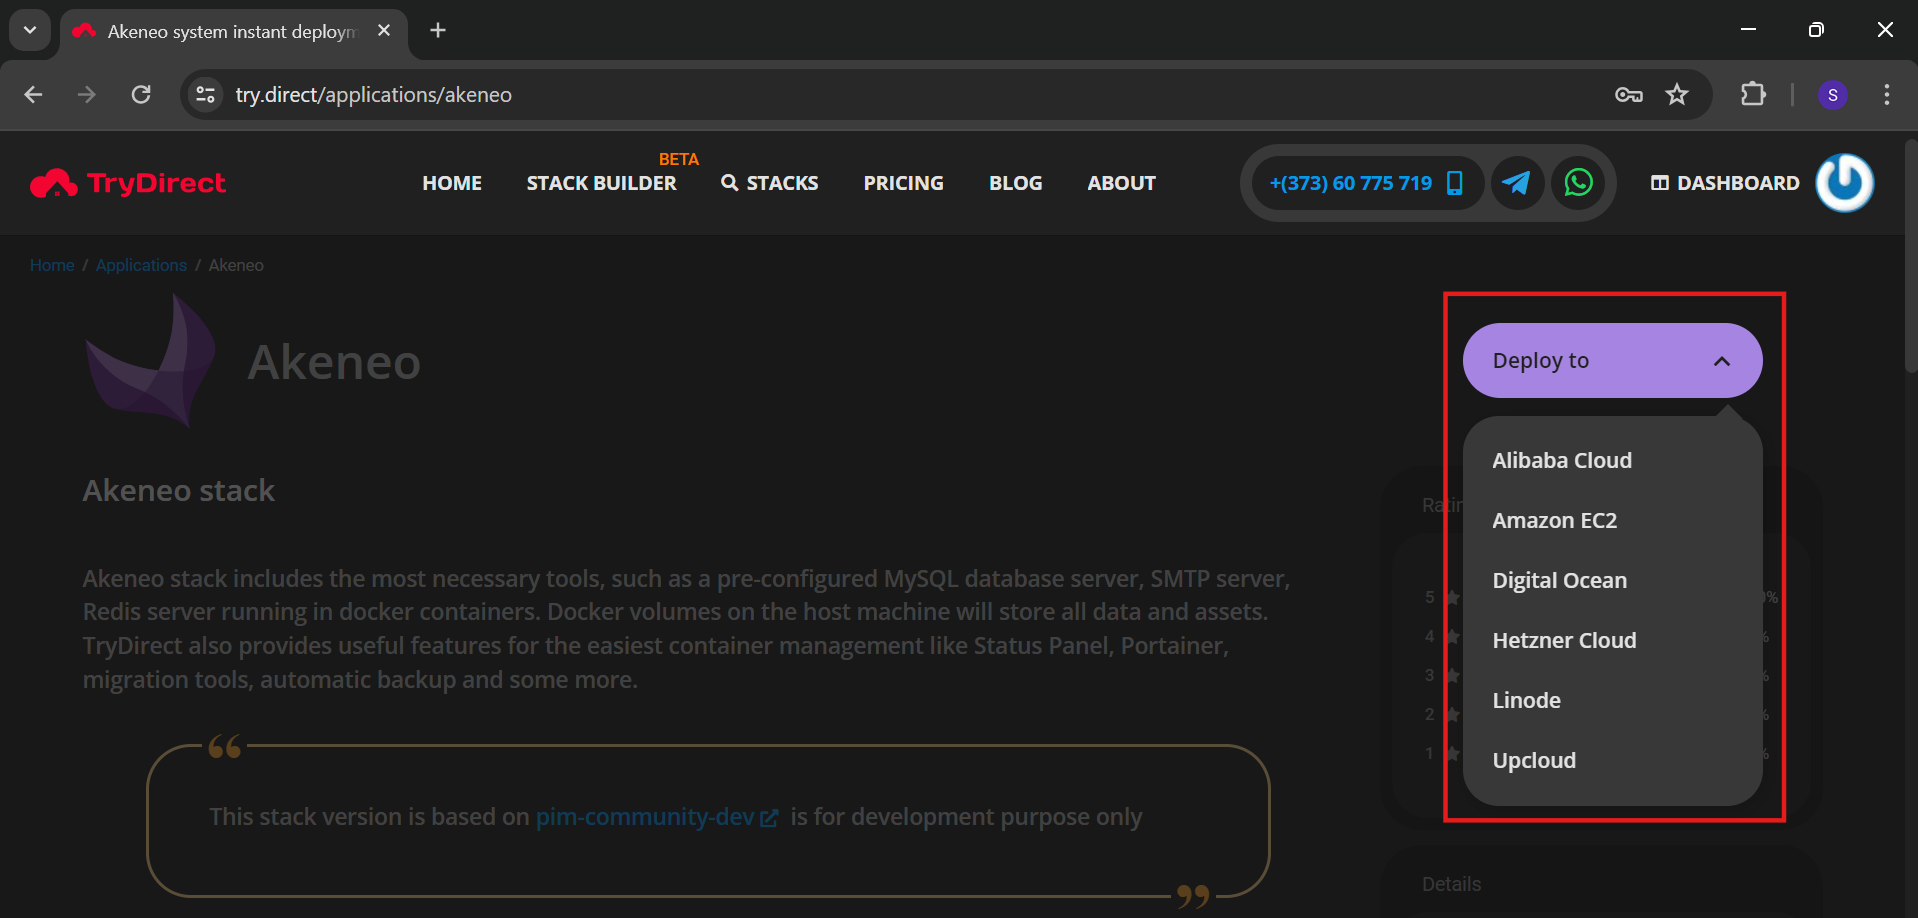
Login into your https://try.direct/ account and click on Akeneo stack. On Akeneo Stack, click on the “Deploy to” option.
Select the cloud provider of your choice from the list.
For this tutorial, we use Linode, When you click on the Linode option from the list you will see a screenshot similar to the one below:
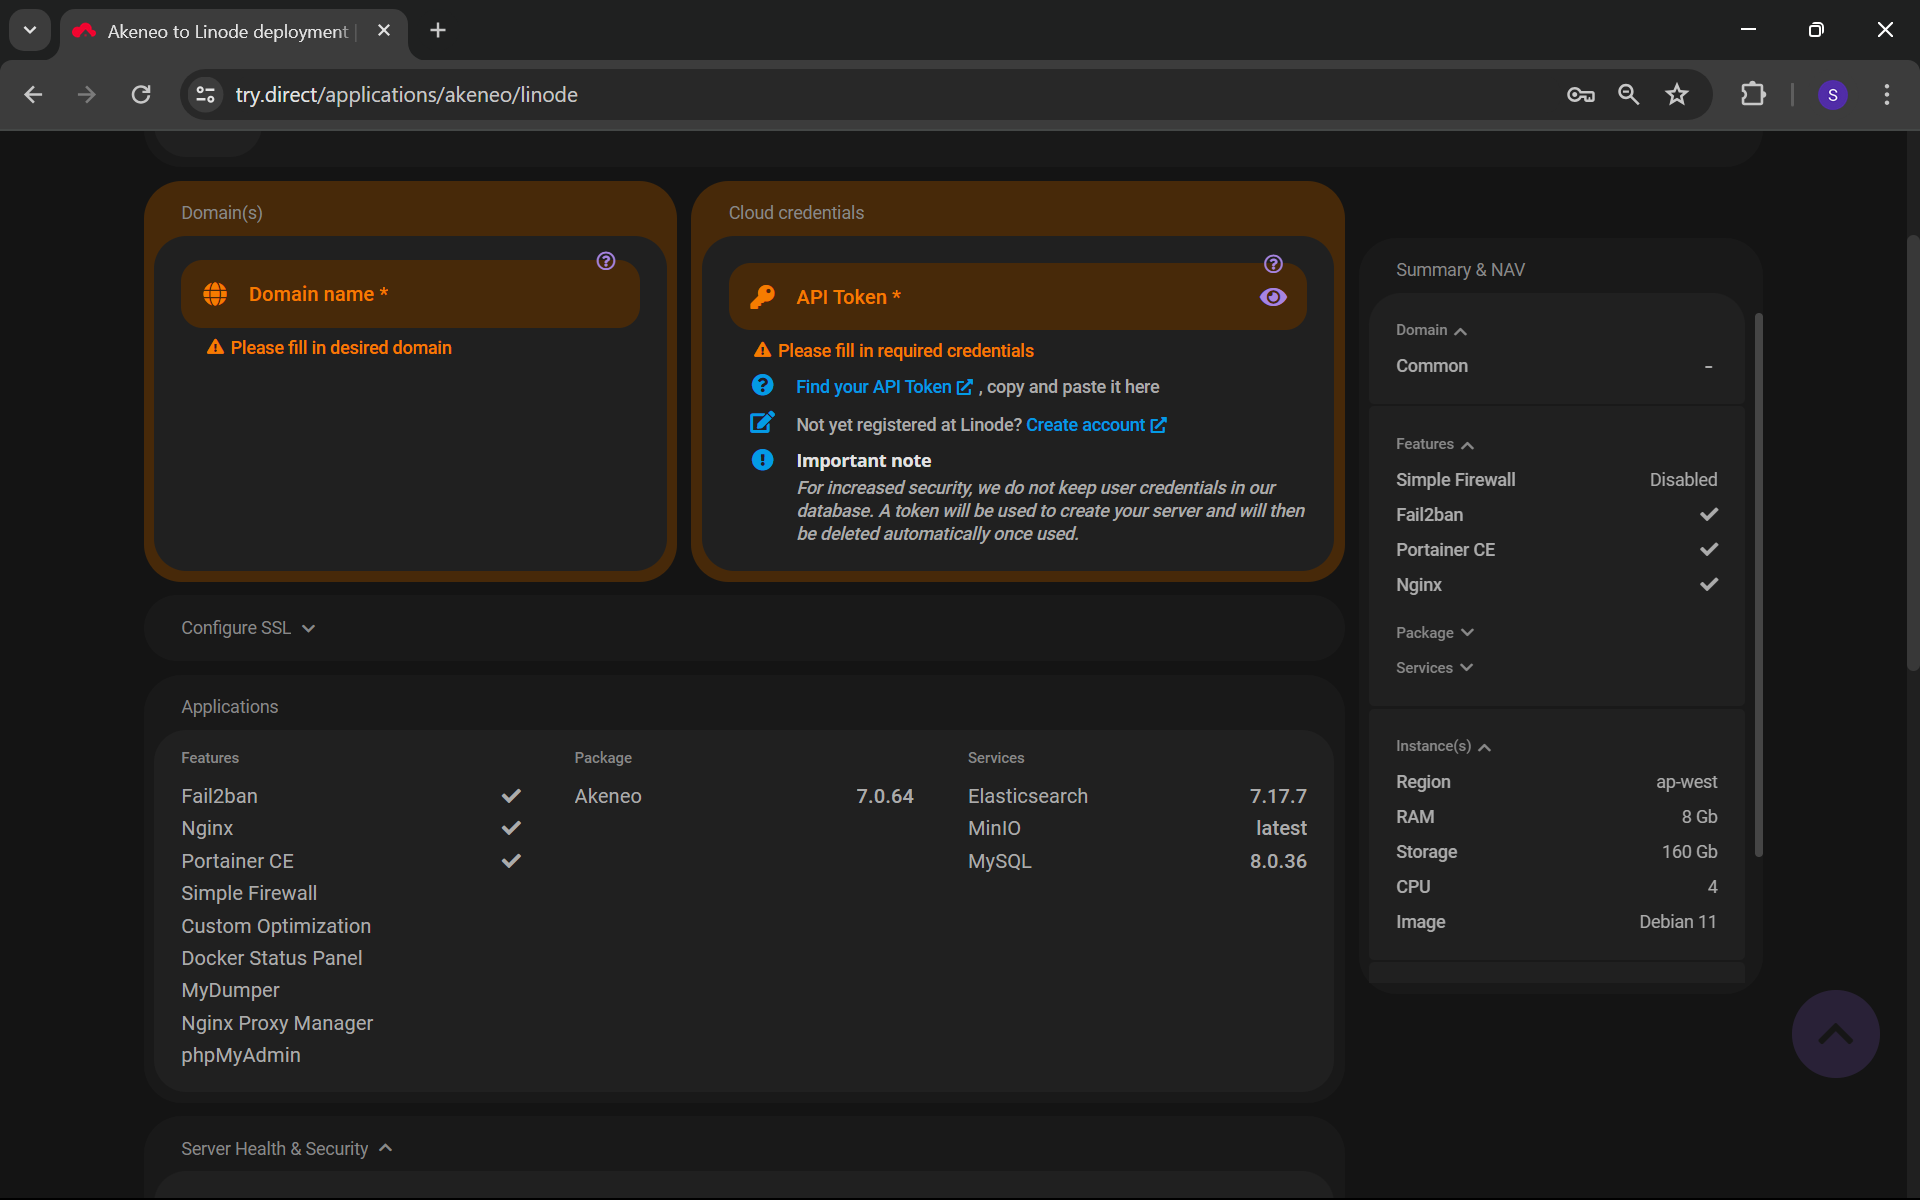
Provide your domain name and Linode’s API token, then click on the “Applications” option:
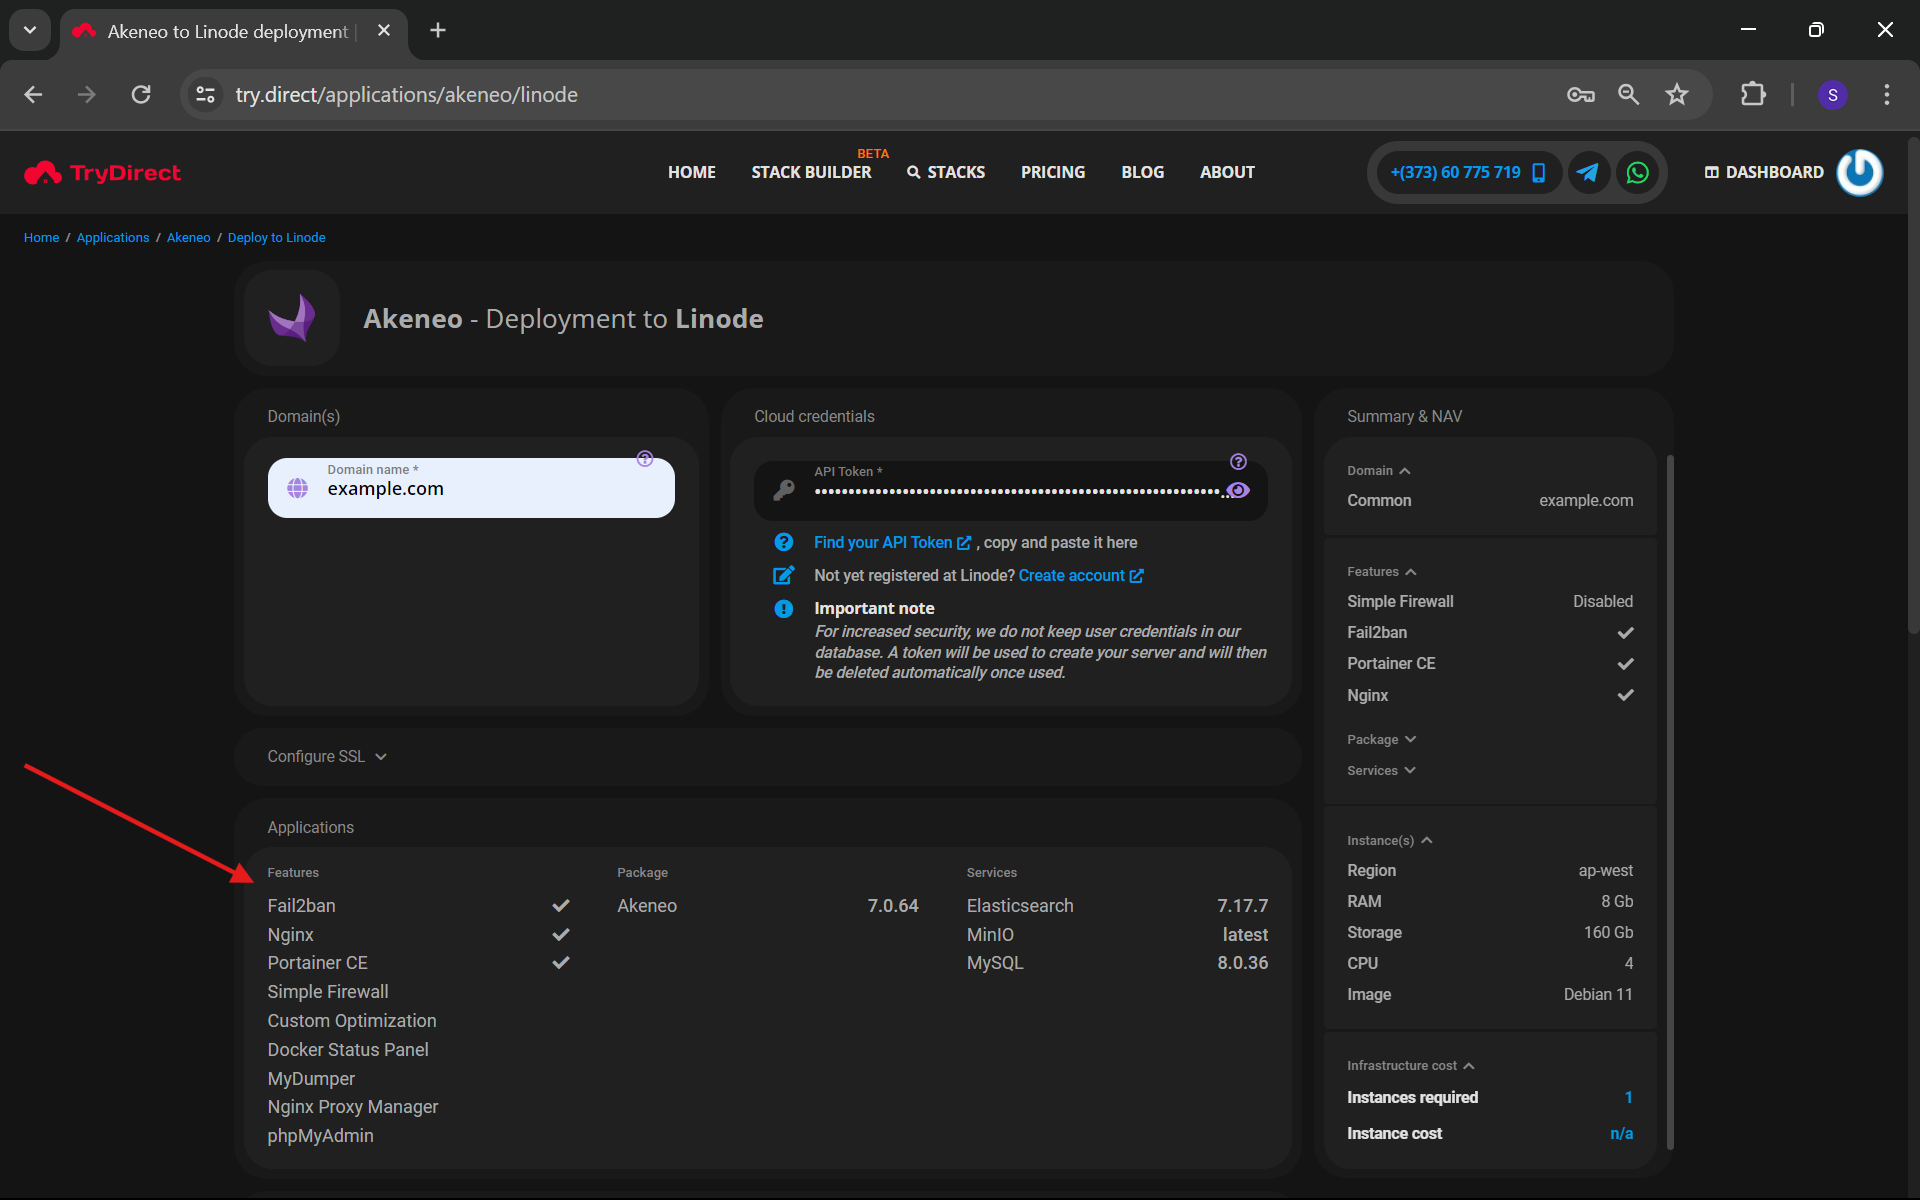
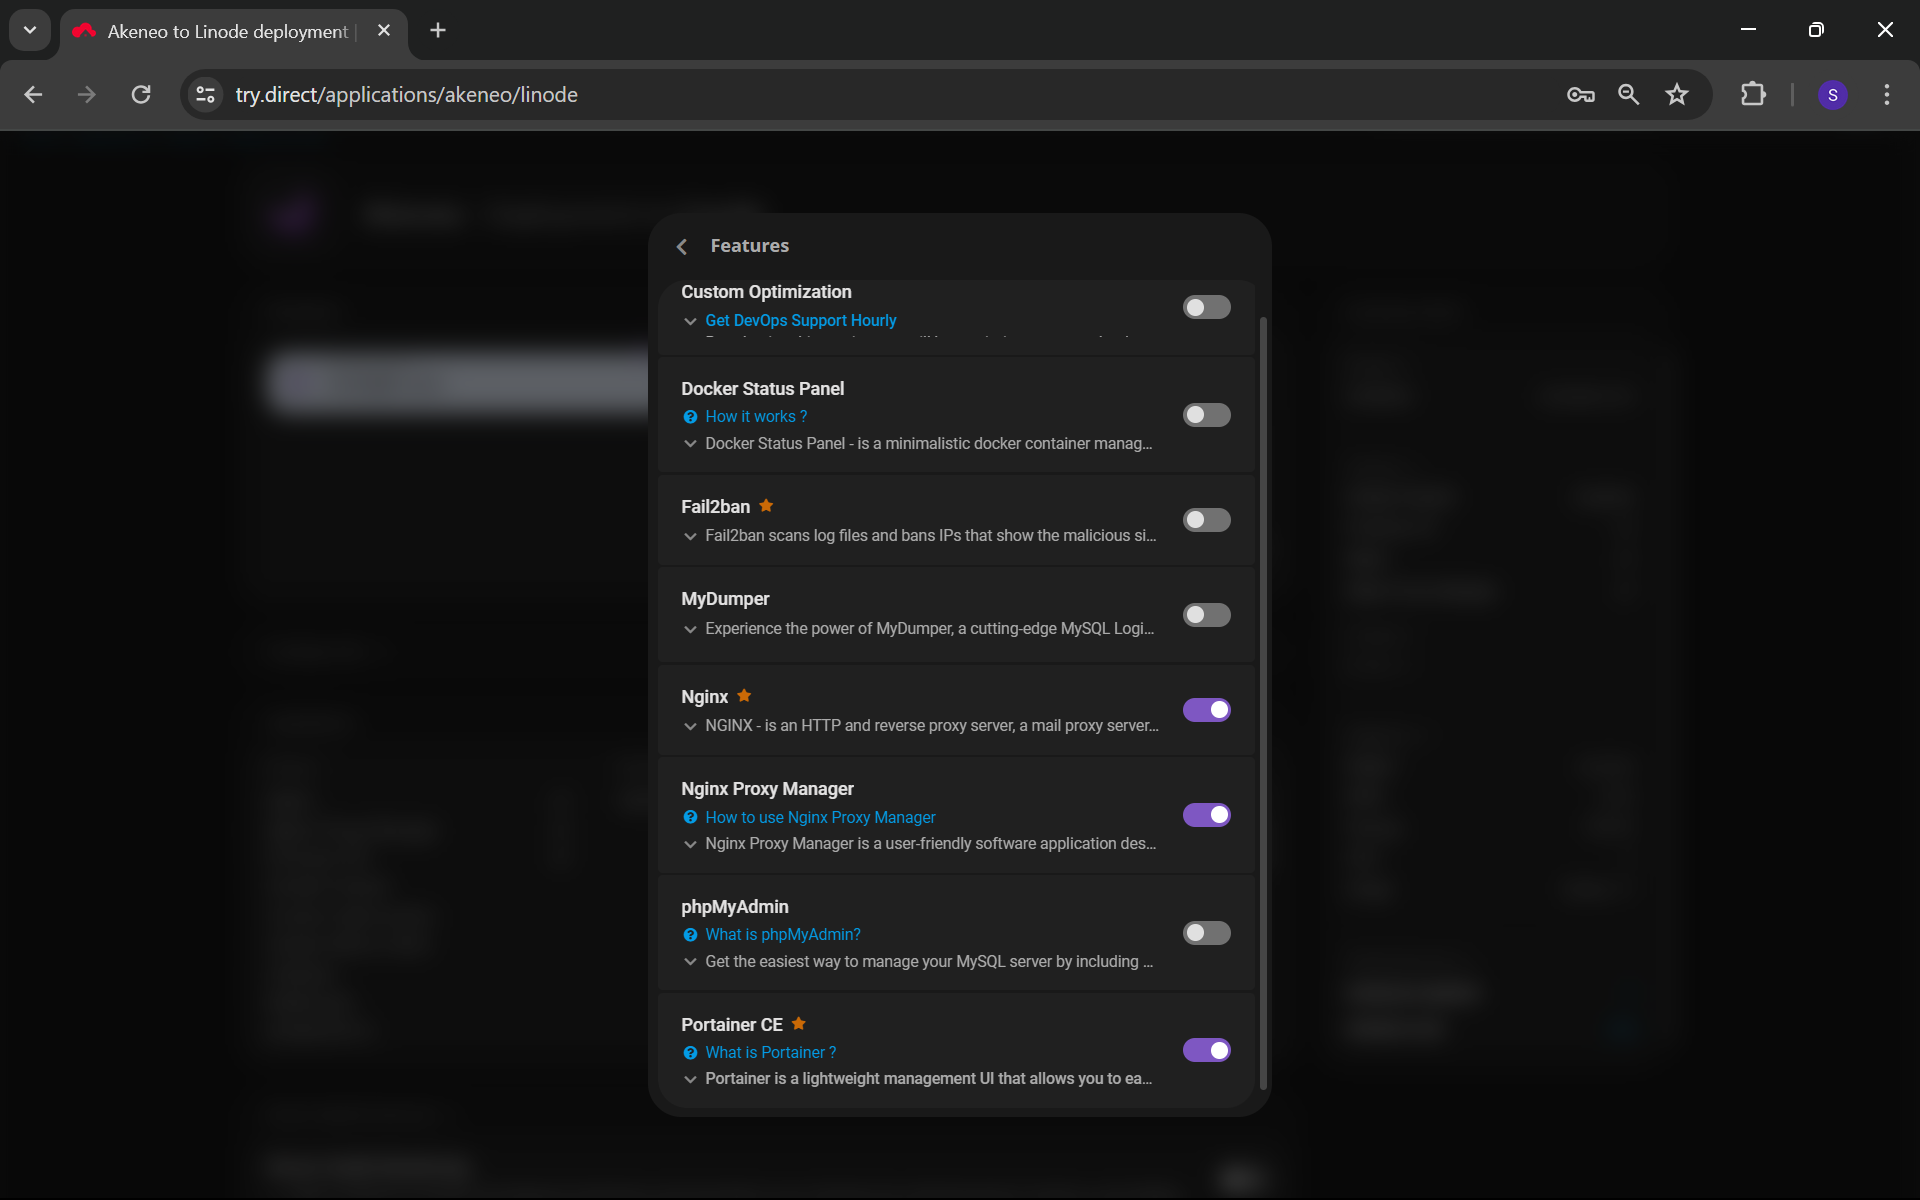
Enable Nginx, Nginx Proxy Manager, and Portainer CE Features.
Next, if you wish, you can select Subscriptions from the “Server Health & Security”. Options.
You can select the data center closest to you and the hardware configuration and OS image on which the stack will be deployed.
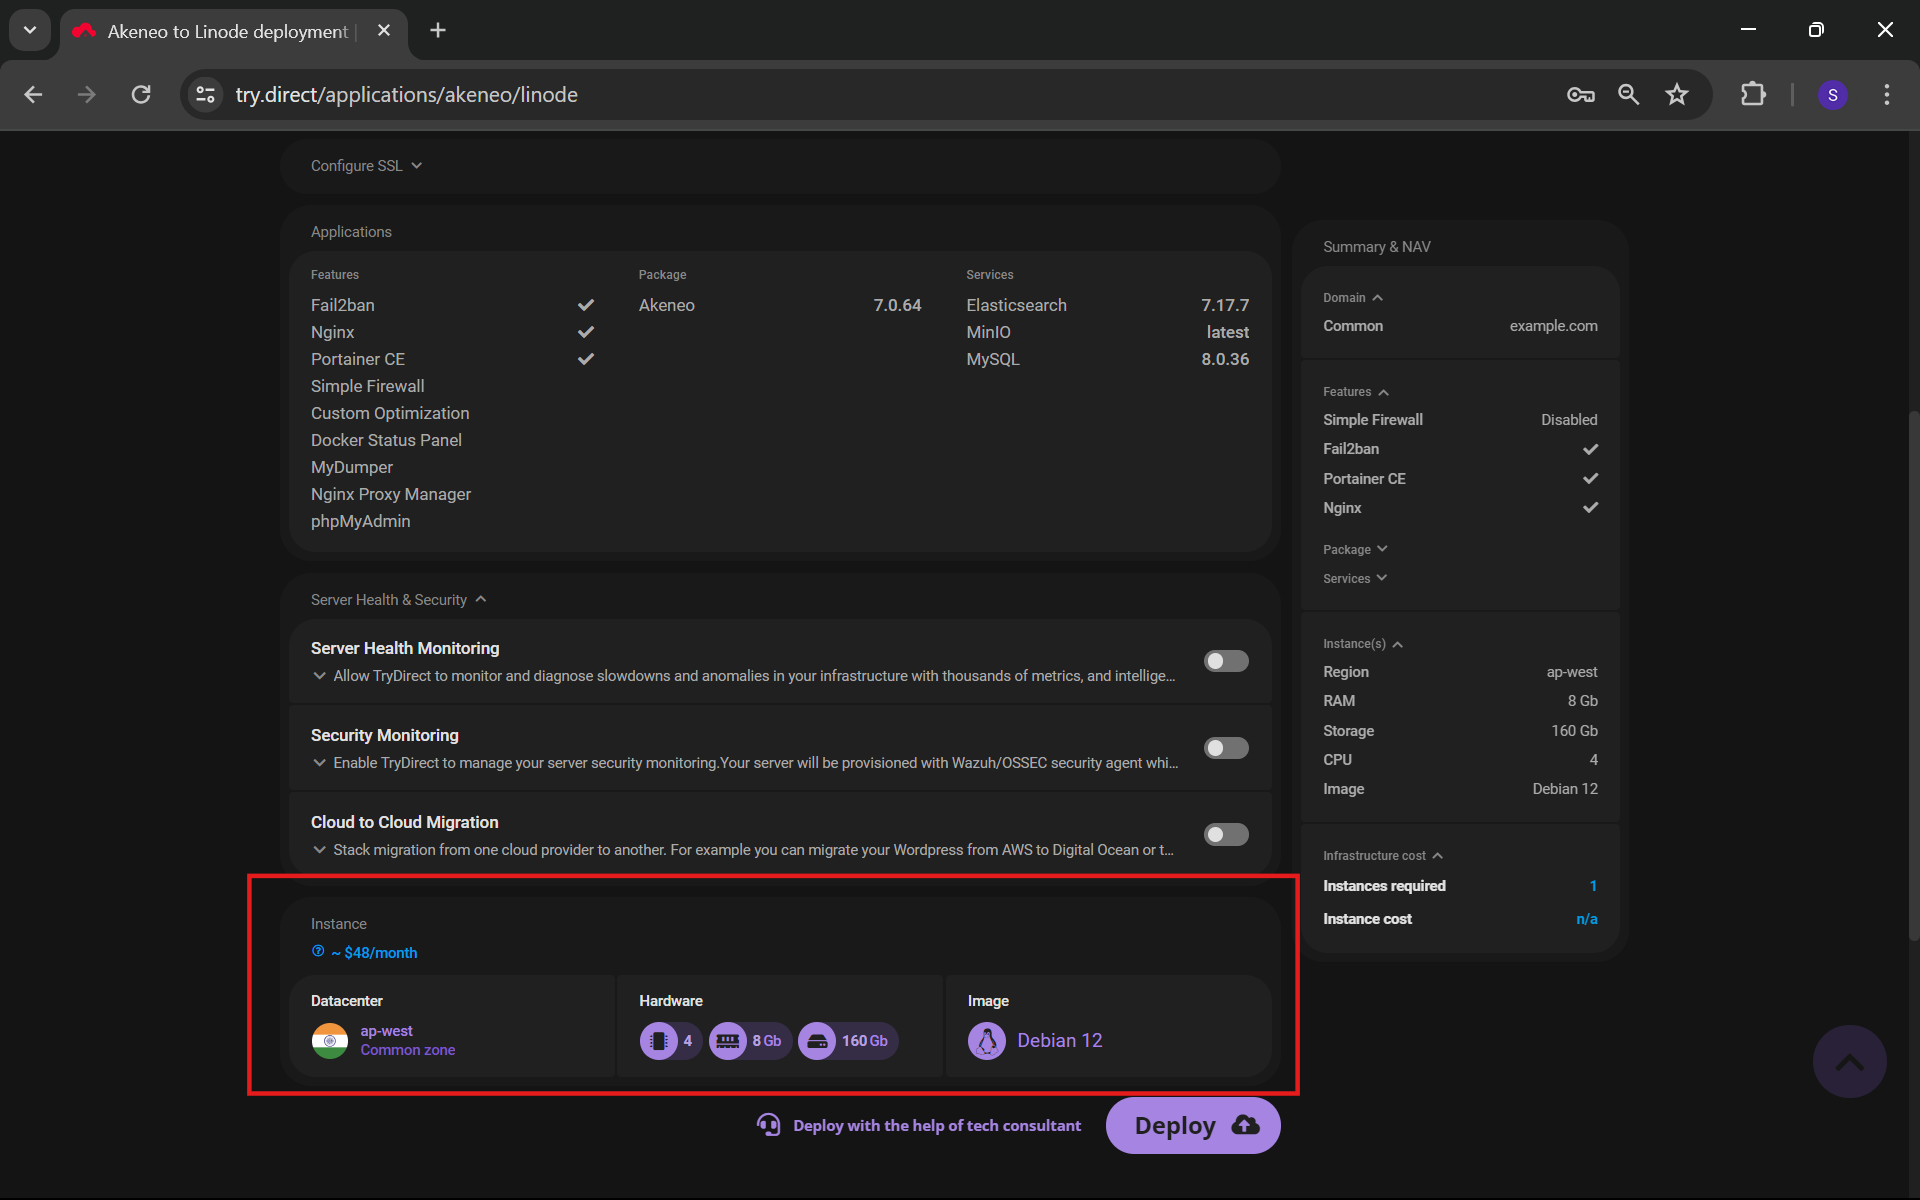
Next, click on the Deploy button, and your deployment starts on the Linode. You will be redirected to the next page, where you can check the detailed logs of the stacks.
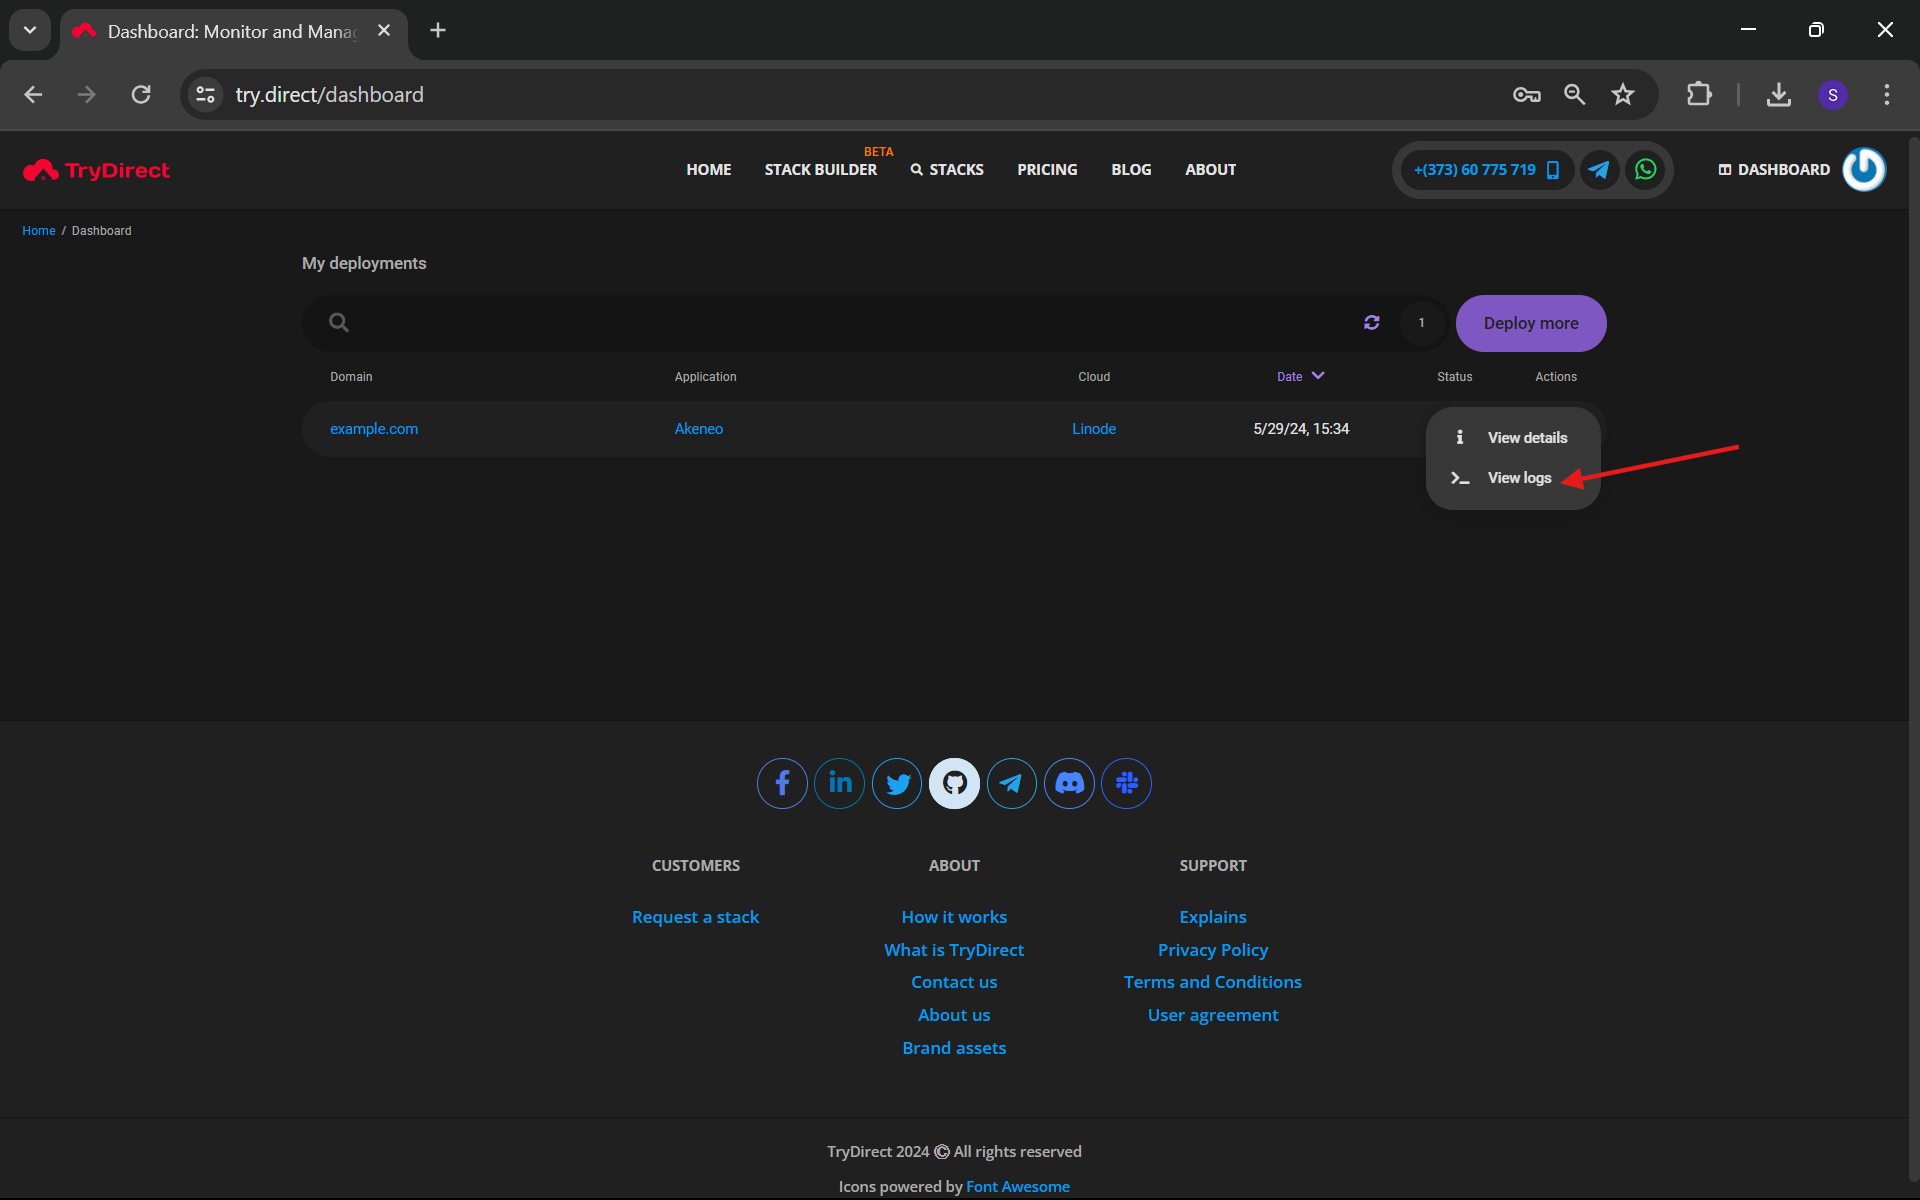
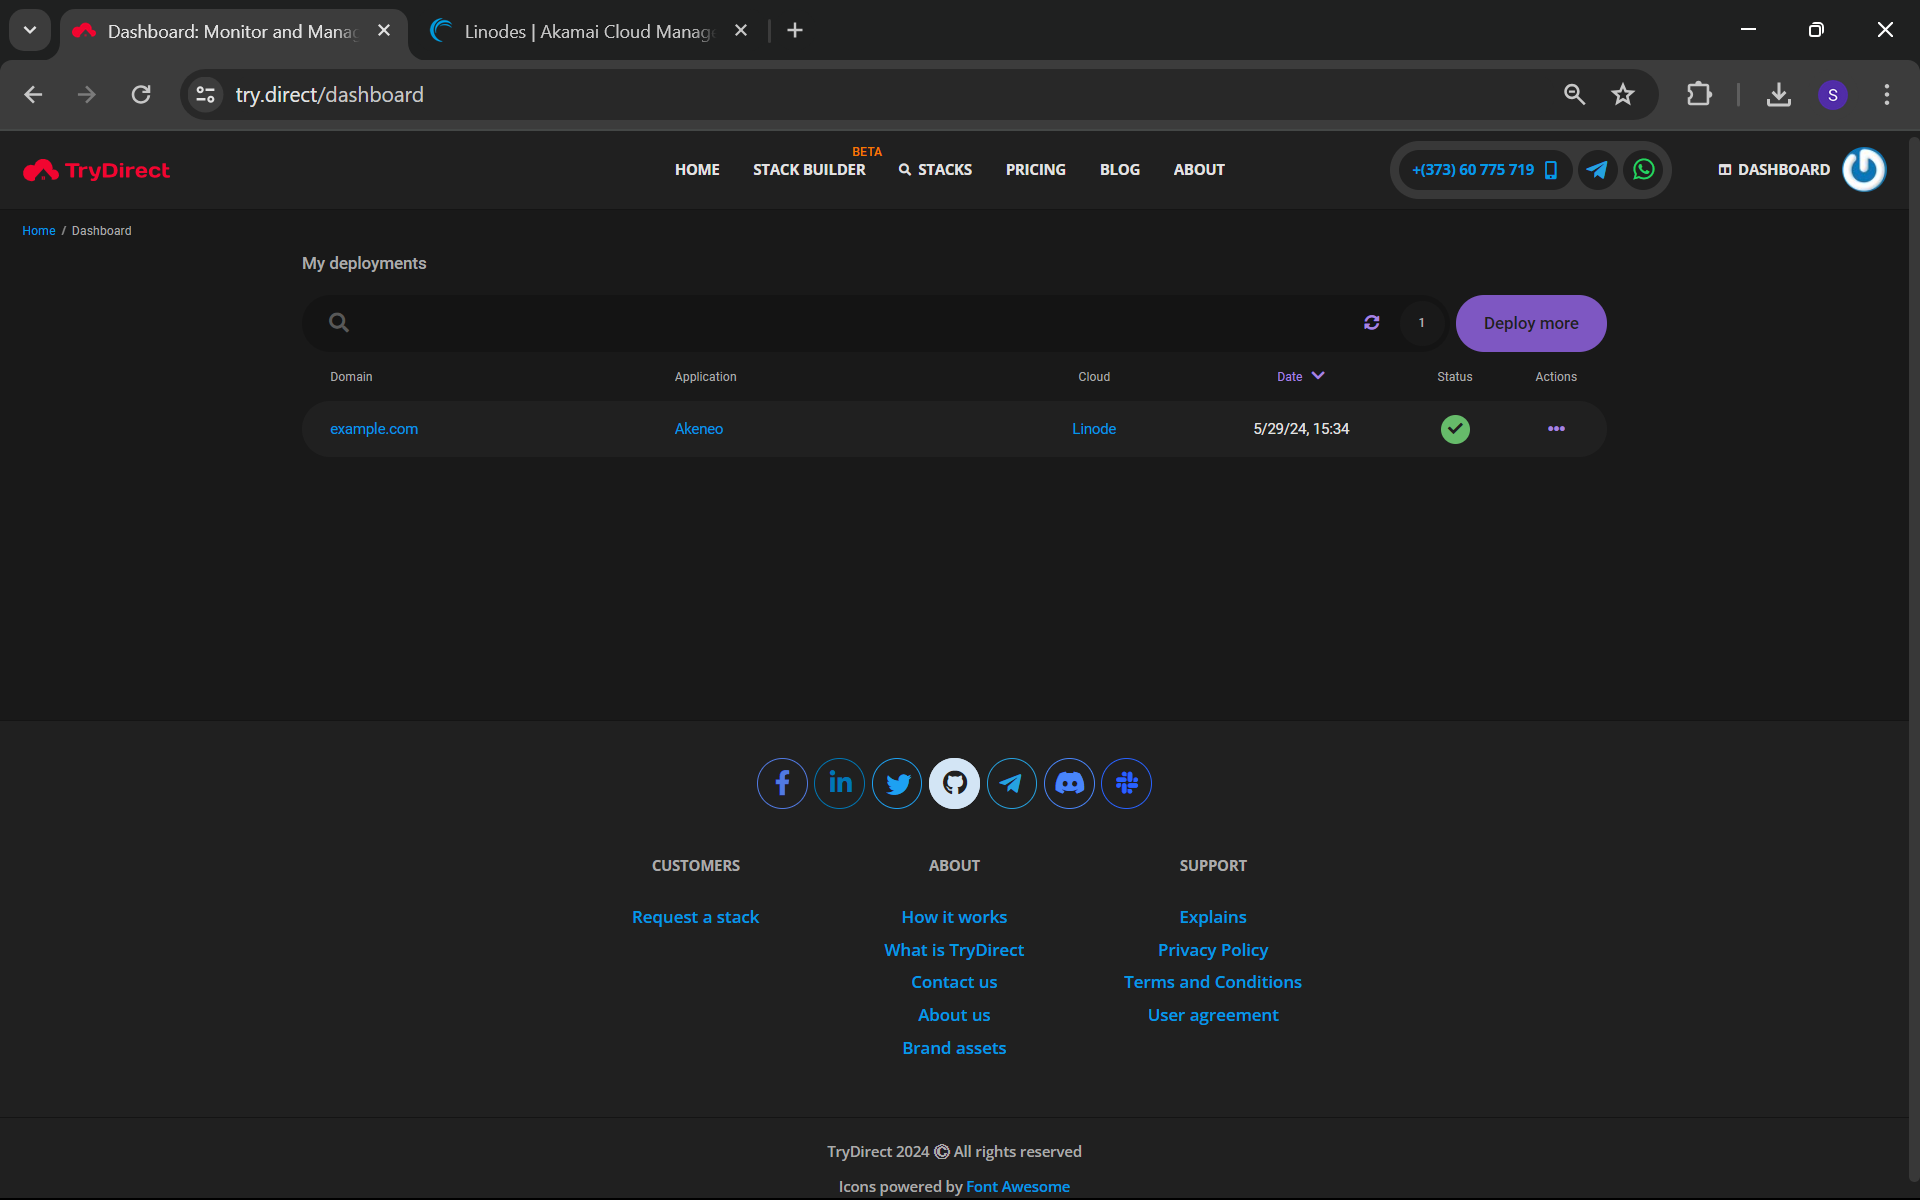
Once the deployment has been completed, you will see a screenshot similar to the one below:
An email has been sent to your email ID containing the “PEM” key to access the server and other useful information. Kindly save this email to a safe place, as TryDirect will not save sensitive information.
Step 3: Configuration
Next, log into the Portainer to identify the hostname that should be configured in the Nginx Proxy Manager. The Portainer URL and credentials are mentioned in the PDF file attached to the email.
Open https://Portainer_url into the web browser:
In our case, it is http://example.com:9000
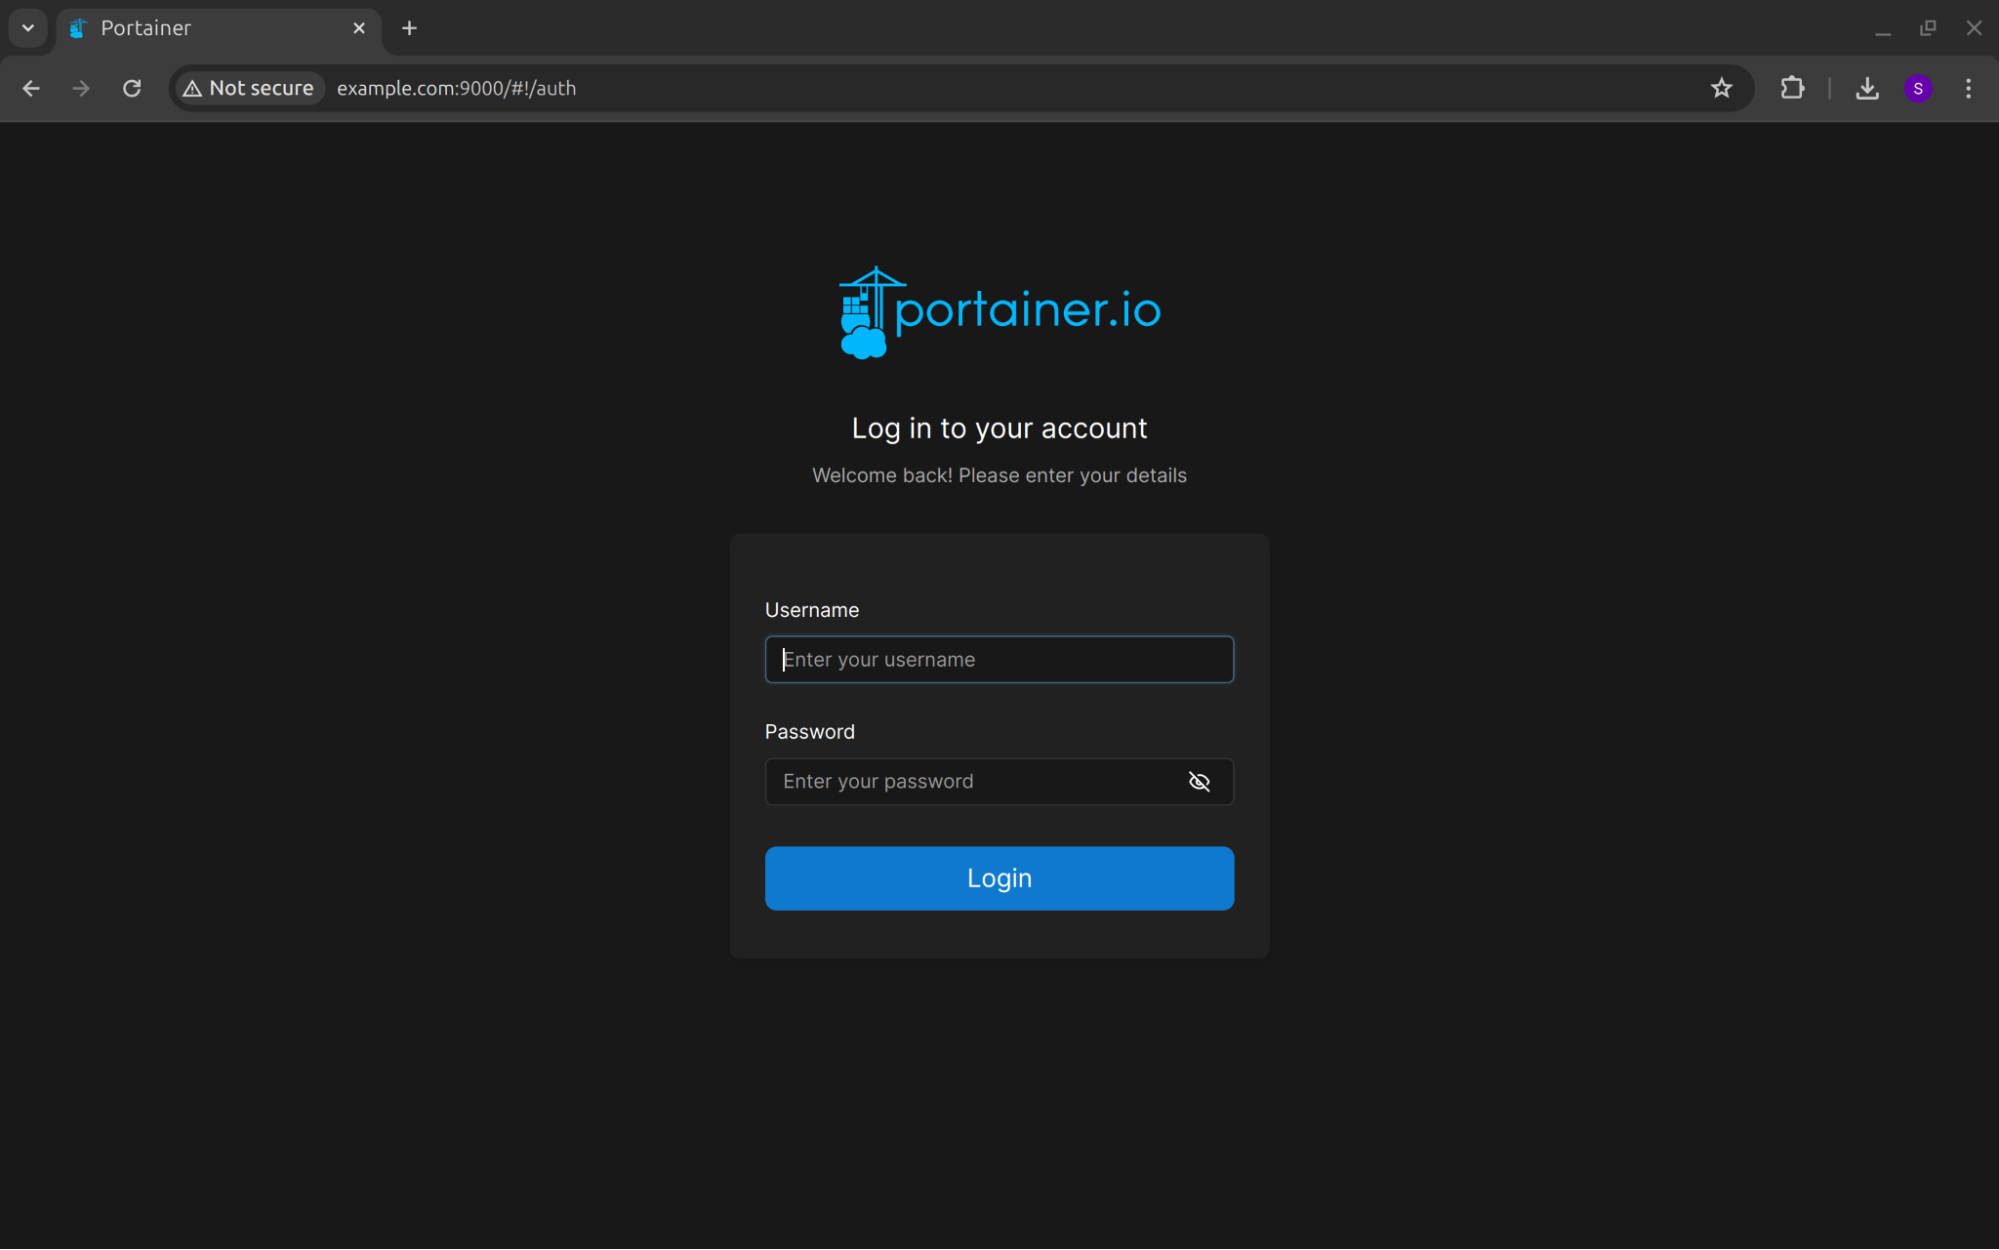
Enter the Username and Password and press the Login button, and you will log into your Portainer.
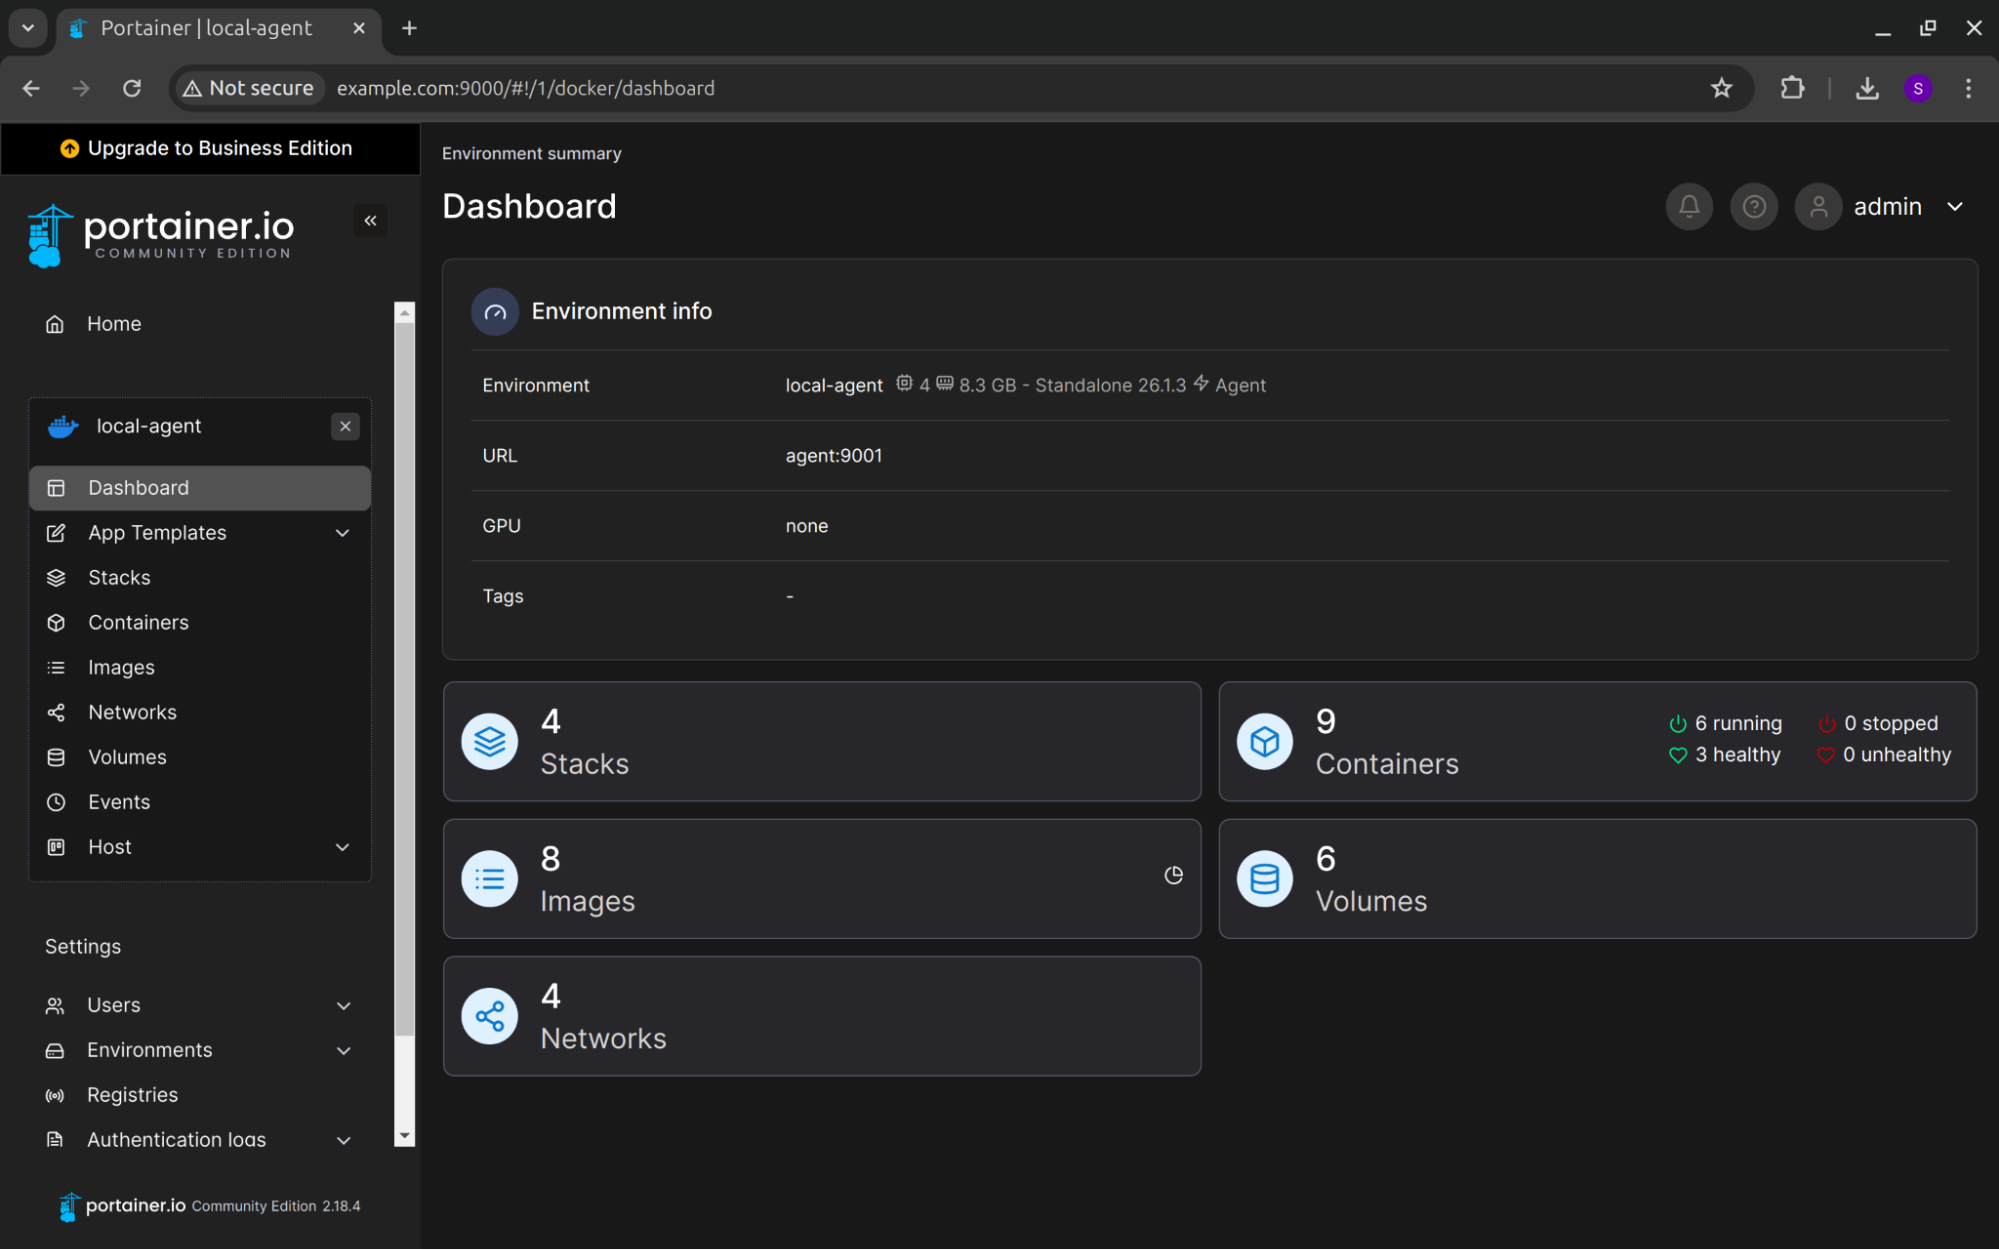
Navigate to the "Environments" section and select “local-agent” as shown in the screenshot below:

Once you click on local-agent, you will see a Dashboard that contains various information about your docker infrastructure.
Click on the stacks, and you will see all the applications that you have selected at the time of stack deployment.
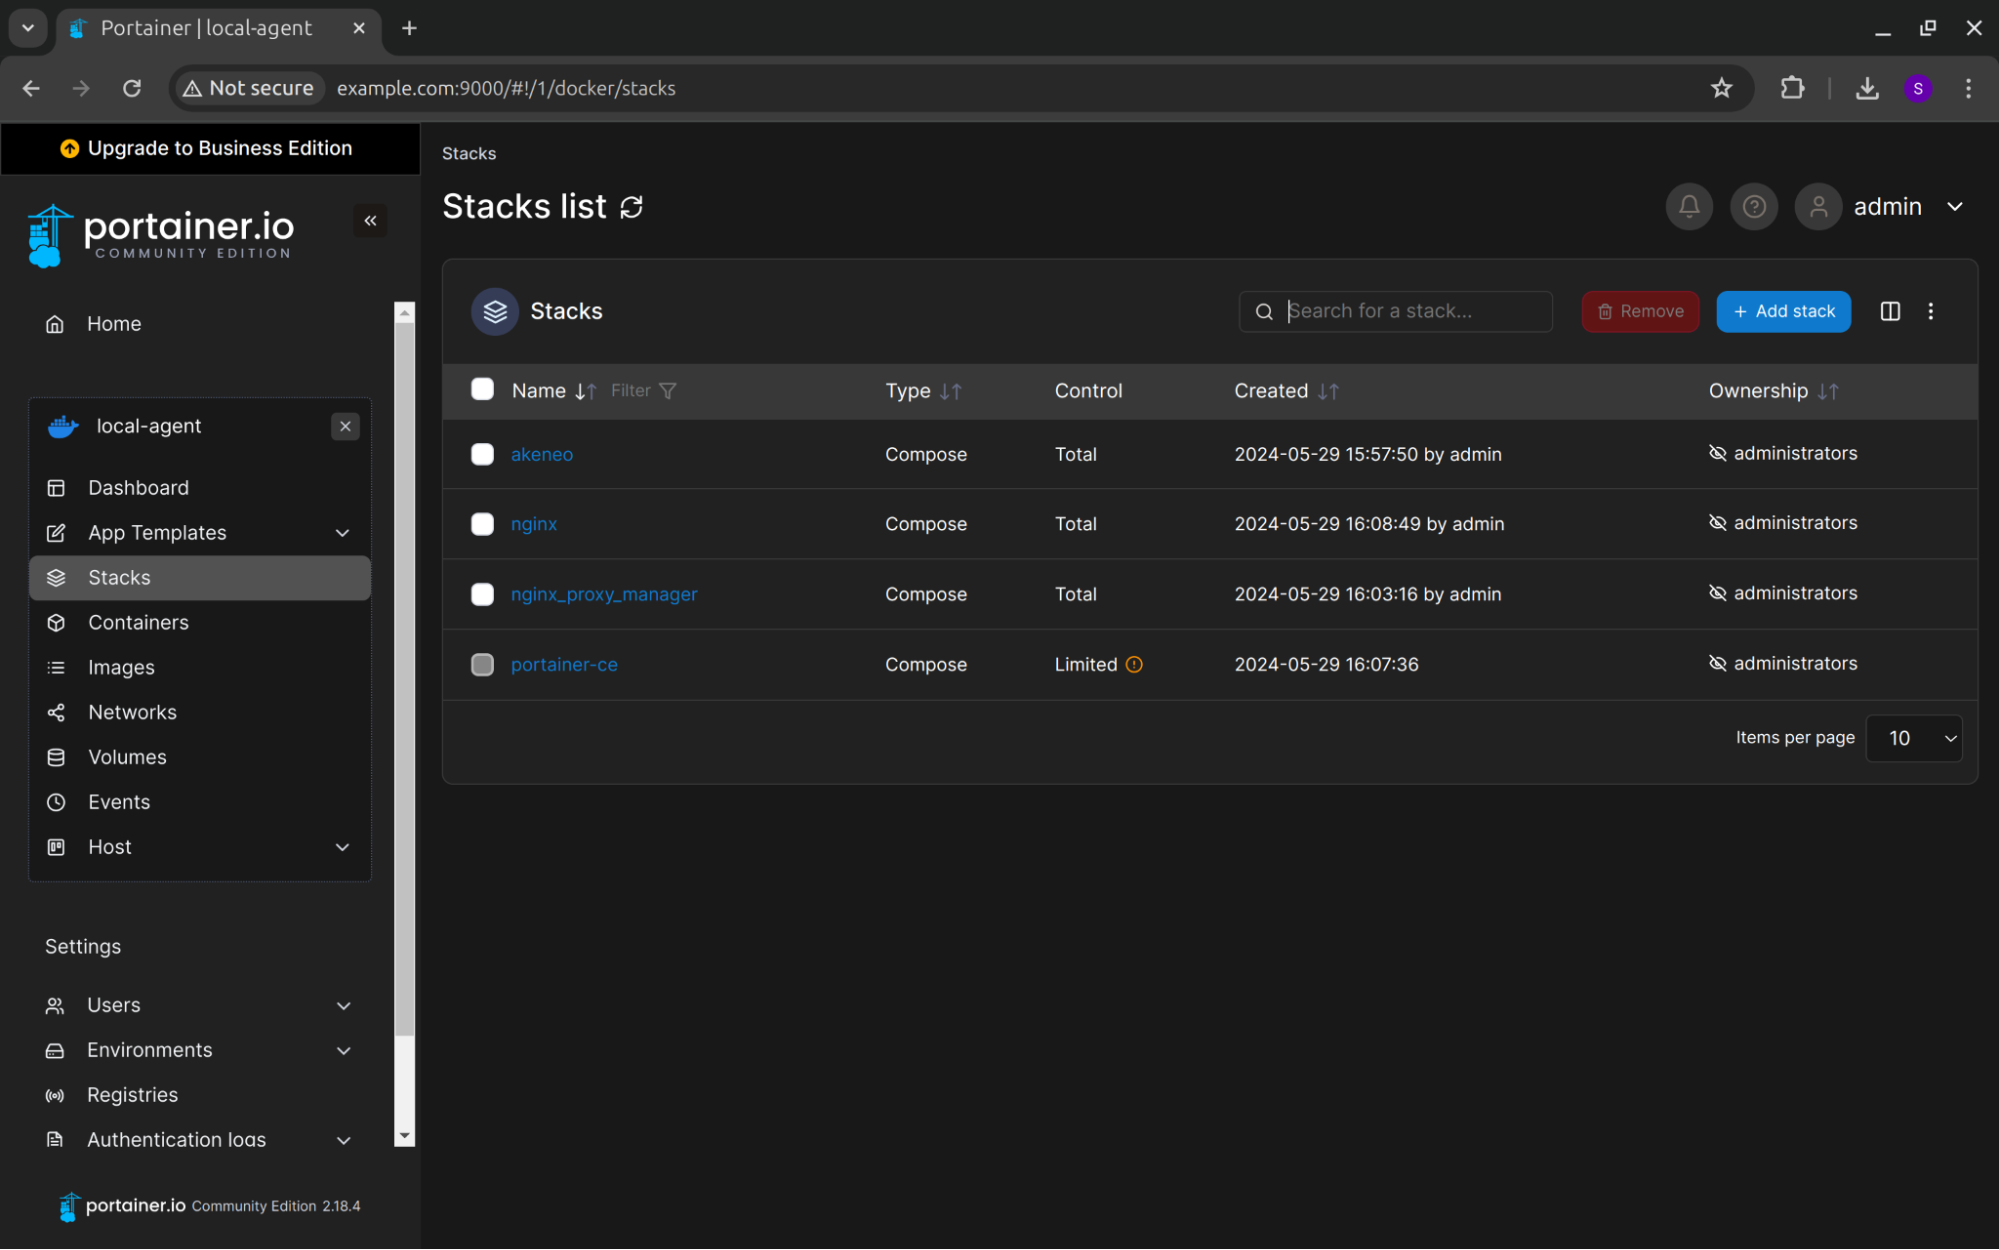
In our case, nginx will work as a reverse proxy of Akeneo. Note down the hostname “nginx” we must configure in Nginx Proxy Manager.
Next, open Nginx Proxy Manager by navigating to http://<your_server_public_ip>:81 in your browser and enter the following credentials:
- Email address: admin@example.com
- Password: changeme
Once, you log in to the Nginx Proxy Manager, change your username and password.
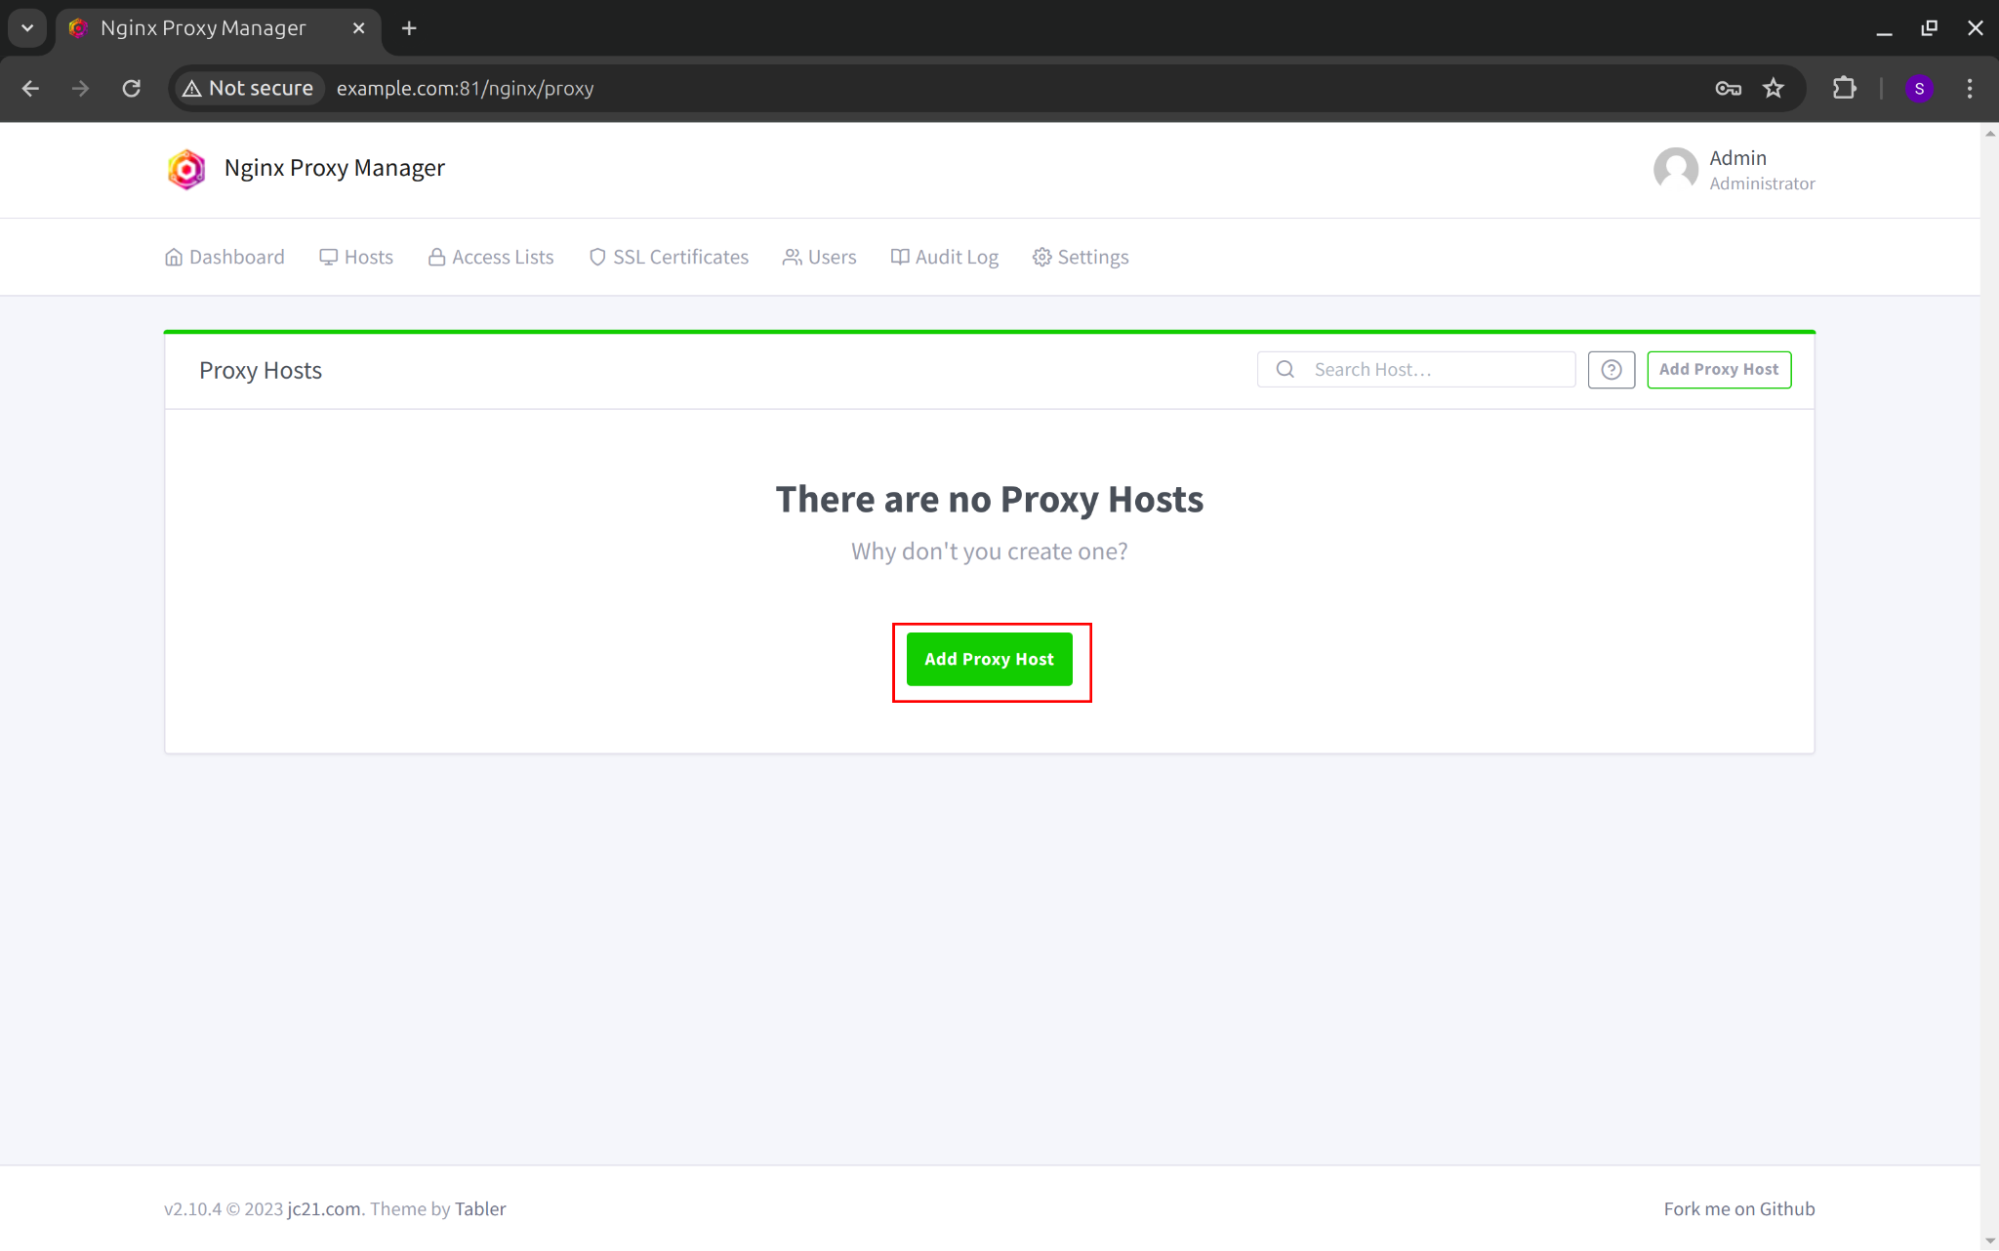
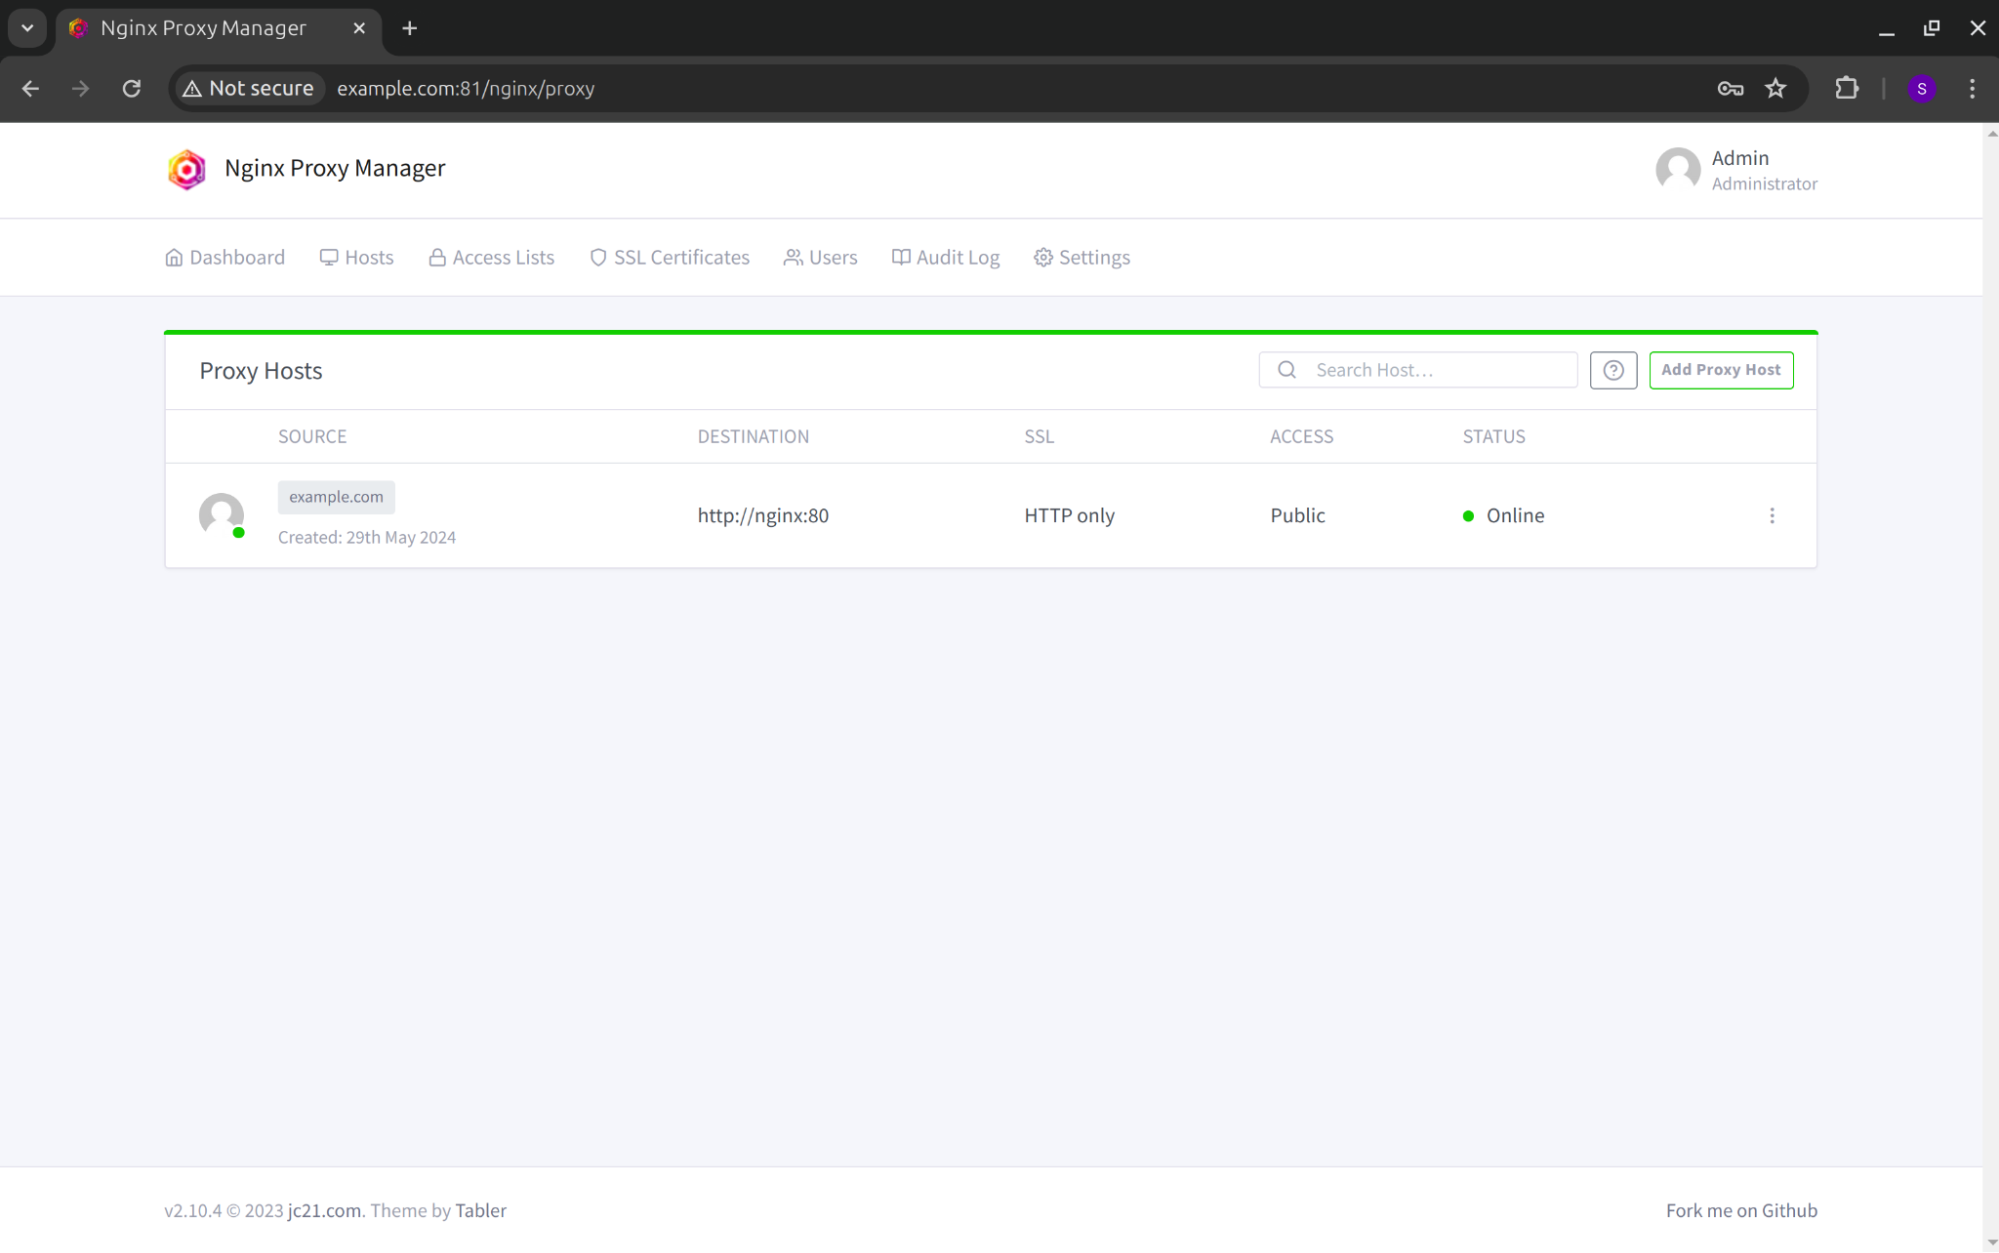
Now, configure the “Proxy Host” from the Nginx Proxy Manager dashboard to route your traffic.

Click on the “Add Proxy Host” button as shown in the screenshot below:
It will open a “New Proxy Host” pop-up where you need to provide the mandatory details:
- Domain Names: Specify the domain name you acquired from your domain provider.
- Scheme: Select either http or https
- Forward Hostname / IP: The hostname or IP address of the target application. In our case, it is Nginx.
- Forward Port: This is the port on which application traffic is forwarded, we have nginx reverse proxy, so the
- `port should be 80, but it might be different according to the application you have configured.

You can configure SSL and other parameters as per your requirements. Click on the Save button. You will see that your domain status is online.
Enter your domain name in your web browser, and you will be directed to the Akeneo login page.
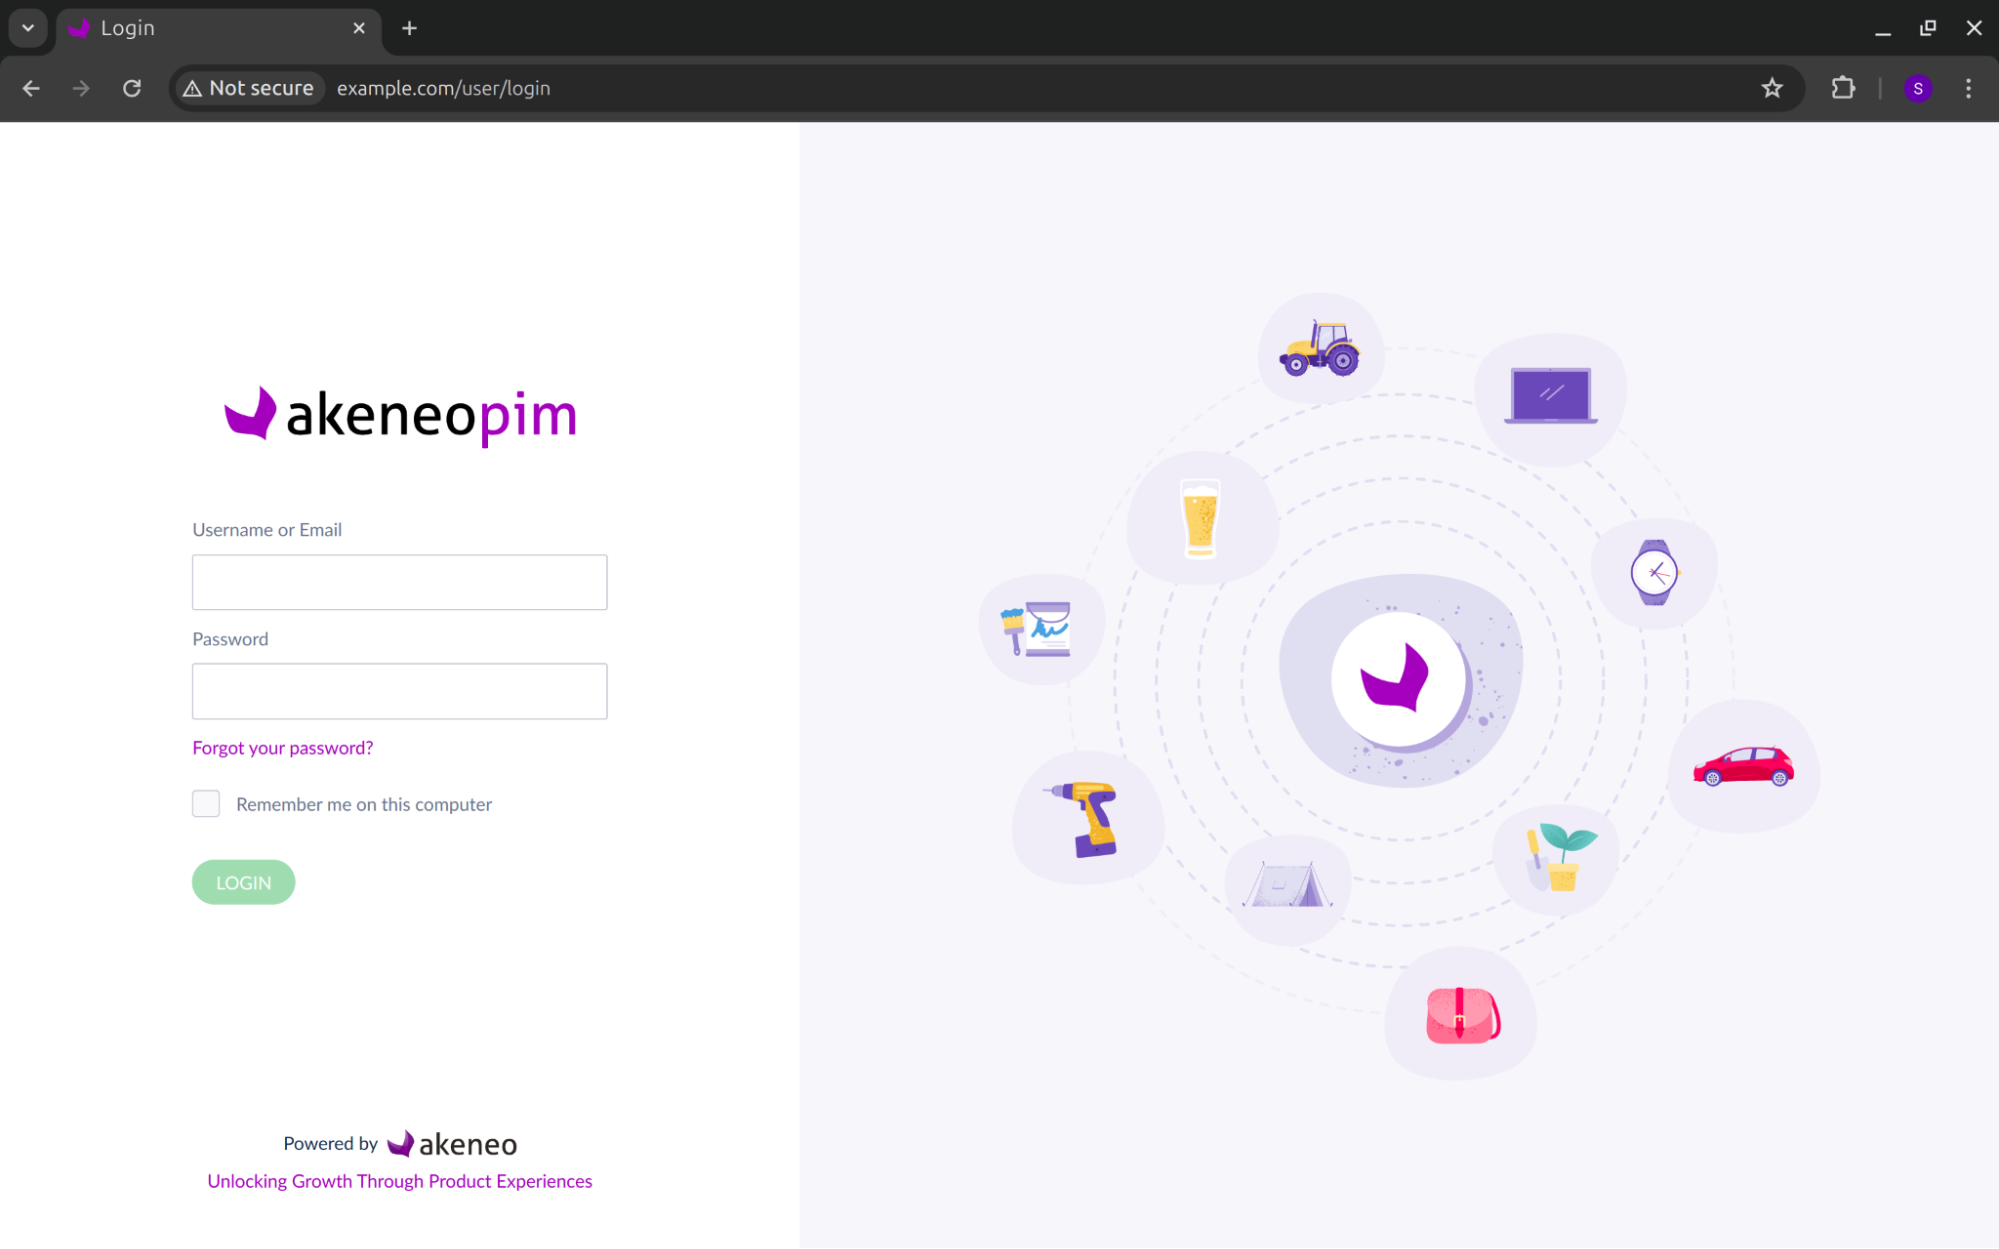
Next, enter the username and password provided in the PDF file you received via email.
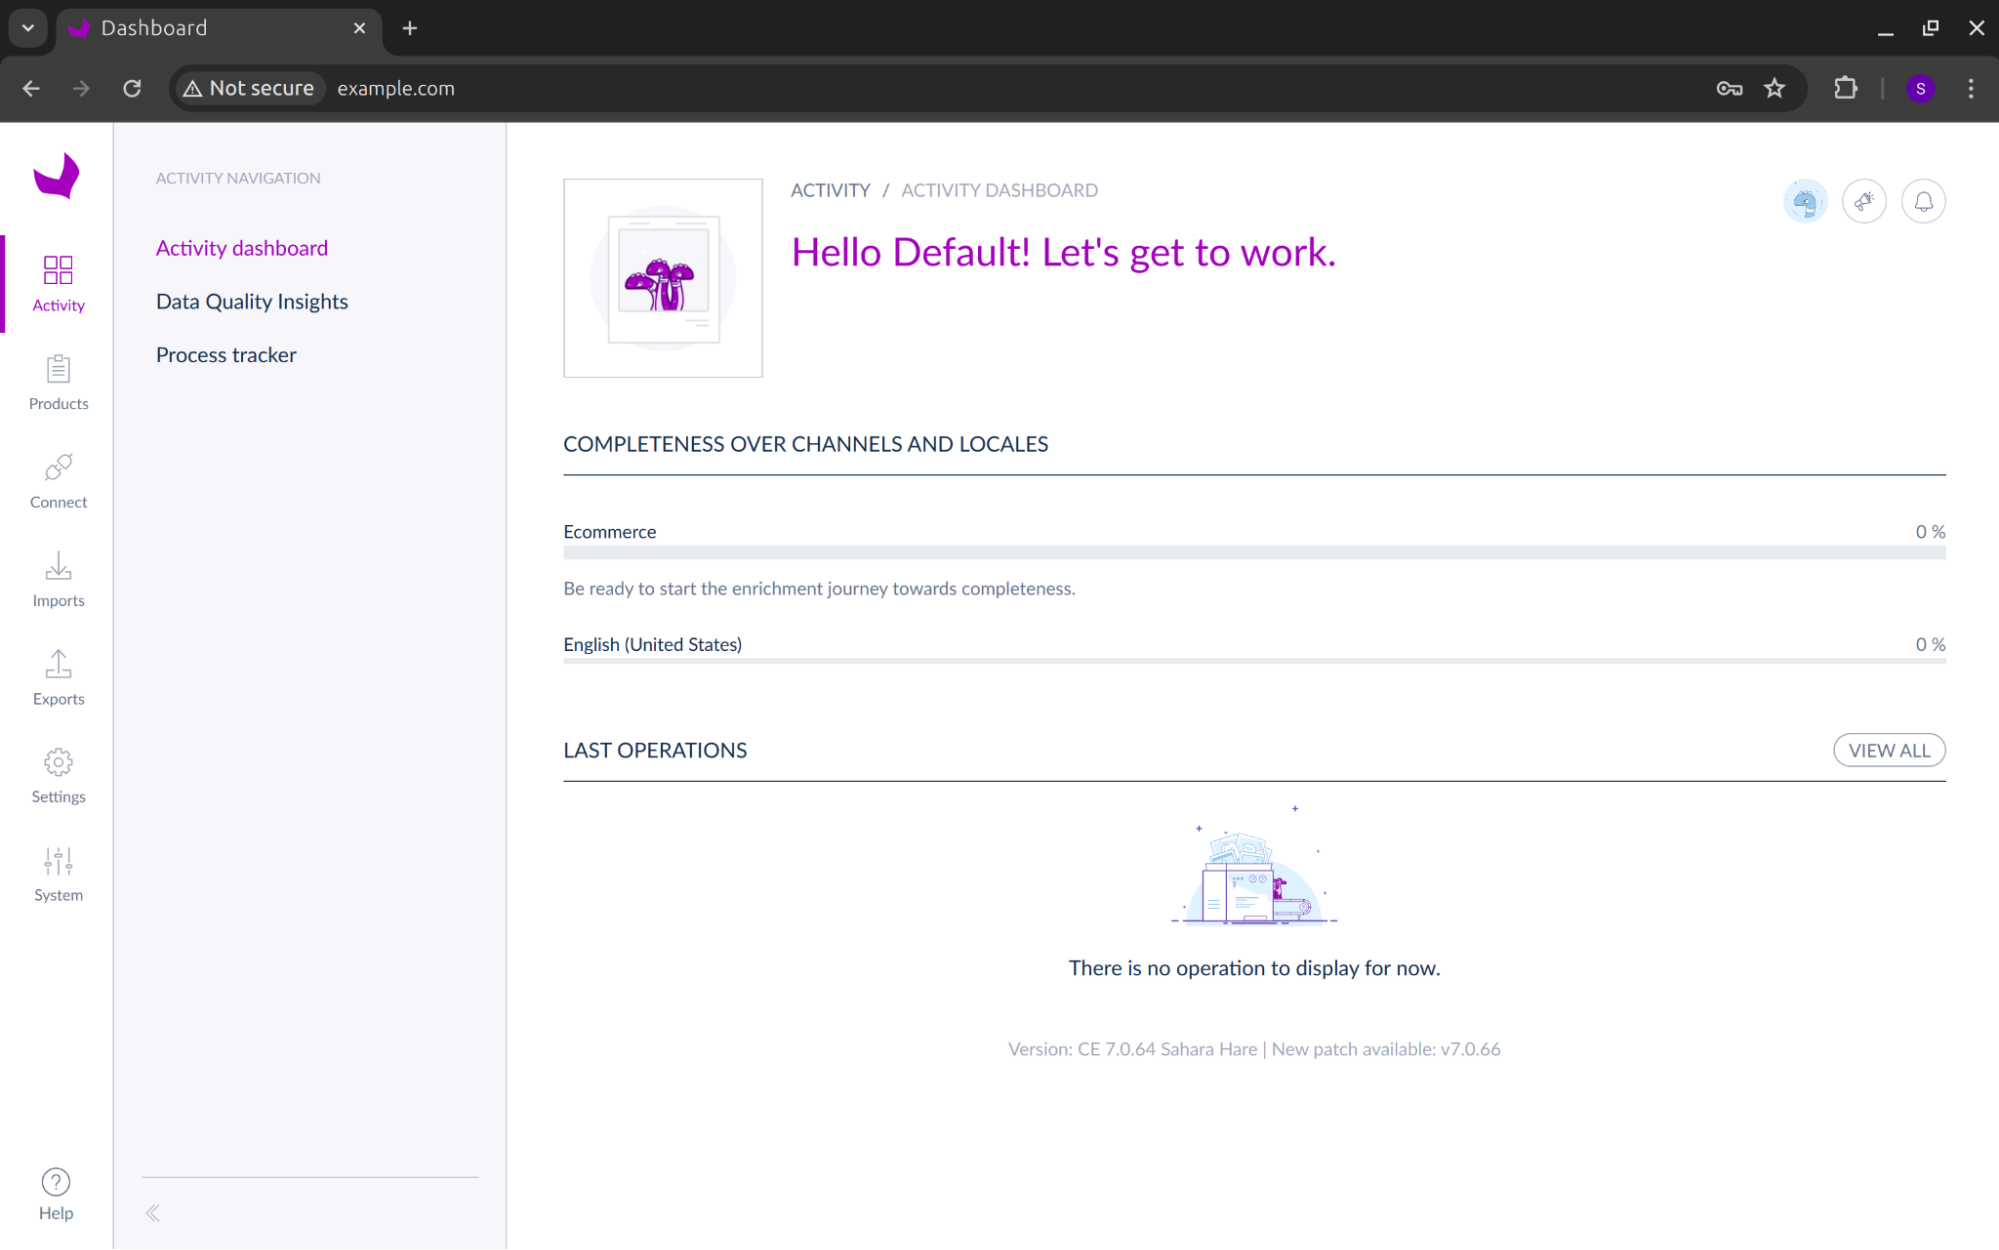
Upon successful login, you will be redirected to the Akeneo home page.
Note: Make sure that your domain name must be associated with your server’s public IP address. To do so, go to your domain provider and add or modify the “A” record to match your server’s IP address.
Conclusion:
Using the Akeneo stack along with Nginx, Nginx Proxy Manager, and Portainer provides not only high performance but also more security, stability, and ease of maintenance. Our Akeneo stack provides the easiest and fastest way of deployment with the majority of cloud support. You can take advantage of docker and nginx from UI using the Portainer and Nginx Proxy Manager.